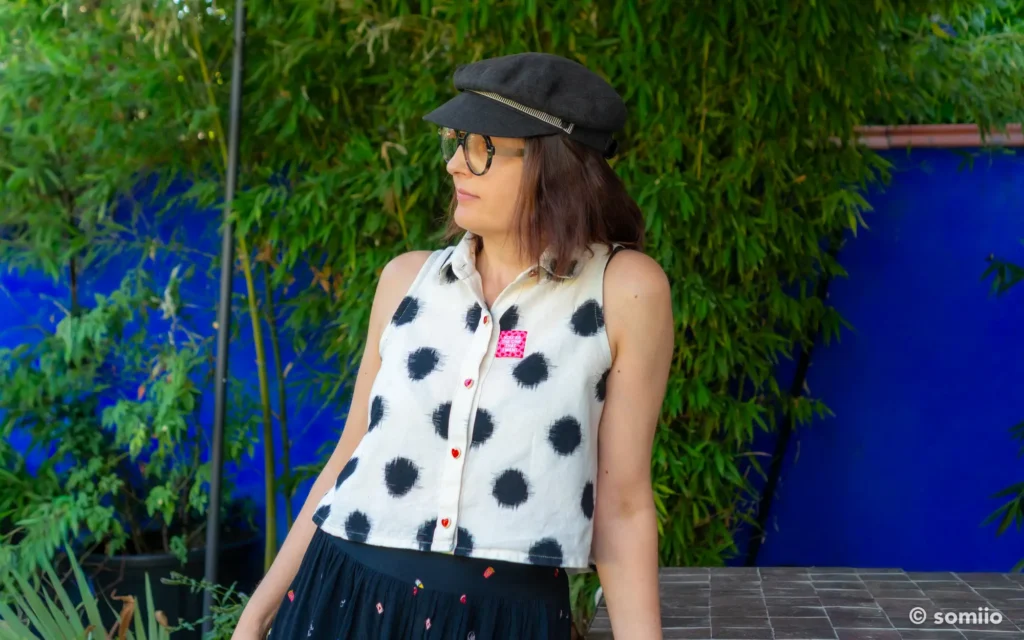
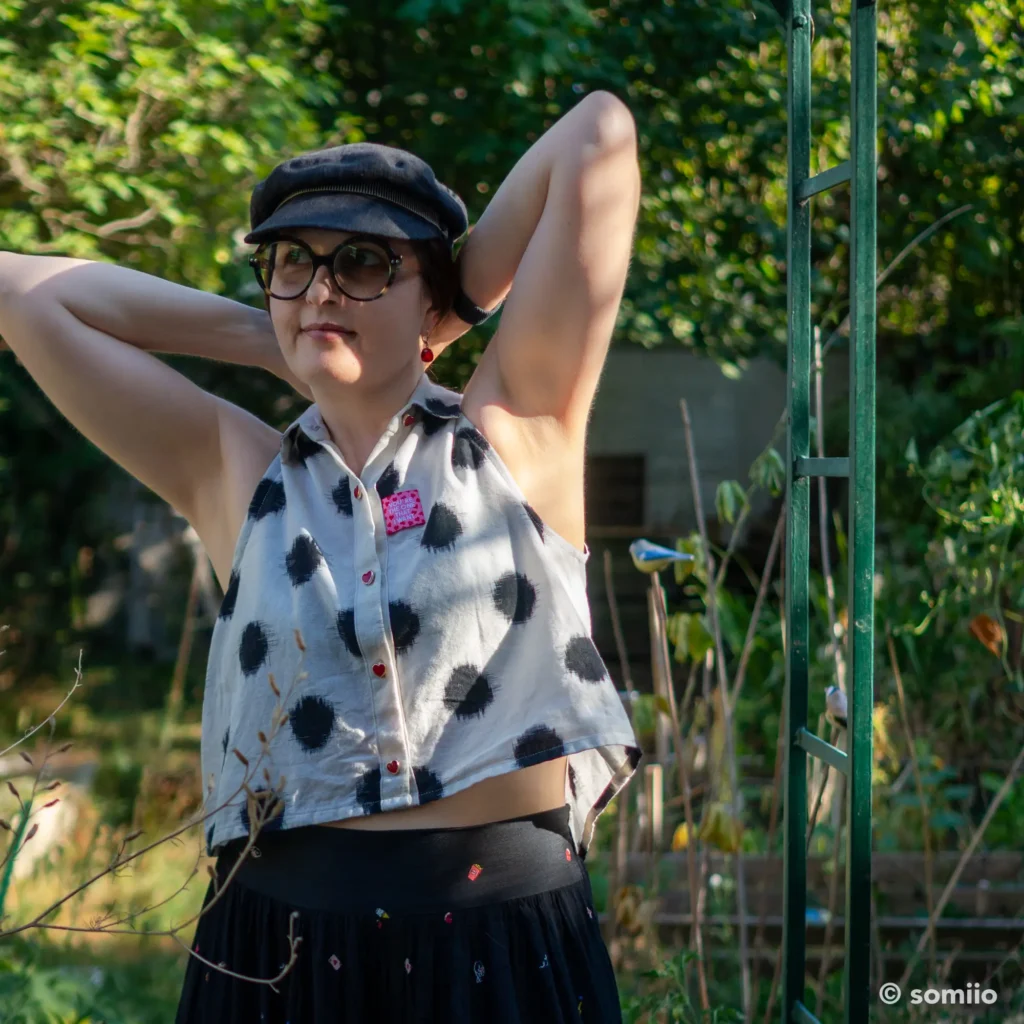
Still on my quest for work outfits that survive a heatwave, and after the silk Fez trousers, here comes the Moussaillon shirt: sleeveless, roomy and cut in Indian ikat cotton. She’s my new best friend.
Bonus, it finished off a rather nice scrap. A really lovely ikat cotton, of which I had a few leftovers, neither very wide nor very tall, the sort you hang on to out of principle telling yourself that one day, well…
Bingo, it went down a treat (much to my own surprise, mind you).
| ITEM | SHOP | QUANTITY | PRICE |
| Moussaillon shirt pattern | Festive Road | 1 | €0 |
| Indian ikat cotton | Itokri.com | 75 cm | €10 |
| Heart buttons | Trade supplier | 8 | €3.00 |
| Black voile bias binding | La Réserve des Arts | 1 m | €0.20 |
| Fusible interfacing | La Réserve des Arts | 0.20 m | €0.10 |
| Thread | Stash | 0 | €0 |
| Total | €13.30 |
The Moussaillon shirt pattern
Biquette from Thread & Needles (also known as le vicomte de Boisjoly on her blog) makes free sewing patterns as an amateur. Amateur in the sense that she hasn’t turned it into a profession. Because her patterns themselves are thoroughly professional.
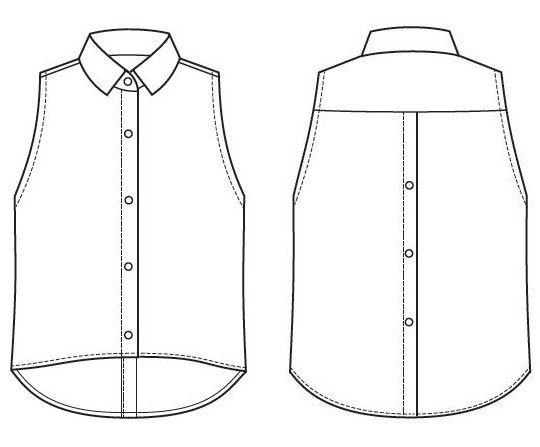
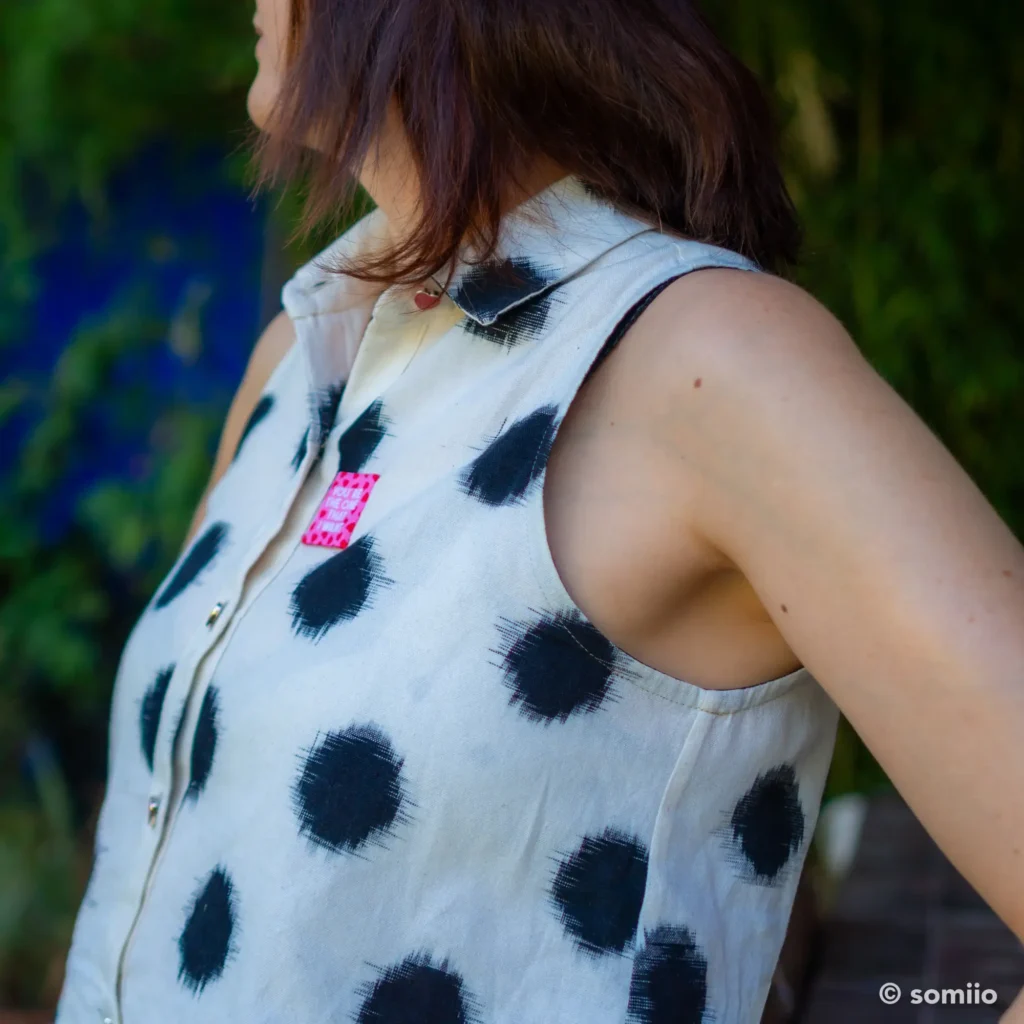
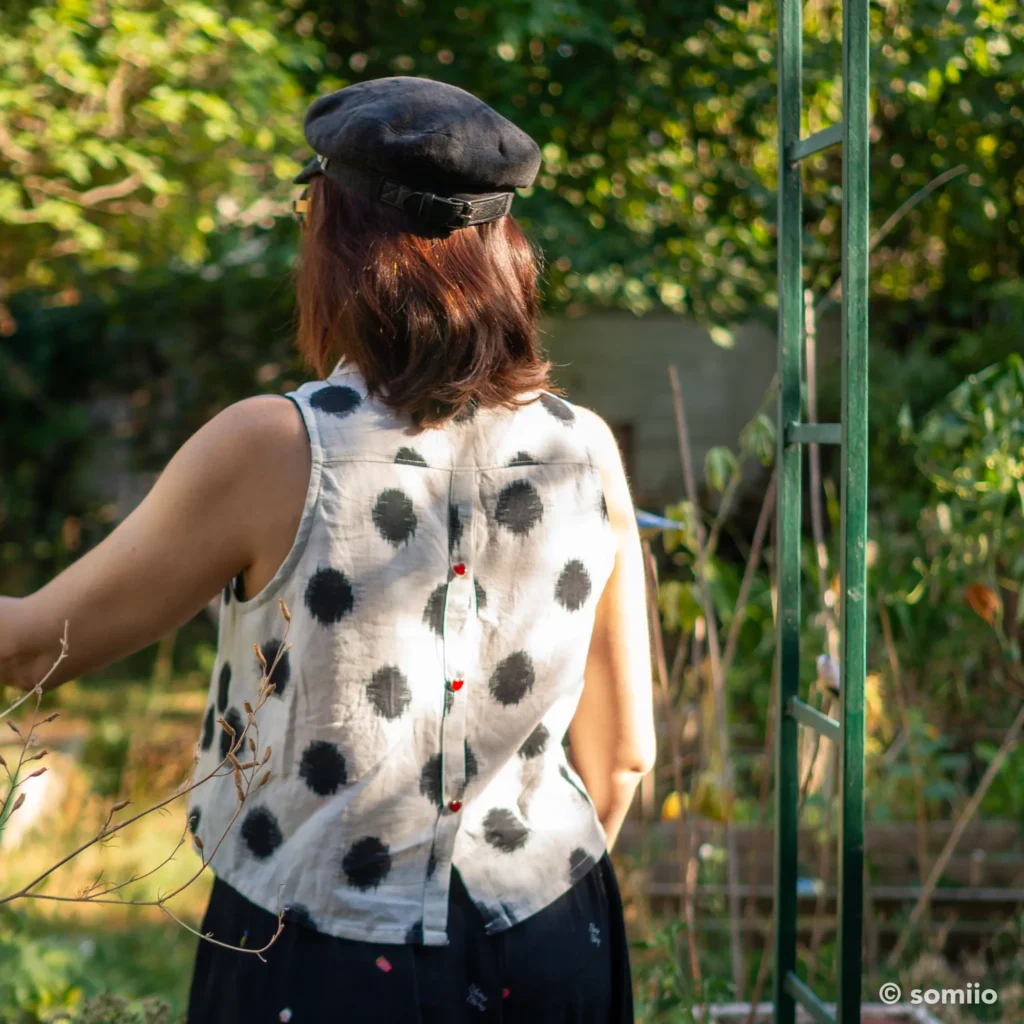
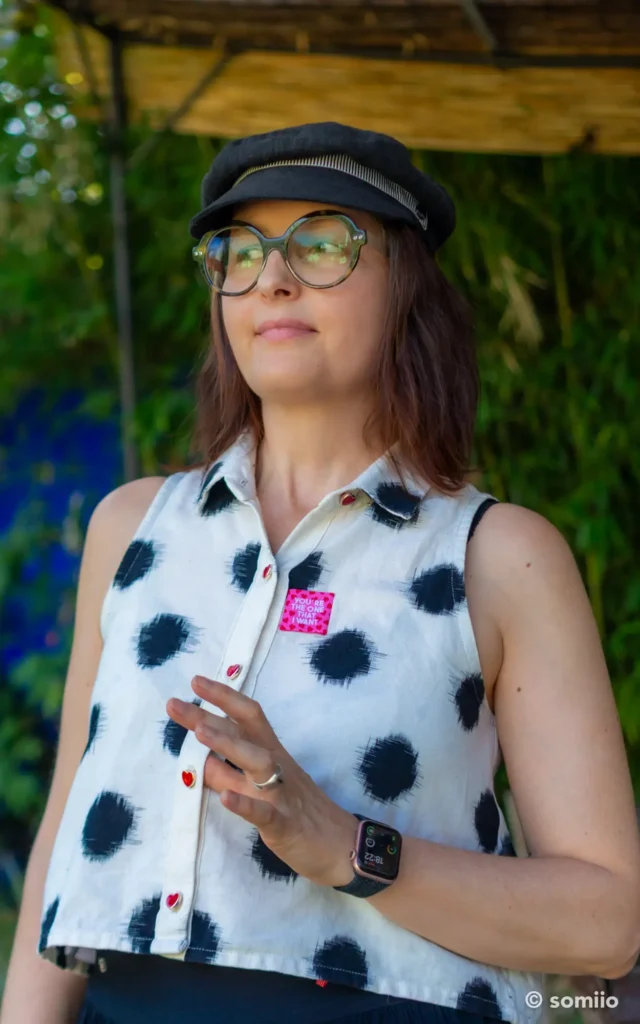
The Moussaillon top is a short, A-line sleeveless shirt, with cut-away armholes and a button placket at both the front and the back.
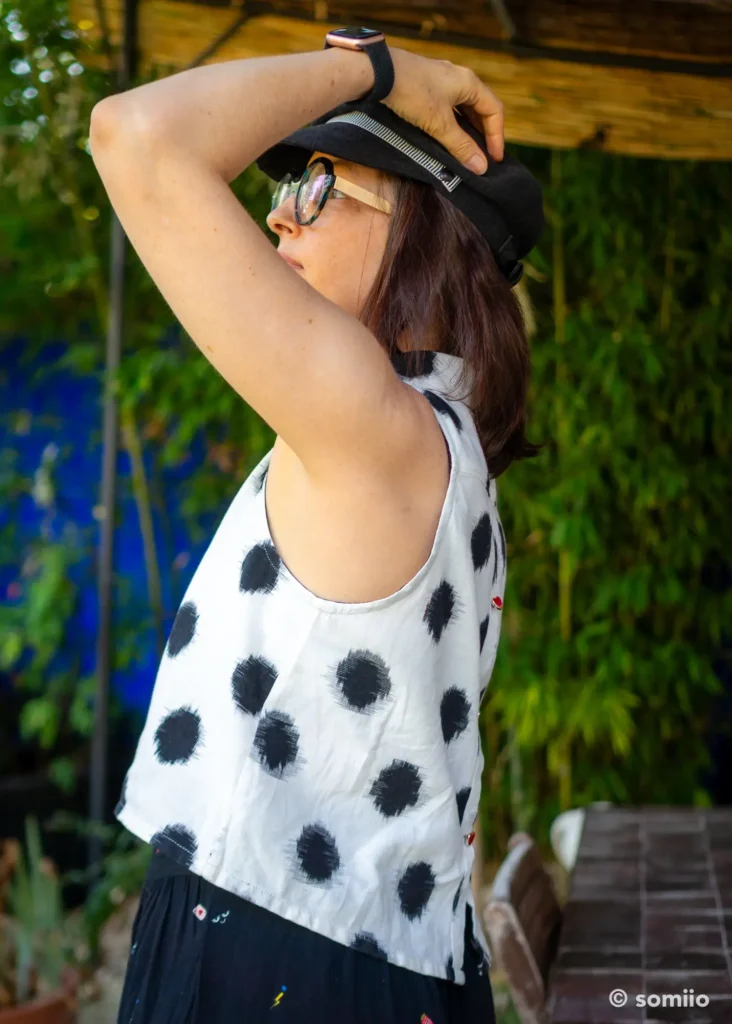
The Moussaillon shirt hangs beautifully. The curves fit together, the ease is spot on. I’ve sewn other patterns of hers before, never blogged them, shame on me, and it’s the same verdict every time: this is the standard of professional pattern designers.
The pattern runs from a size 34 to a size 46 (EU sizing), in A4 and US Letter format only. The instruction booklet is concise, with two pages of hand-drawn diagrams.
That said, the Moussaillon shirt pattern really isn’t complicated to sew.
What’s in the pattern
- Free, under a Creative Commons BY-SA licence
- 8 pages in A4, plus a US Letter version, also 8 pages
- Instructions at the end of the PDF, with a body measurement chart, a finished garment measurement chart, the notions required and cutting layouts for various fabric widths
- Sizes 34 to 46, that is a 76 to 100 cm bust, drafted for a height of 168 cm and a B cup
- Stated level: intermediate, though I reckon an adventurous beginner could give it a go
- Fabric requirements of 0.75 m to 1.05 m depending on size and fabric width, plus 8 buttons and a 50 x 10 cm piece of fusible interfacing
Four pieces, one collar, zero suffering
The pattern has only four pieces: the back, the front, the back yoke and the collar. Plus two strips of bias binding to cut for the armholes.
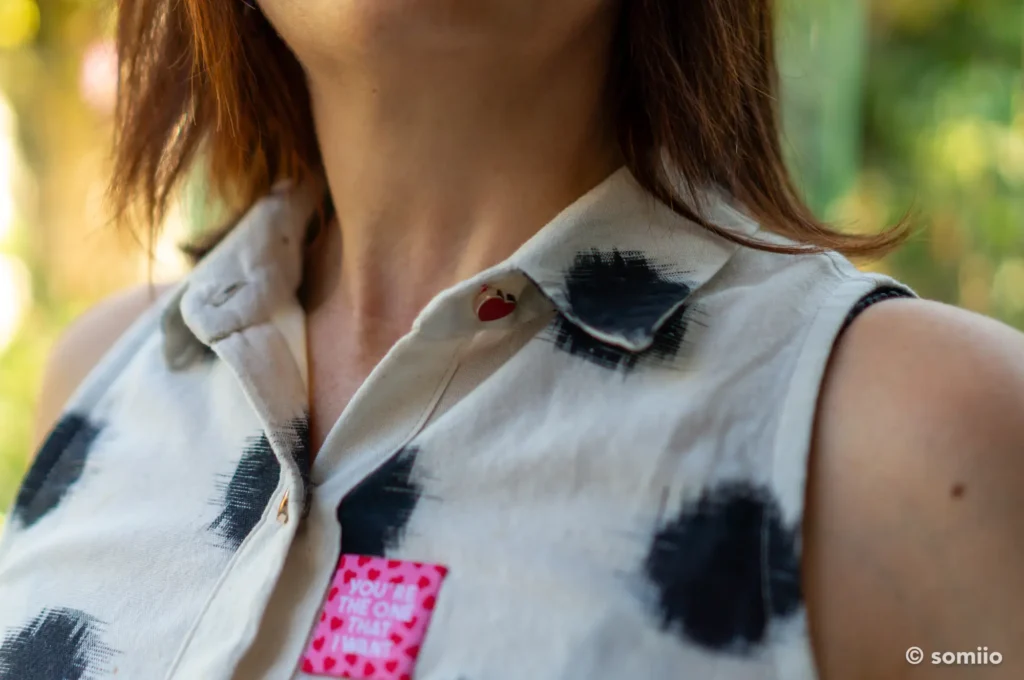
And the collar is cut in one piece with its stand.
I mean that literally: it’s the simplest shirt collar in existence. No separate collar stand to attach, and yet it still sits really nicely.
The 8 pages line up perfectly, with notches that are easy to match.
The catch is that the pattern comes without seam allowances, with a recommendation of 1 cm all round, hem included (personally, I went for 2 cm on the hem).
It’s a bit of a pain when you just want to sew the thing as drafted, but very handy the moment you’re planning modifications.
Sewing the Moussaillon shirt
Size 42 (and why not 40)
I hesitated between the 40 and the 42. I went for the 42, because weight training has added a few centimetres to my upper bust, back and pectorals included. At this rate I’ll be He-Man’s wife.
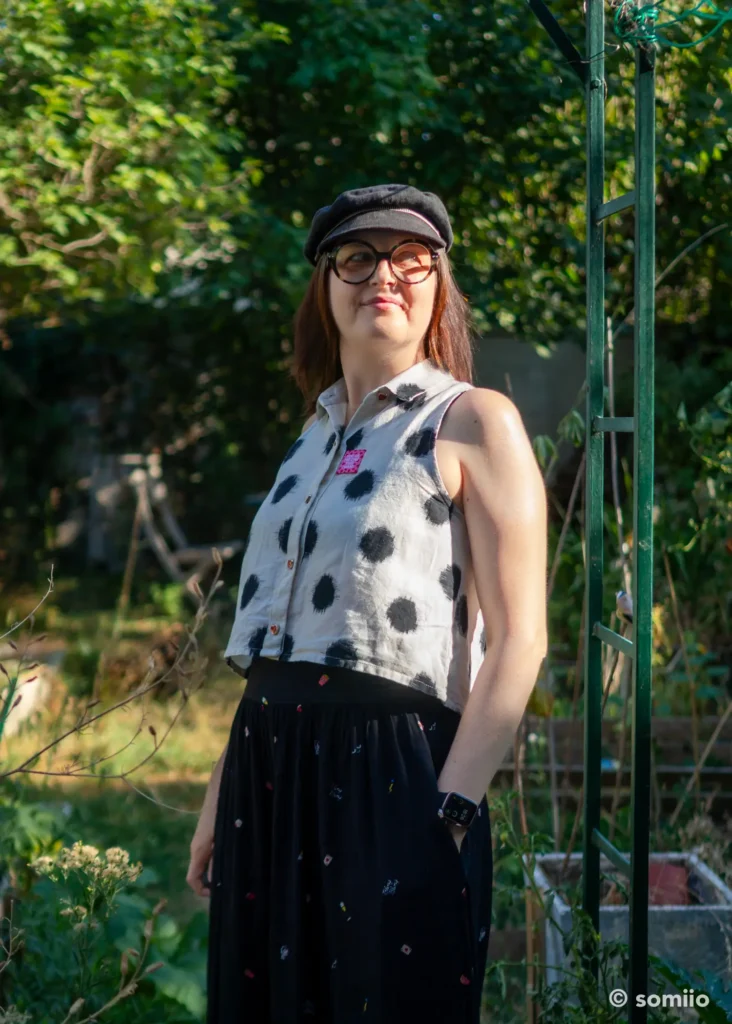
No changes to the draft. No length adjustment, no shoulder slope, nothing.
The ikat cotton from Itokri
Five or six years ago, I placed a big order with Itokri, an Indian website selling fabric and craft goods.
Worth knowing before you fill your basket: the fabric is very cheap, but the postage is calculated by weight (the more you add, the more it costs) and it came to half the bill.
If this cotton is so pleasant to wear at 38 °C, it’s thanks to the airy, very light weave of ikat*. Hardly surprising for an Indian fabric… but what actually is ikat? I learned about it on a weaving course, and let me tell you, once you’ve been initiated into the art of weaving and its preparatory maths, the explanation is quite bonkers 🤯!
Ikat refers both to an ancient technique and to the fabric it produces. The principle: you dye the yarns before weaving, which means the design is prepared on the yarn BEFORE the warp and weft are woven together.
Which means you have to plan things extremely carefully so that the designs dyed onto the warp and weft yarns end up in exactly the right place on the loom when the weaving starts.
That’s also why you can recognise ikat by its blurred outlines: the effect of the yarns shifting very slightly during weaving. It’s what makes the fabric completely reversible, too.
*”to tie” in Indonesian
Victory over the scrap
This length of cream ikat cotton with big black polka dots had already been used for the sleeves of my Paddington top. What was left was an L-shaped scrap: one vertical strip that wasn’t wide, and one horizontal strip that wasn’t tall…
You know the ones: too big to bin or turn into pockets, too small for most projects (especially with no children around).
Well, it all fitted! There’s nothing left of it. Deeply satisfying.
The modifications (next to nothing)
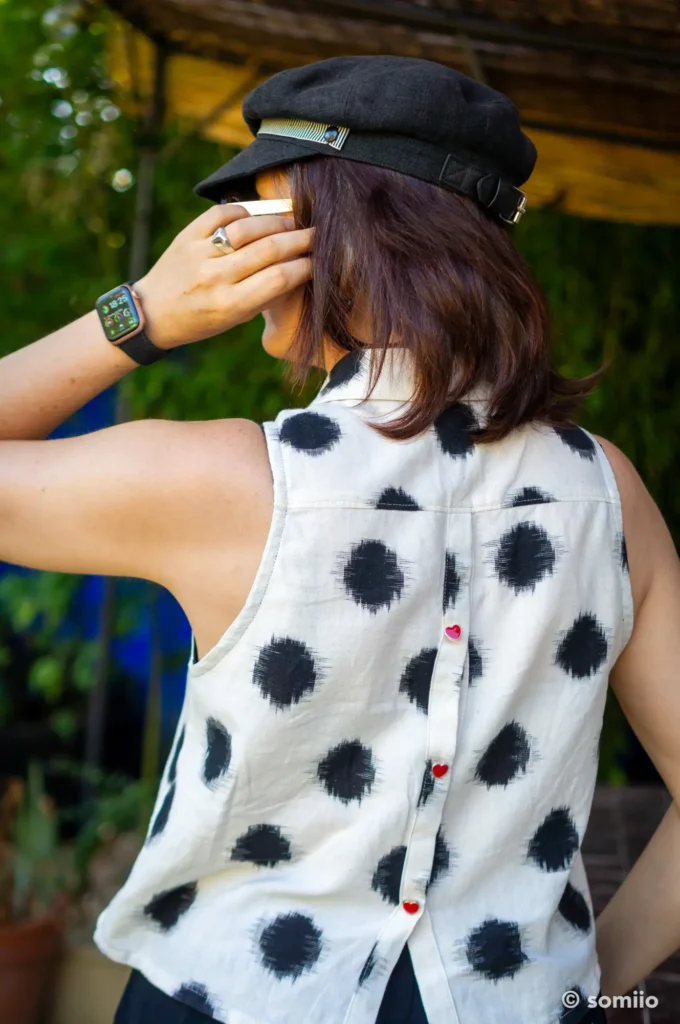
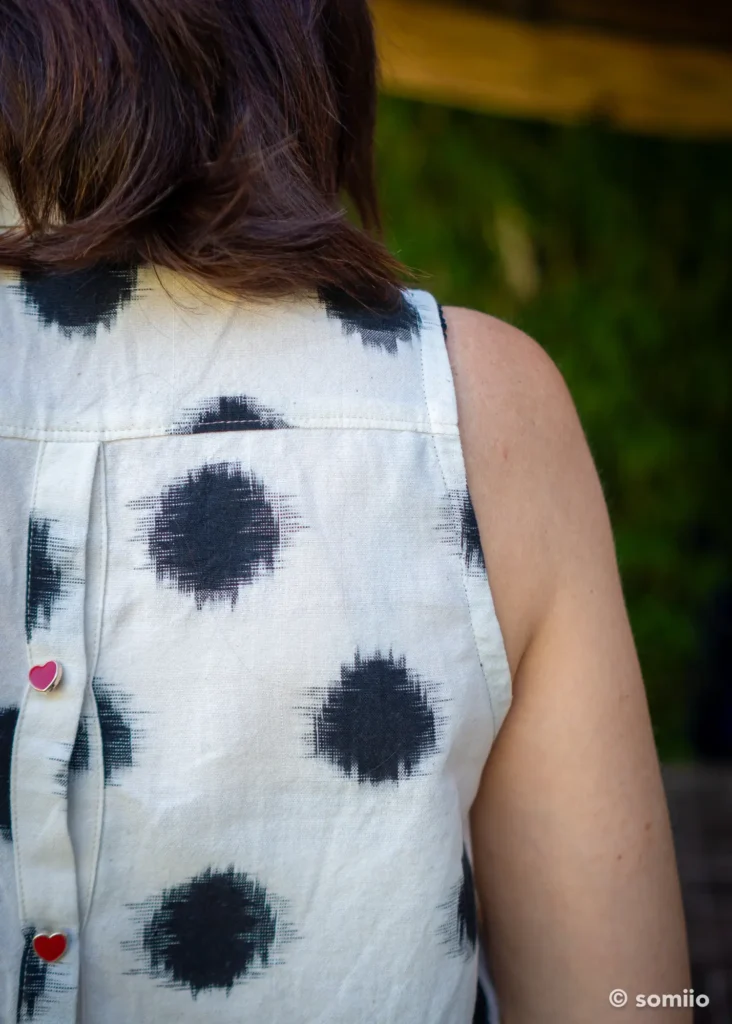
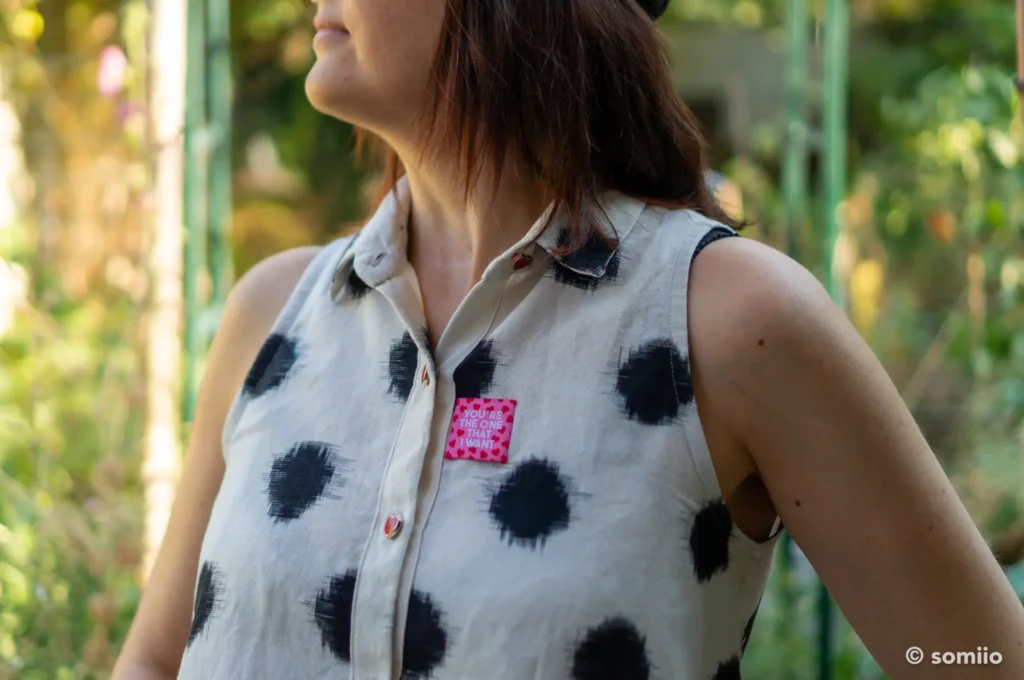
My one departure from the instructions: I folded the button plackets to the right side instead of the wrong side. That way you can see how perfectly, and how accidentally, the print lines up.
To be clear: I had nothing to do with it. No attempt whatsoever at print matching when cutting, I simply laid my pieces wherever they would fit, full stop. The match is pure luck.
The sewing goddess was leaning over my shoulder.
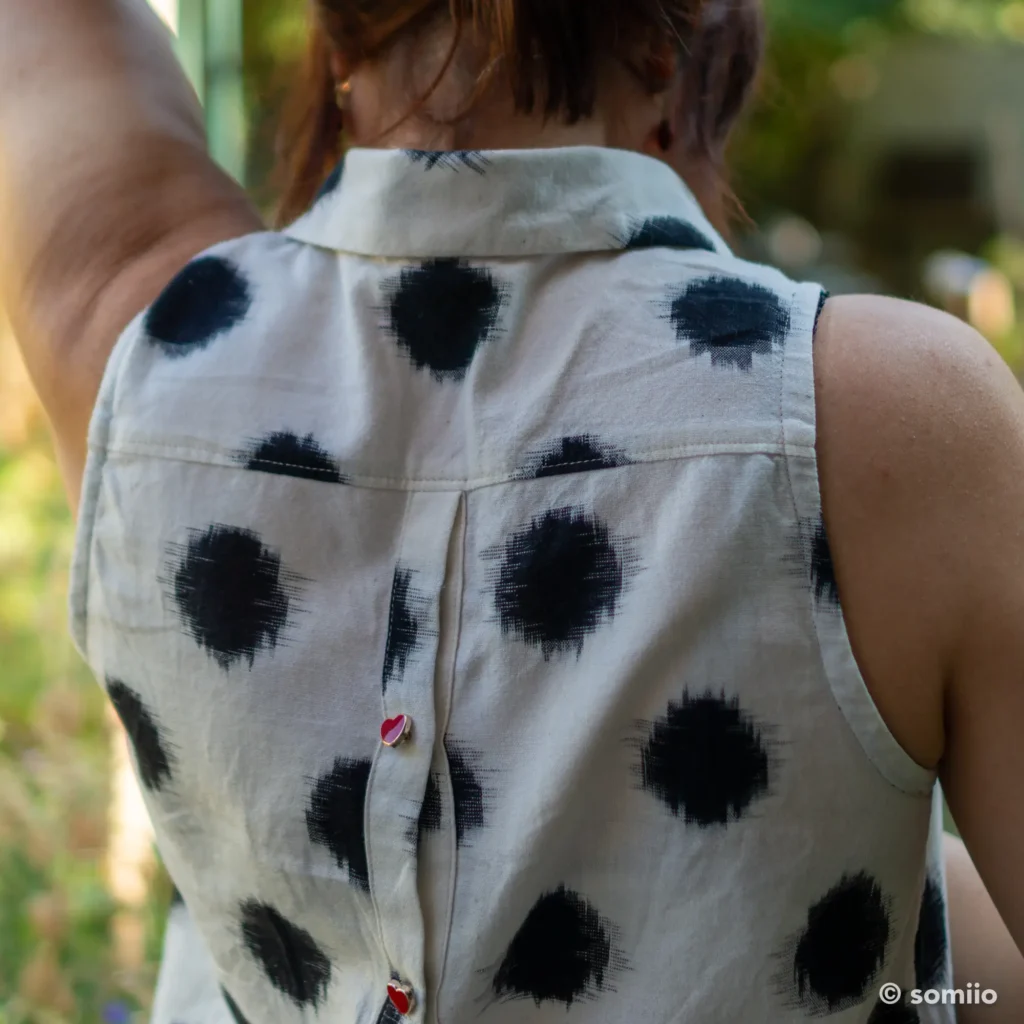
Otherwise, and again for want of fabric, the upper collar is cut on the bias and then stabilised with fusible interfacing. And the under collar is in two pieces, with a seam at the centre back.
Nobody will ever see it, it sits under the collar. Olé.
The finishings
Being a Breton raised in Normandy, I was torn between doing the finishings beautifully and giving in to heat exhaustion. So what we have is a mix of techniques hovering somewhere between quick-and-dirty and properly done:
- Armholes: invisible bias binding in a very light black voile
- Side seams: French seams
- Everything else: plain seams finished with a three-thread overlock
- Hem: 1 cm double-turned hem
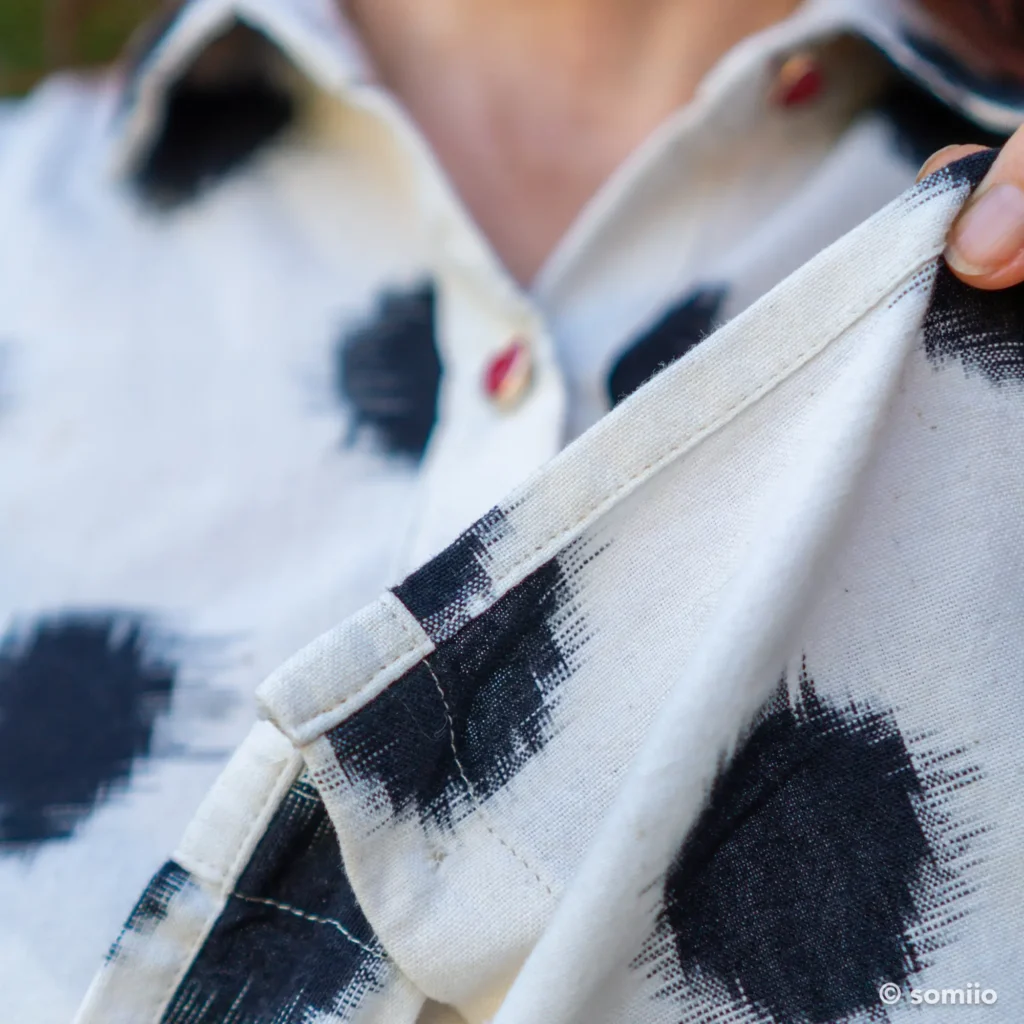
- Front buttonholes: machine-made, no bother
- Back buttonholes: what back buttonholes? I joined the two plackets by sewing the buttons through both layers.
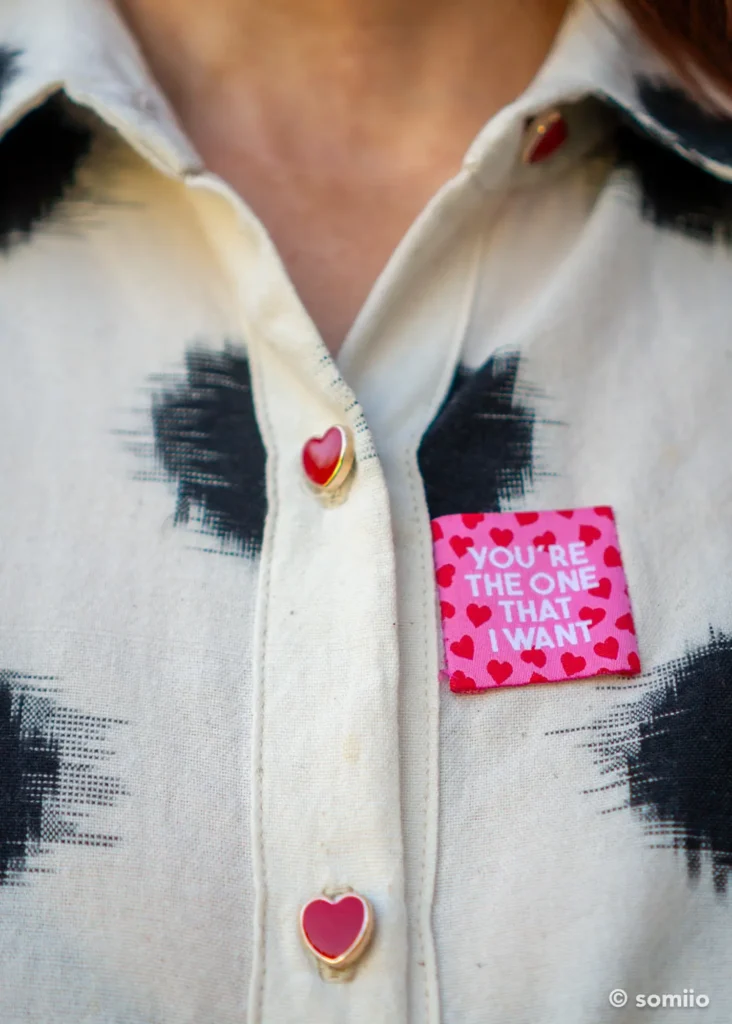
- Buttons: tiny red plastic hearts unearthed while sourcing haberdashery for Tissœurs. Against a print this graphic, I think they’re perfect.
- Label: hand-sewn, already coming undone, needs redoing. Just for fun!
Sewing during a heatwave 🥵
The difficulty with this project was neither the collar nor the buttonholes. It was the temperature of the room.
Fire up the steam generator iron in the middle of a heatwave? No. Thanks. Goodbye.
So: the bare minimum of pressing, with an old back-up iron with no steam function, and a spray bottle to dampen the fabric. Sorted.
Does that actually heat the room up less, or am I telling myself stories to feel clever? No idea.
Frequently asked questions about the Moussaillon shirt
Is the Moussaillon shirt pattern free?
Yes, completely free, under a Creative Commons BY-SA licence, downloadable from the designer’s blog. The bundle contains the pattern in 8 A4 pages and in 8 US Letter pages, plus a pattern envelope and the instructions over 3 pages.
Is the Moussaillon shirt suitable for beginners?
The pattern states an intermediate level, but the construction stays very approachable: four pieces, and a shirt collar cut in one with its stand. The two real hurdles are the buttonholes and having to draw your own seam allowances.
In short
Washed, pressed, worn, washed again: that’s the mark of success! I love the look of it, the graphic print, the cut, the fabric. For a garment that came out of a scrap, from a free pattern, sewn during a heatwave, the ratio is unbeatable.
I fully intend to sew this Moussaillon shirt again for one of my sisters, in a Tissœurs fabric still sleeping in my stash.
And above all, it has given me the urge to go digging through the rest of the Festive Road patterns, several of which have caught my eye.
Until then, I still have a few summer makes to show you. If I can find the time in the middle of moving house.
So, how do you sew when it’s 38 °C? See you in the comments! 🤞