I’ve been eyeing the Sienna Maker Jacket from Closet Core Patterns* since its release and a certain trip to Madrid.
And then there was the announcement of the Thread and Needdles « L’Habit fait le moine » competition. At the same time as the contest was announced, a 25% off promo appeared at Closet Core Patterns.
Well, you know how to do the maths of this sort of thing as well as I do, I guess…
| ITEM | SHOP | QUANTITY | PRICE |
| Sienna Maker Jacket pattern | Closet Core Patterns | 1 | 12 € |
| Denim brut bleu | Bennytex | 2 m | 11,86 € |
| Indigo panels | Vietnam trip | 1 | 5 € |
| Copper buttons | Réserve des Arts | 6 | 0,20 € |
| Bouton à recouvrir | Aliexpress | 1 | 0,05 € |
| Red stripes piping | Trouvé dans la rue | 2 m | 0 € |
| Amandine Cha’s striped organic bias | La Textilerie | 1,5 m | 3 € |
| Fil | Stock | — | 0 € |
| Total | 4,70 € |
*Closet Case Patterns recently changed its name to Closet Core Patterns: surprisingly the joke about the phrase Closet Case (which makes fun of gay people who don’t dare to flaunt their sexual orientation) no longer represented the brand (which had started as a personal blog).
The Sienna Maker Jacket pattern
The download folder comes with no less than 13 files. Bim! Each version is in a separate file: Letter and A0 versions, sizes from 0 to 20 and from 14 to 30, A & B versions and C version and finally instructions in French & English.
Versions A and B represent 44 pages to assemble and version C 36 pages with separate layers.
Attention, between the 2 versions there are common parts: no need to do as I did by printing the whole of the 2 files since I now have duplicates.
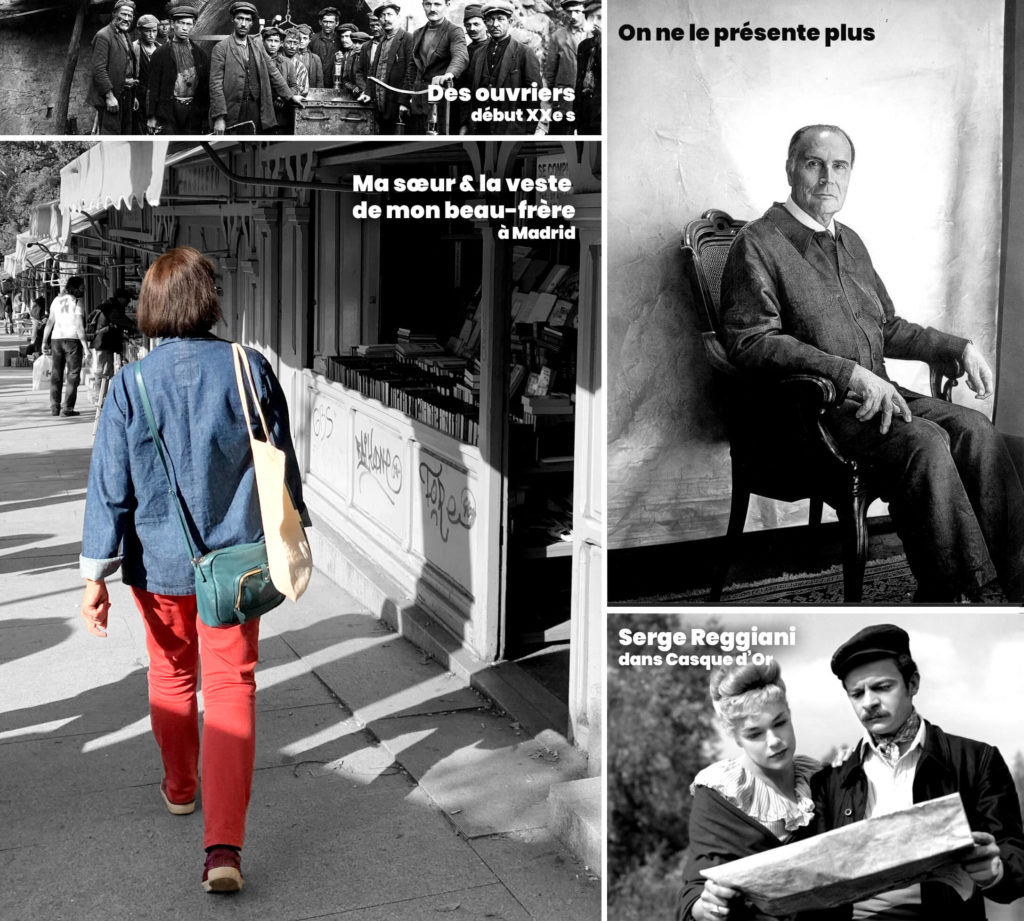
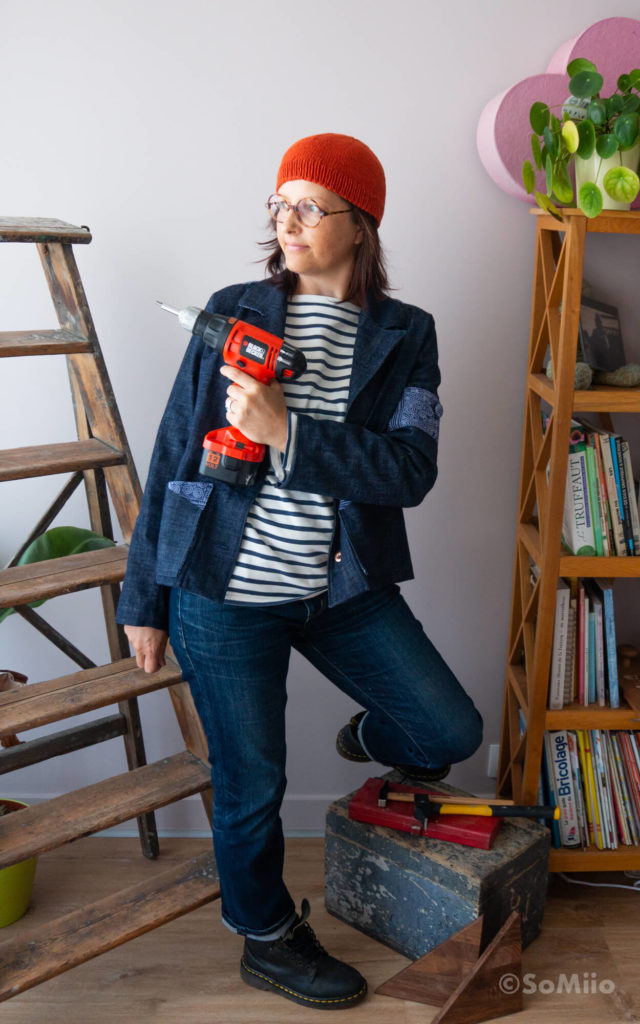
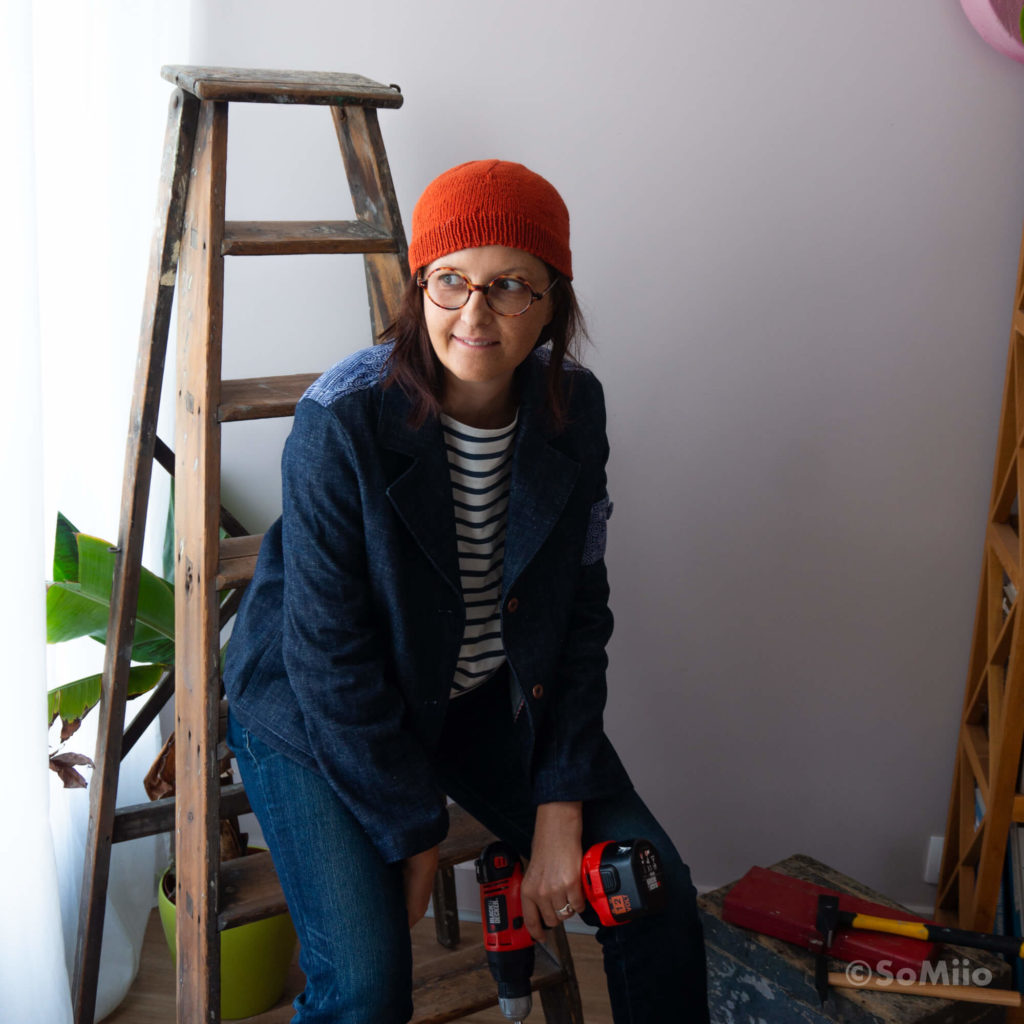
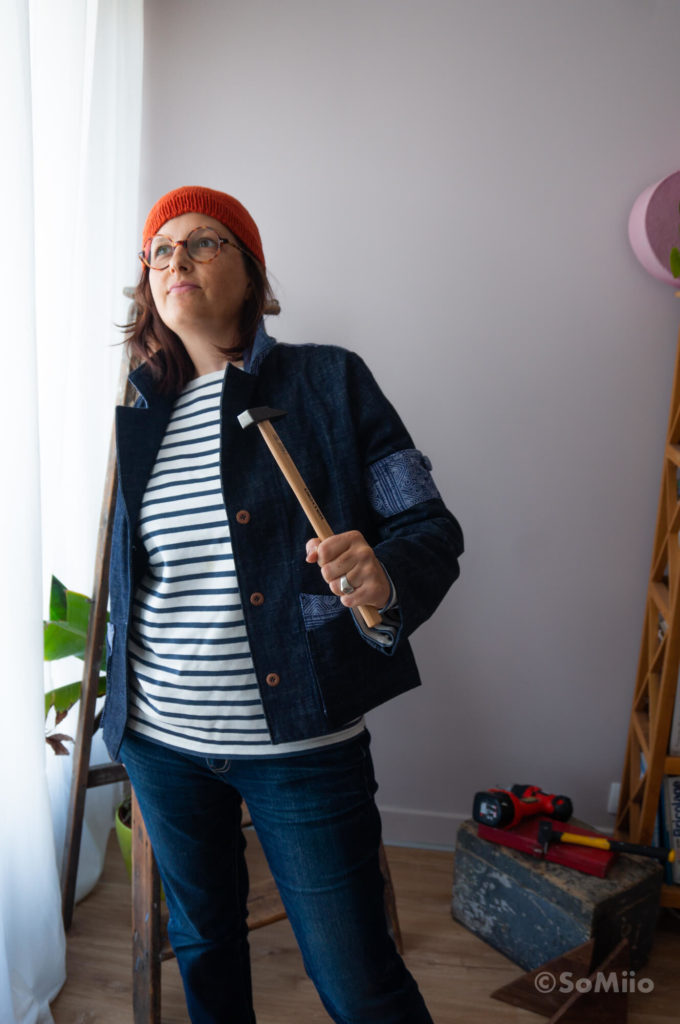
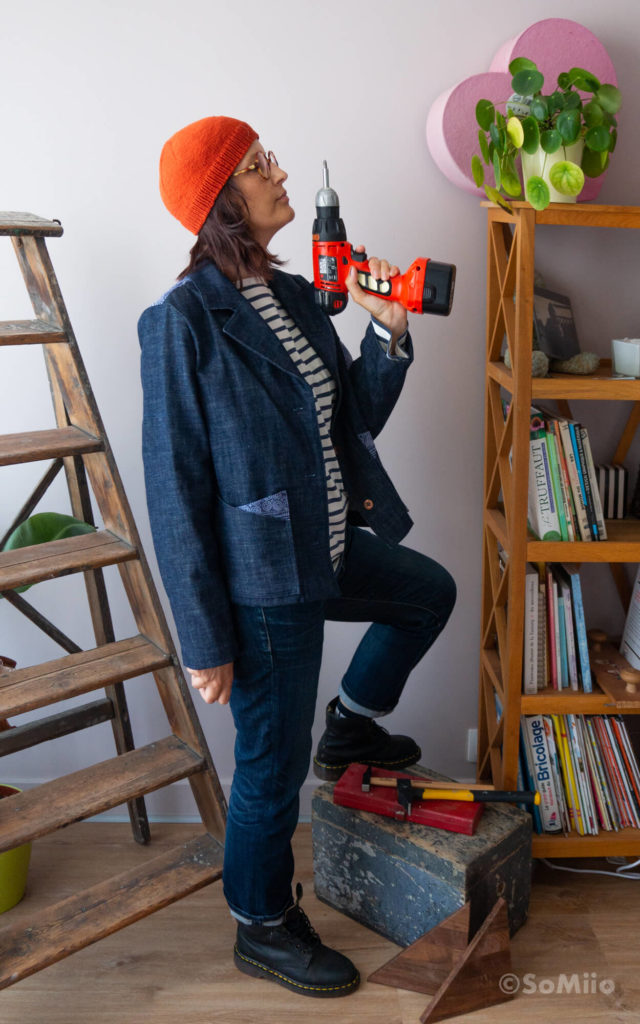
My model for this jacket is a denim workshop jacket that I stole from my sister during almost an entire trip to Madrid… which she herself stole from her partner.
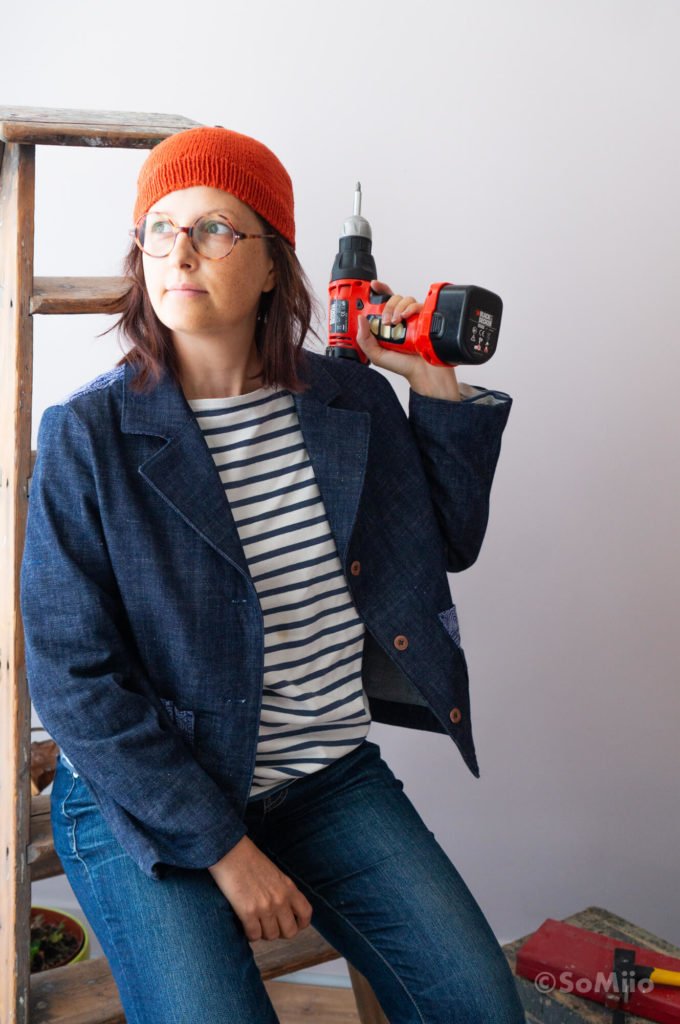
So I wanted a « work jacket » or a workshop jacket or a carpenter’s jacket or, in fashion terms, a workwear jacket.
Just like the pattern for the Sienna Maker Jacket.
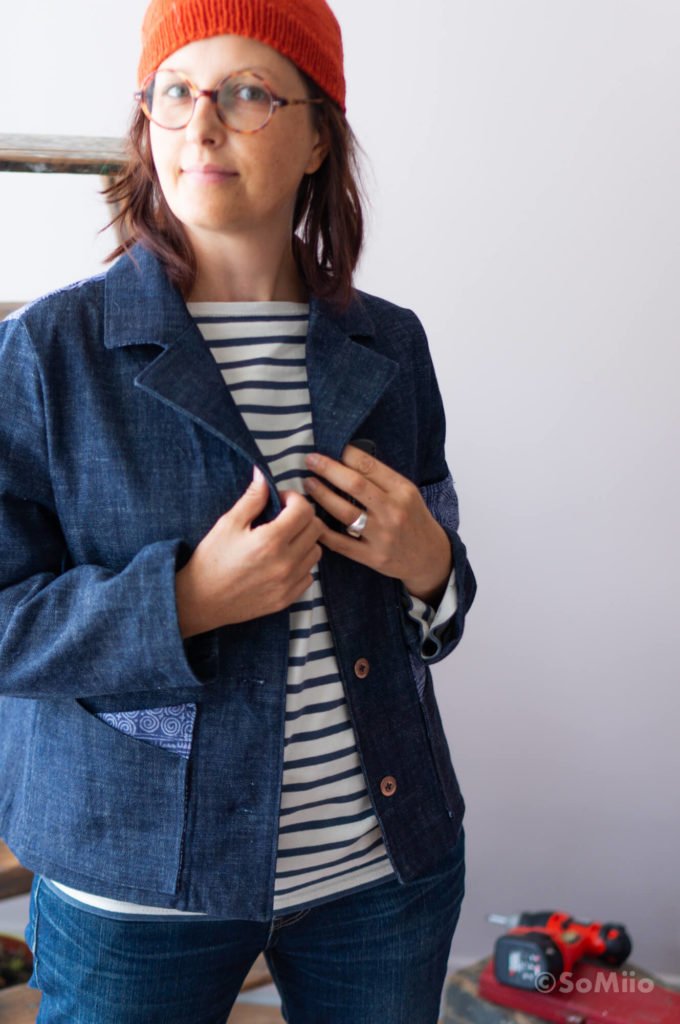
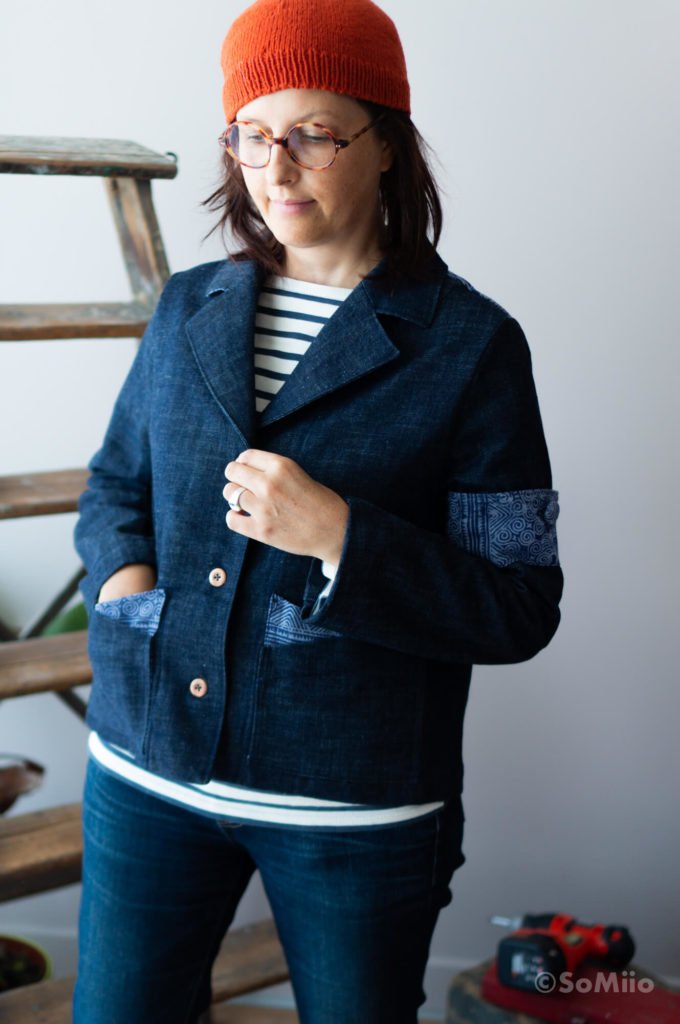
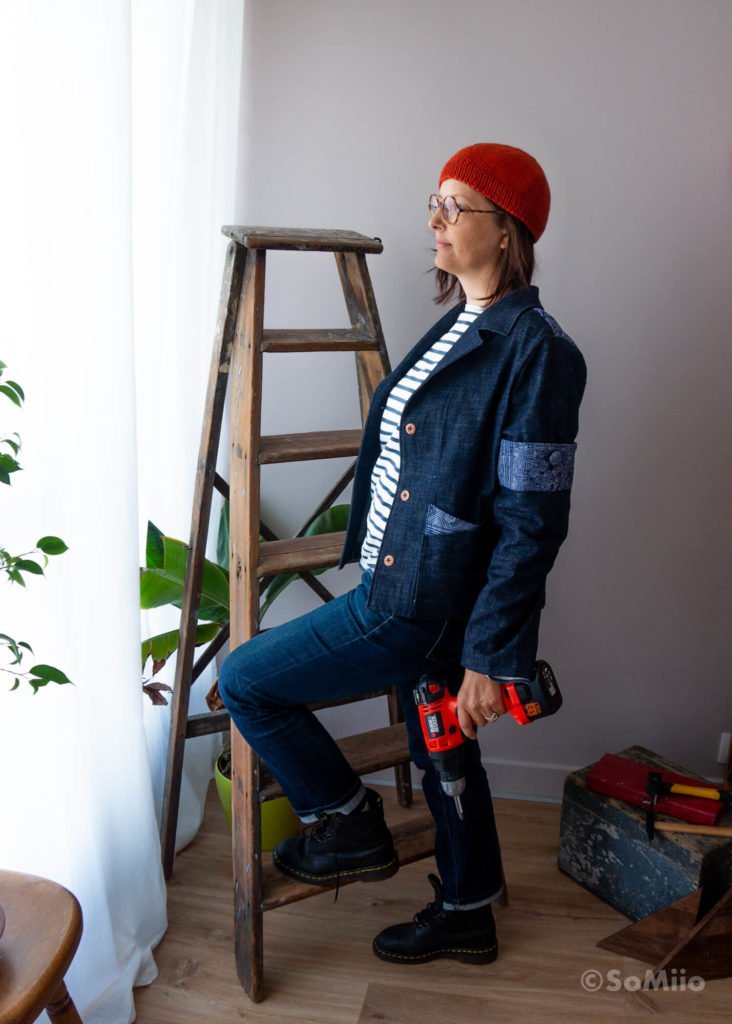
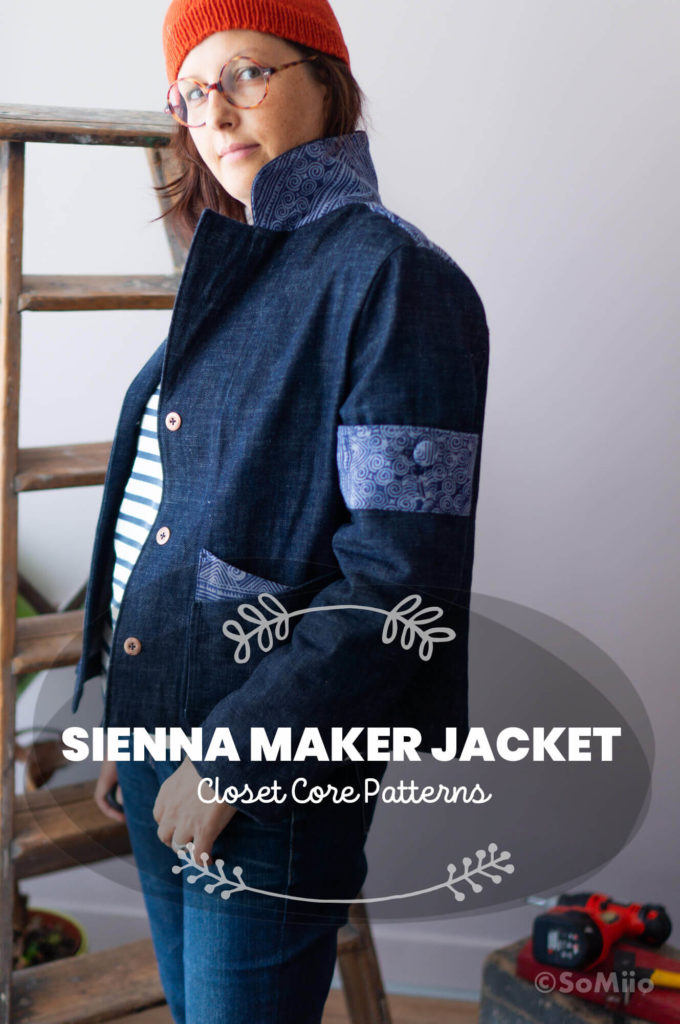
The Sienna Maker Jacket version C is a short jacket with a collar & sleeves (2 parts).
It also features a button closure, 2 front patch pockets, 1 or 2 sleeve pockets and a button placket on the back.
The tailored collar is also one of the reasons why this jacket overtook other projects on the 2020 list: it was a practice run for my « tailored » coat project.
No, I’m not making excuses.
Sewing the Sienna maker Jacket
After fully assembling and applying my stature modifications to sew version B… I did a bit of bloggin surfin on the internet. I saw this, this and especially this.
And admitted in my heart that it was rather the C version that I needed.
And started all over again, cut and assembled for the C version in size 8 to 10 at the hem.
It was a good start.
Modifications to the jacket
As you may have noticed, I’ve made some changes to the Sienna Maker Jacket pattern…
I can’t help but modify a pattern, even especially when I’m doing it for the first time.
I can’t help but modify a pattern, especially when I’m doing it for the first time. Anyway.
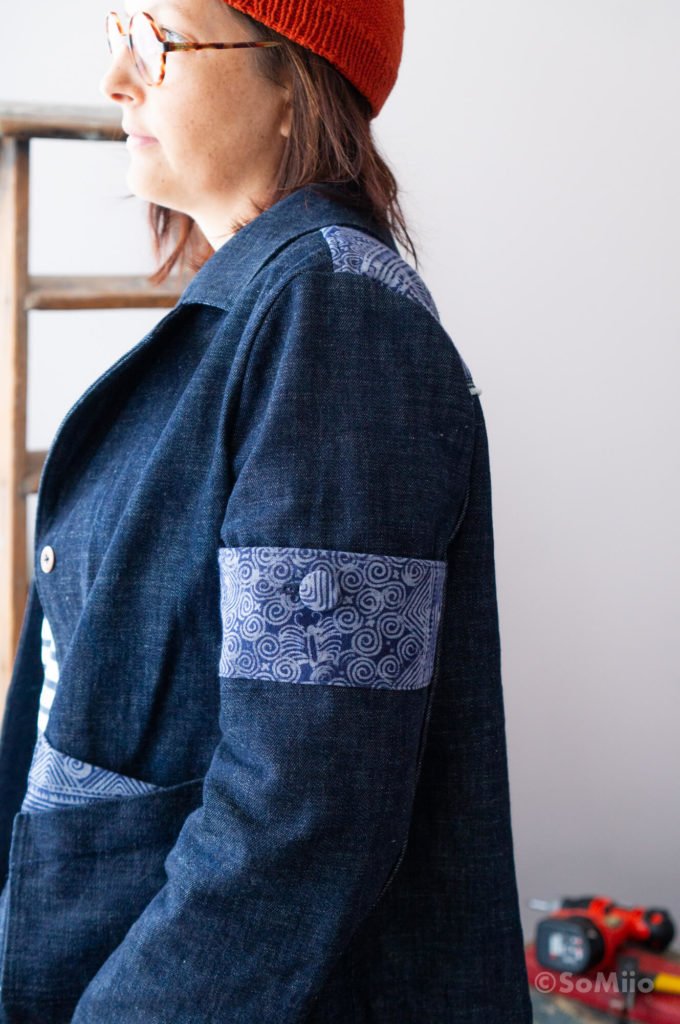
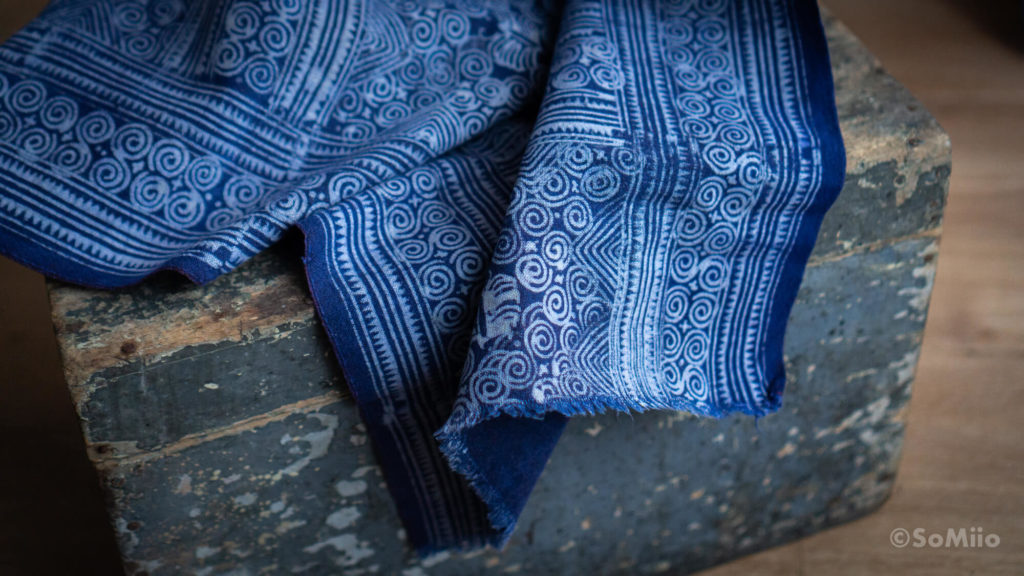
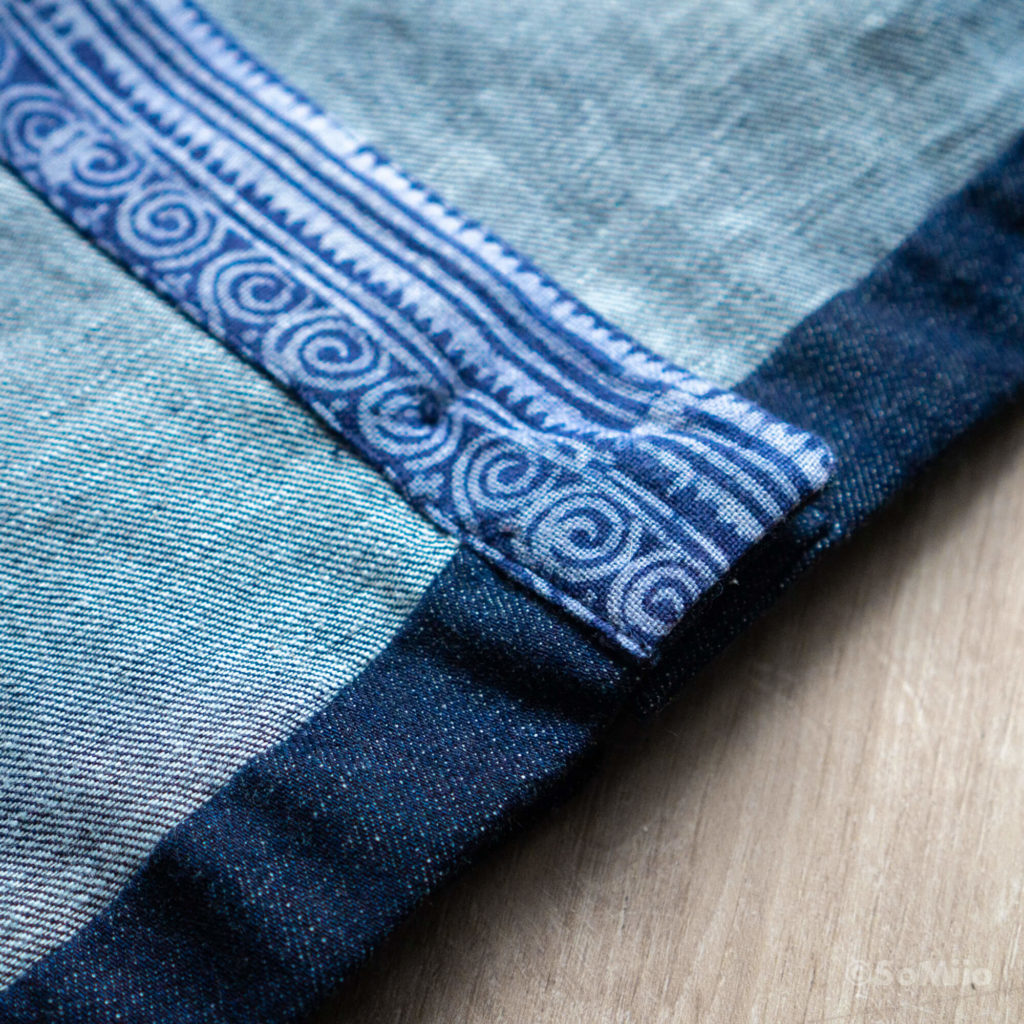
That is, I wanted to match my lovely raw indigo denim with one of the strips of fabric I bought in Vietnam.
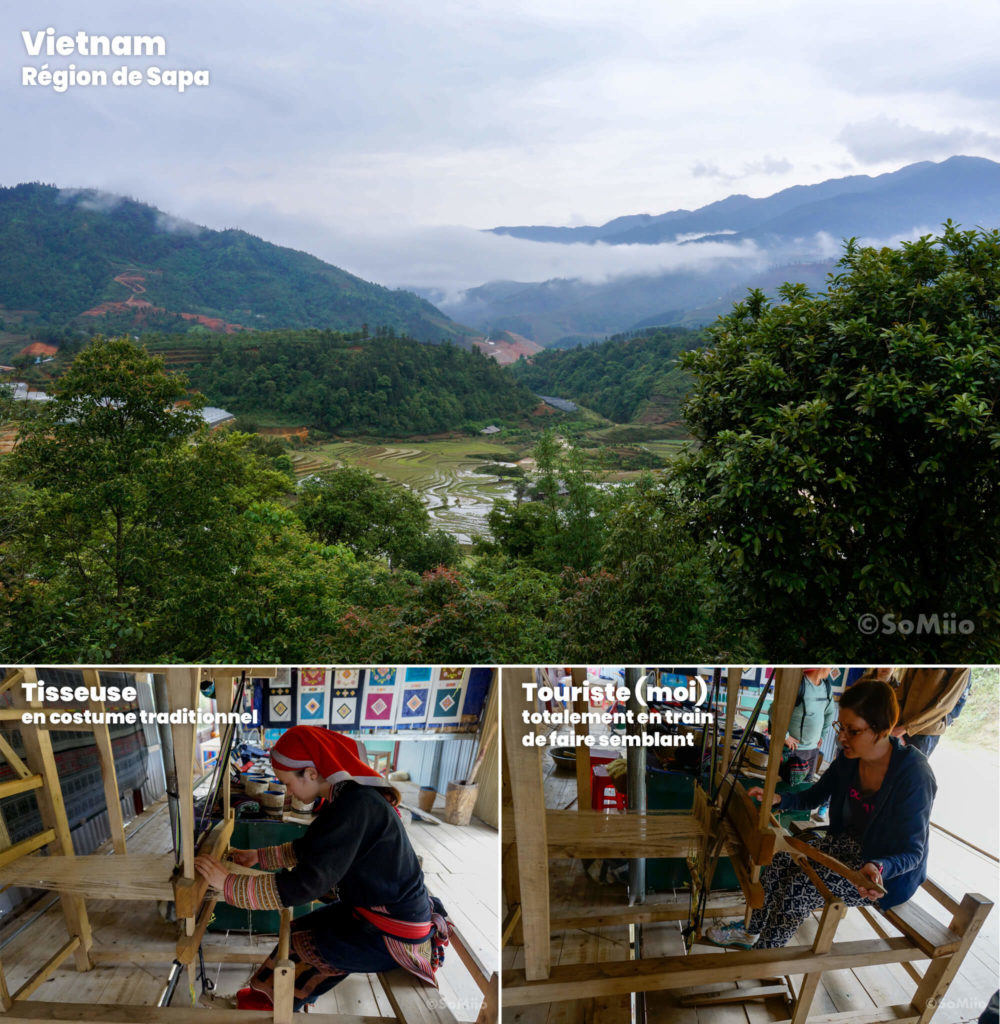
This 1.62 x 35 cm strip is one of the 2 I acquired from my guide during a 1 day and 1 night « trek » in the Sapa region where several minority ethnic groups of South-East Asia live.
Dyed on site with indigo that grows on the sides of the paths, the tape is also woven locally on ancient looms. The patterns are created with wax on the principle of batik.
So I modified :
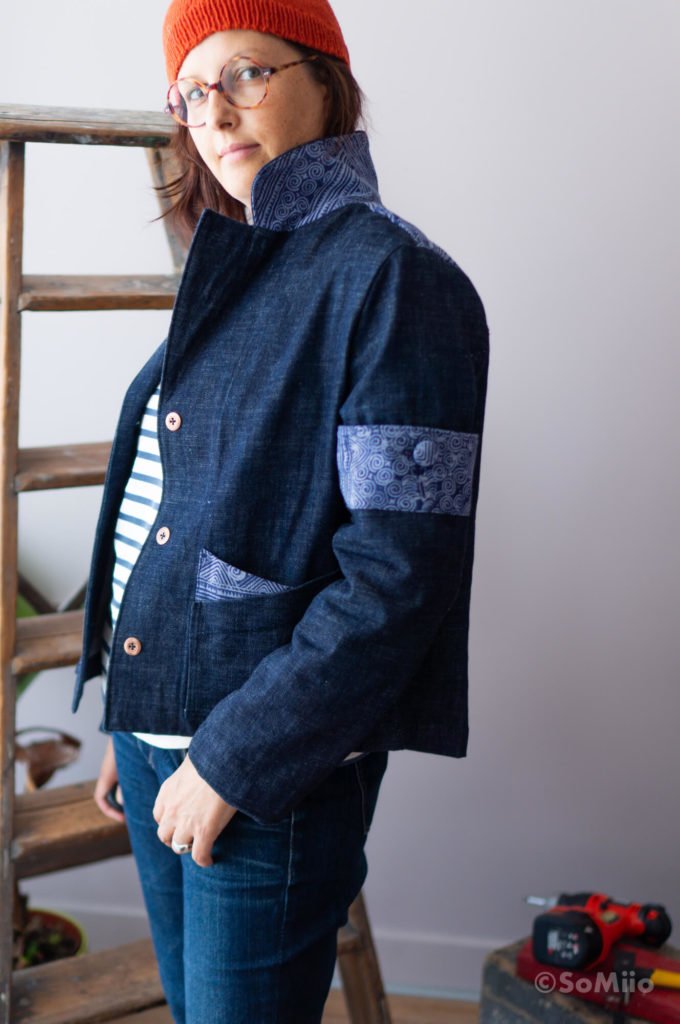
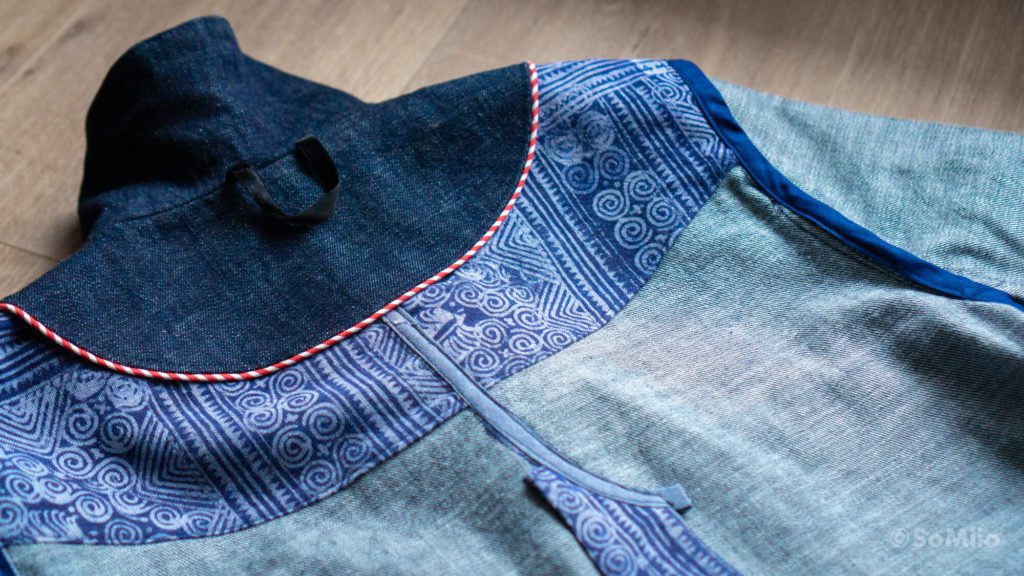
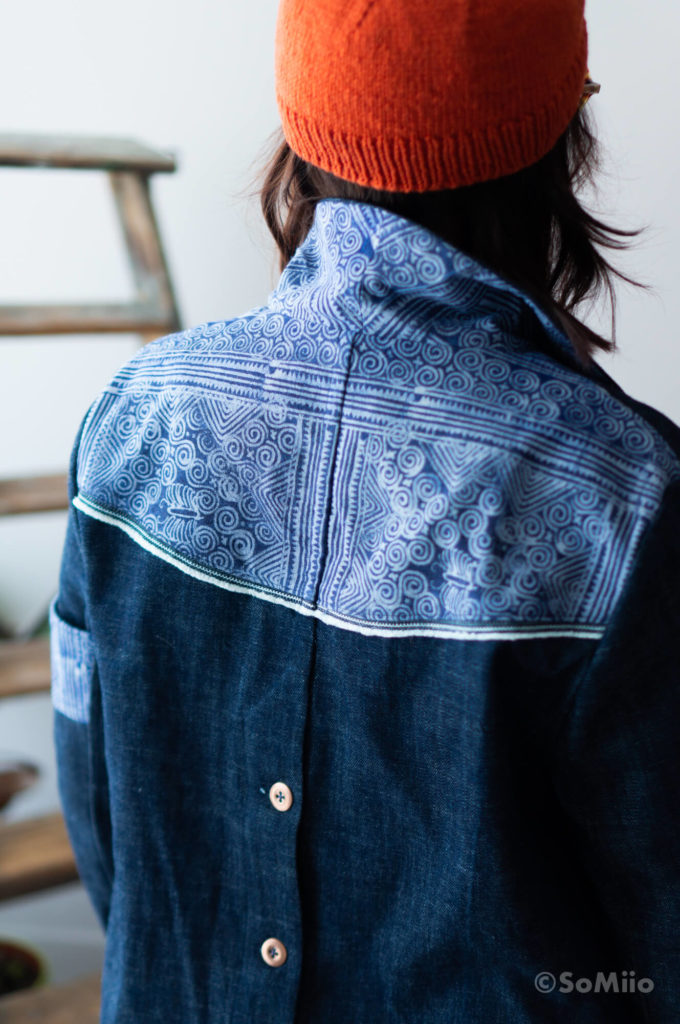
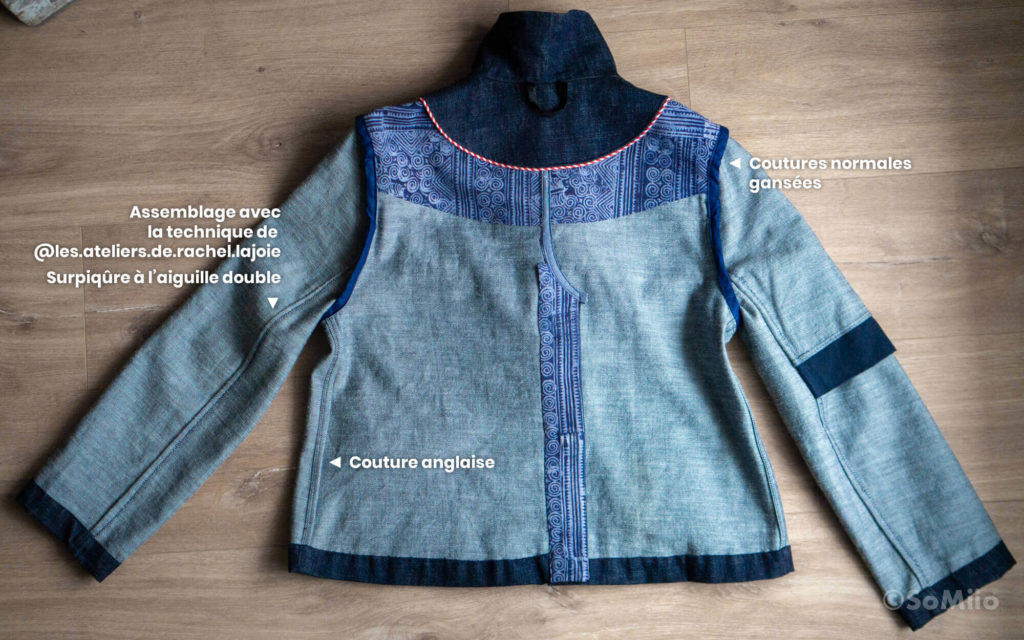
- the back with an indigo fabric yoke and a « piping » made of one of the edges of the denim coupon. The inspiration for this came from a blog post by Closet Core Patterns.
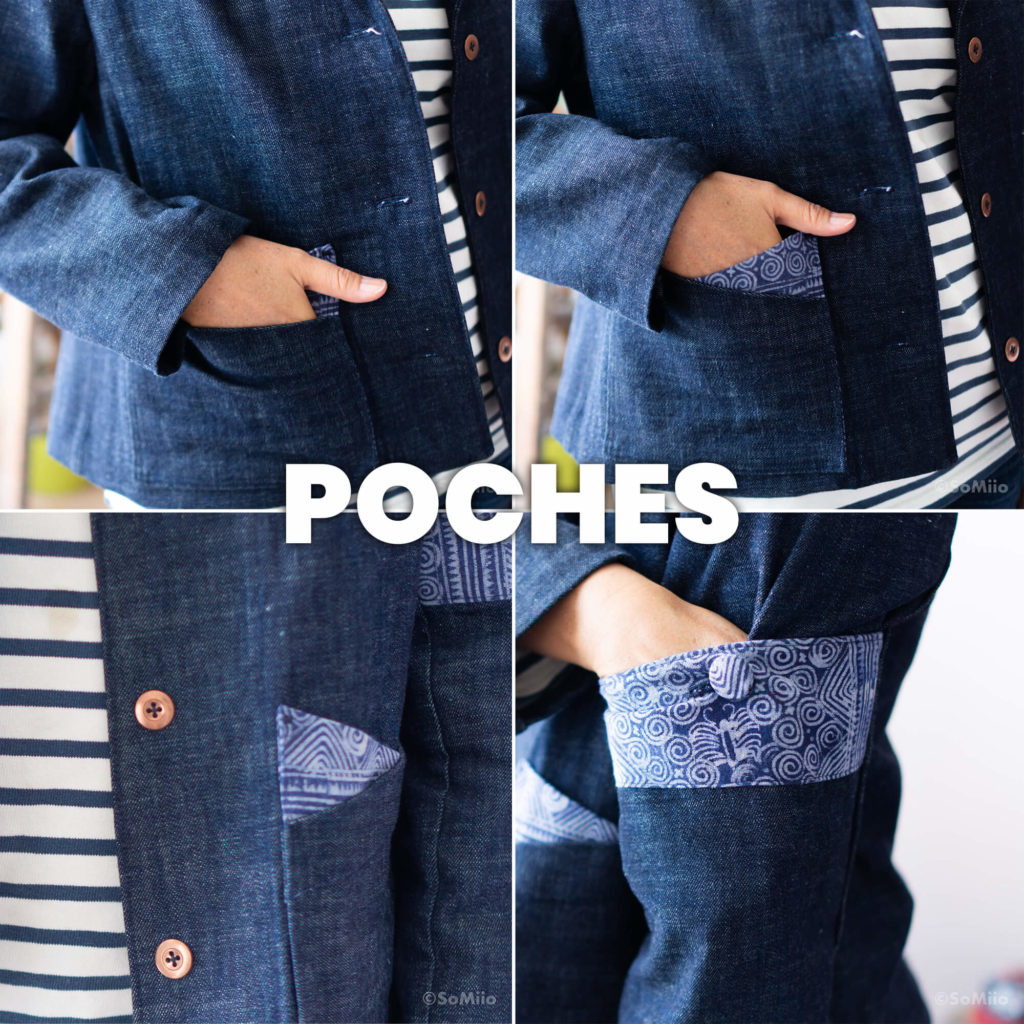
- the patch pockets with a small « petal » design that creates a double compartment
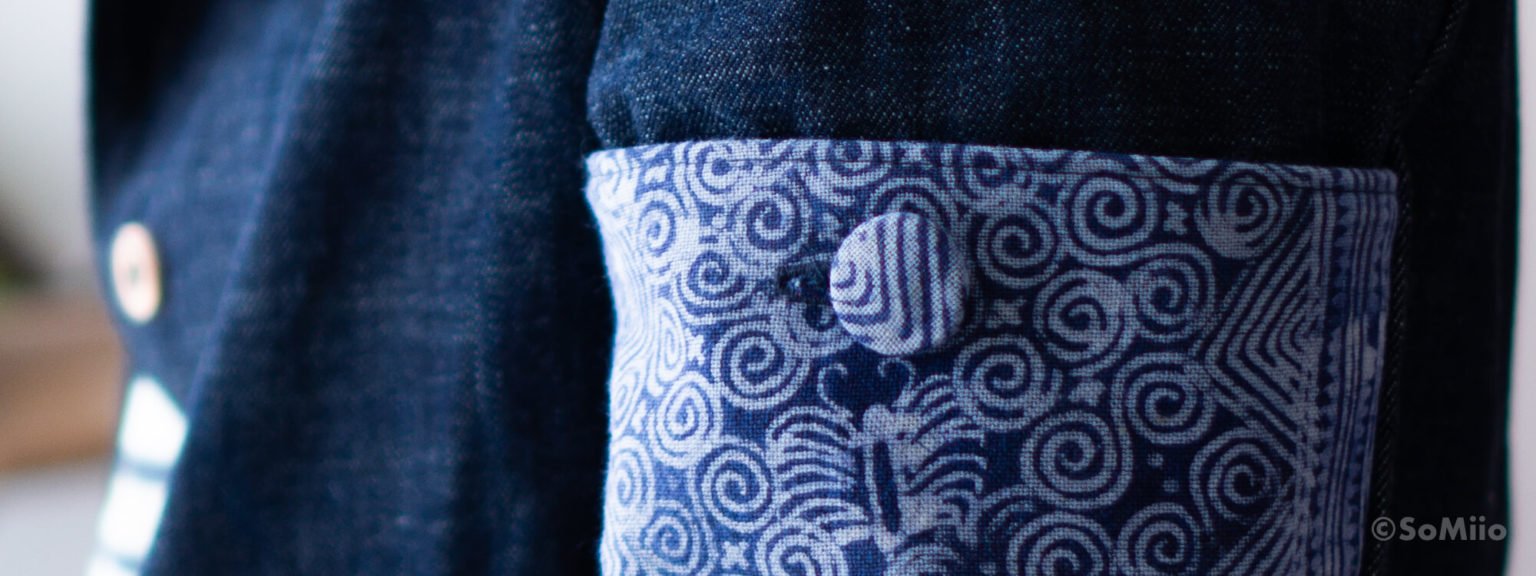
- a contrasting piece on the sleeve pocket
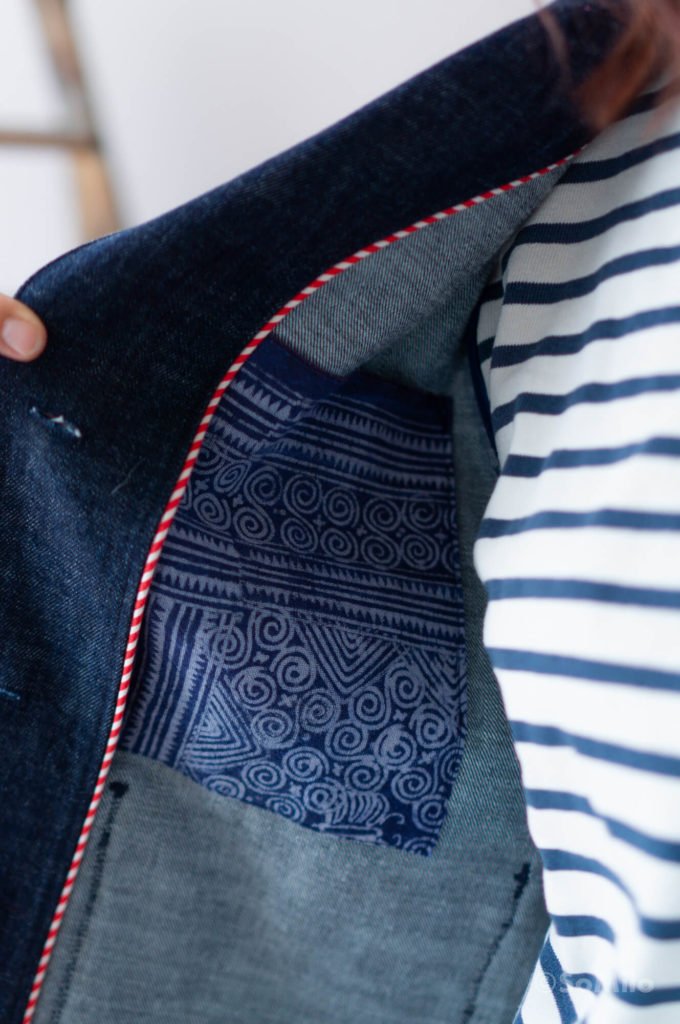
- the inside patch pocket
The back yoke
For the back, I cut the back piece in 2 with a slight rounding. Then I cut 4 pieces of the new « top back » and 2 pieces of the « bottom back ».
Then I assembled each half back (2 top yokes + « piping » made of the denim selvage + 1 bottom back) enclosing the seam between the 2 top yokes.
Finally, I treated these half-backs like the normal pieces and resumed the course of the explanations as if nothing had happened.
Patch pockets
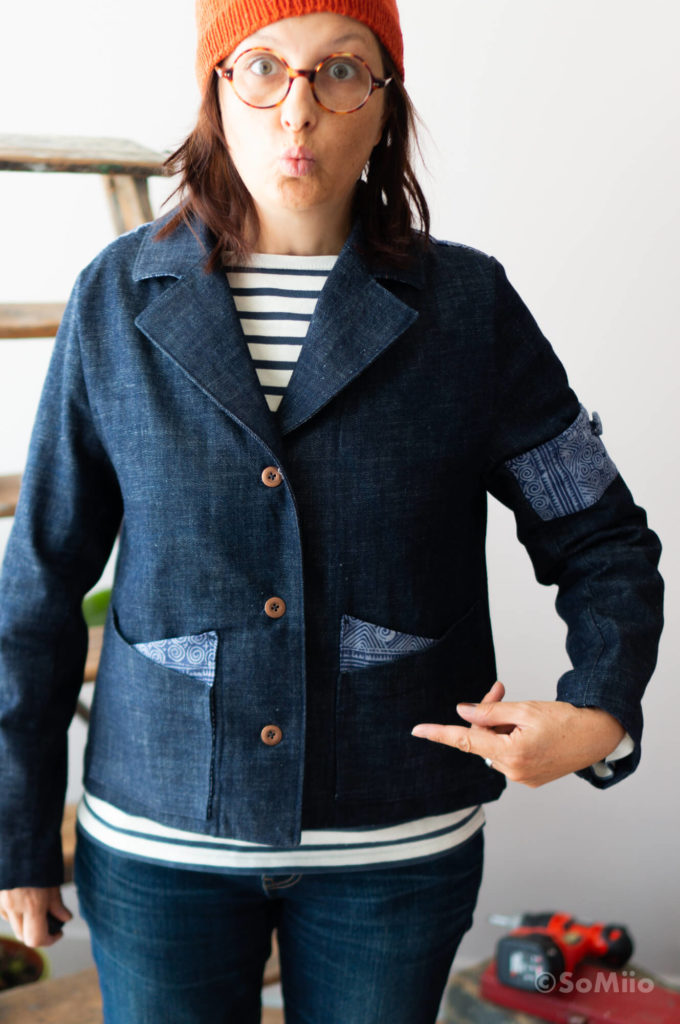
Oops. I realised it when I was taking the photos to tell you the truth. (The sides are aligned, it’s the effect of the photo)
The patch pockets were a bit of a problem for me… obviously since they aren’t aligned.
But also, a bit too low, they « eat » on the hem.
This is a problem encountered by at least one other blogger. I thought I had pretty much followed the pattern.
As a result, the hem was partially sewn by hand. Hop la, with the hand sewing: a problem? No problems.
Of course, to align it, I could unsew and restitch. But how can I put it… I don’t really care. Haaaan.
Maybe one day.
The tailored collar
No doubt about it, the tailoring collar is not for beginners.
That being said, the explanations + the sewalong are very clear. In addition, the pattern has been simplified compared to the classic tailor collar pattern by transforming the two right angles to be inlaid into a curve.
Much better if you ask me.
Denim is also a perfect fabric for a first time: stable enough AND shapable enough to go well.
Seam finishes
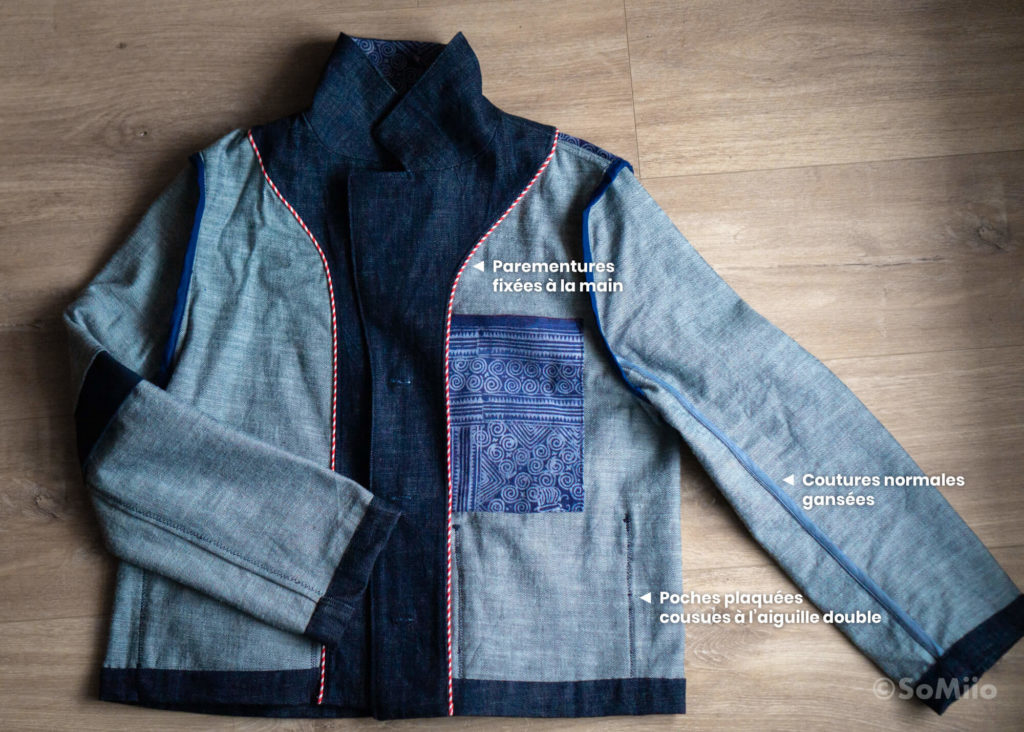
An unlined jacket means finished seams.
Assembly seams
For this project I made French seams, flat felled seams as described by @les.ateliers.de.rachel.lajoie and normal seams trimmed with bias.
I was not convinced by Rachel’s flat felled seams technique.
Perhaps because of my inexperience, or because the seam was slightly curved. Either way, I found it too inaccurate.
Topstitching
I also fixed the seams in different ways:
- topstitching with twin-needle for jeans but I don’t like the zig-zag stitch on the wrong side
- classic topstitching in 1 or 2 passes
- hand slip stitch for hems and facing
To finish the edge of the facing, I decided to use some piping. I’m very happy with this finish, it’s nice and easy to do.
Otherwise, the pattern recommends to topstitch the facing so that it doesn’t go all over the place every time you put it on. I obeyed quietky.
Then I realised that the facing was poaching on the top of the back.
Everything was unsewn (what would we do without a seam ripper, I ask you?) and sewn back by hand… which also allowed me to deal with the inner patch pocket.
The hem is sewn with invisible stitch or slip stitch. Not bad, are we?
Finally, I followed the step-by-step instructions on the blog rather than the PDF instructions for sewing the back placket and finishing the hem.
Conclusion
I loved sewing this jacket. It was a more ambitious than average project, but very satisfying. The steps went very smoothly and I enjoyed the finishing touches.
This denim, so easy to work with, took it’s part in the pleasure. But the pattern, perfectly designed and explained with multiple resources, is the main part of it.
I’m very happy with my finished jacket*. I just need to be able to travel again to make sure it’s as practical as the one that inspired it…
Let’s keep our fingers crossed.
*Except for the zig-zag of the double needle stitching. And no, I don’t have a perfectionism « problem ».




10 commentaires
[…] Closet Case Patterns (Canada) : patrons en français et en anglais de grande qualité avec des explications complètes, illustrées et souvent complétées par des pas-à-pas en photos et des vidéos sur le blog. → testé avec le Charlie Caftan et la veste Sienna Maker Jacket […]
Elle est superbe cette veste et le choix des tissus impec ! j’adore aussi les finition intérieur et notamment le passepoil rayé !
…et dire que je devais aller au Vietnam ce printemps (soupir !) !
Merci pour la veste. Arf pour le Vietnam… ce n’est que partie remise j’espère. C’est vraiment un chouette voyage. Si tu veux voir, j’ai tout mon voyage sur le blog : https://somiio.fr/tag/vietnam
Elle est magnifique cette veste et absolument top combinée avec ce beau tissu vietnamien.. J’adore tes fantaisies sur les poches!! Sacré boulot en tout cas bravo!! Et bravo pour le look façon bricoleuse!!
Merci ! J’avoue que je suis assez contente de mes poches 😉
Mais quelle beauté cette veste! C’est tout ce que j’aime: la forme, les tissus (et cet indigo vietnamien, il est trop trop beau) et les finitions! Bravo. Tu peux être fière de cette splendide veste de travail (ce serait quand même dommage de faire des travaux avec ;-*)
J’espère aussi que tu pourras vite la tester pour une prochaine escapade.
Merci beaucoup 🙂 Avec le temps assez doux qu’on a eu, j’ai pu la porter pour mes petites promenades quotidiennes et les multi-poches sont vraiment pratiques.
Wouah ! Ça c’est de la veste ! Je suis en admiration. J’adore
les fantaisies que tu as ajoutées. Et les finitions aux petits oignons… génial ! J’ai quand même une question. Comment as-tu fixé la poche intérieure ? Entièrement à la main ? Sinon, j’imagine qu’on verrait la couture sur l’endroit.
Merci !! La poche intérieure est une poche plaquée tout ce qu’il y a de plus simple. Mais le fil se confond totalement dans le denim. Du coup, ni vu ni connu ! 😉
Cela fait un moment que je cherche ce genre de veste surtout avec des manches tailleur.
Votre réalisation est jolie et originale, tout l’intérêt du home made