{:fr}
La shacket Ingrid est un projet de Noël, arrivé totalement à la bourre dans la todo-list de l’atelier du Père Noël.
Ayant appris que ma nièce se caillait les miches, en peine de manteau, et sachant ce qui lui faisait envie puisque je la follow (je la suis) sur Instagram, je me suis lancée… en la prévenant que je serai probablement à la bourre pour Noël.
Il ne restait plus plus qu’à trouver le patron et surtout le tissu pour cette non-petite personne (elle me dépasse !) qui a des goûts très précis.
| ITEM | BOUTIQUE | PRIX | QUANTITÉ |
| Patron PDF de la shacket Ingrid (en russe) | Vikisews | 1 | 3,42 € |
| Drap de laine sergé noir | Tissus de Rêve | 1,2 m | 14,90 € |
| Flanelle de laine à carreaux rouges & noirs | Tissus de Rêve | 1 m | 9,90 € |
| Velours de laine (chutes) | Tissus de Rêve | 1 m | 0 € |
| Drap de laine à carreaux (chutes de ma cape V9288) | Tissus.net | 1 m | 0 € |
| Doublure polyester | ? | 2 m | 8 € |
| Boutons noirs nacrés | La Réserve des Arts | 5 | 1 € |
| Boutons noir | Stock de ma sœur | 5 | 0 € |
| Thermocollant laineux | Fil 2000 | 2 m | 6 € |
| Fil | Stock | 0 | 0 € |
| Total | 37,22 € |
Le patron de la shacket Ingrid
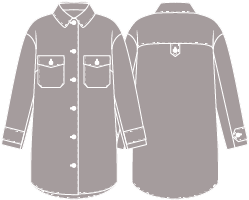
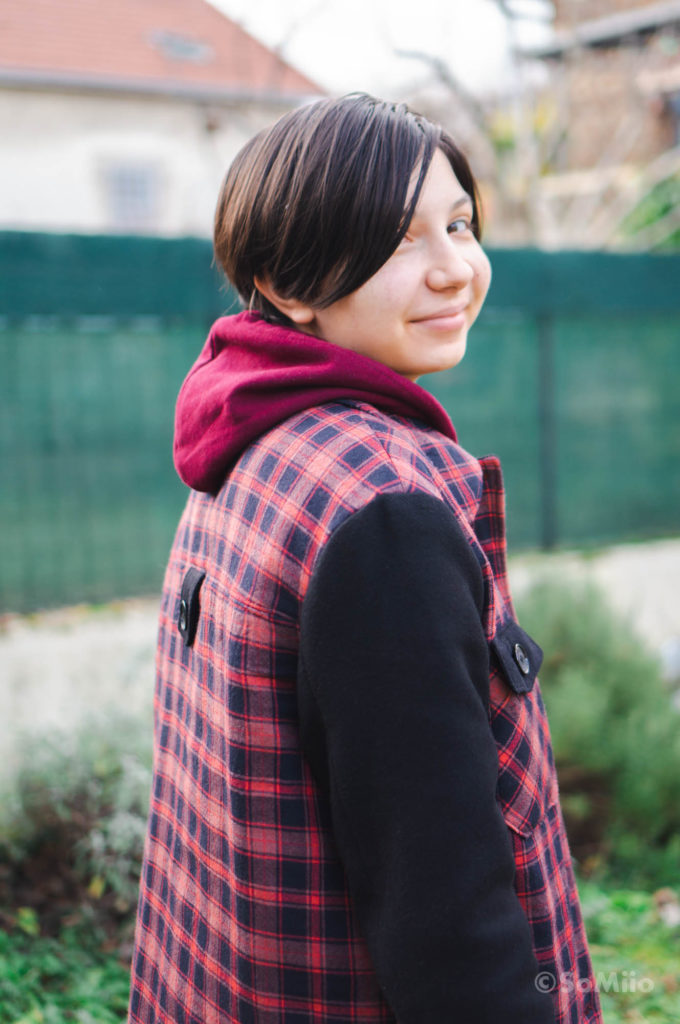
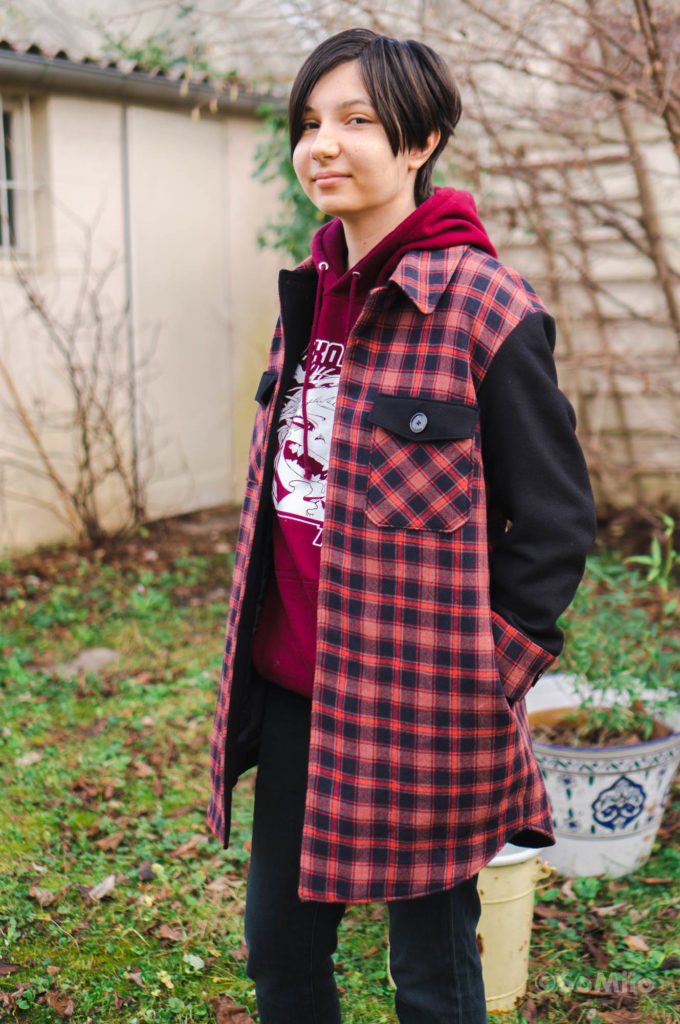
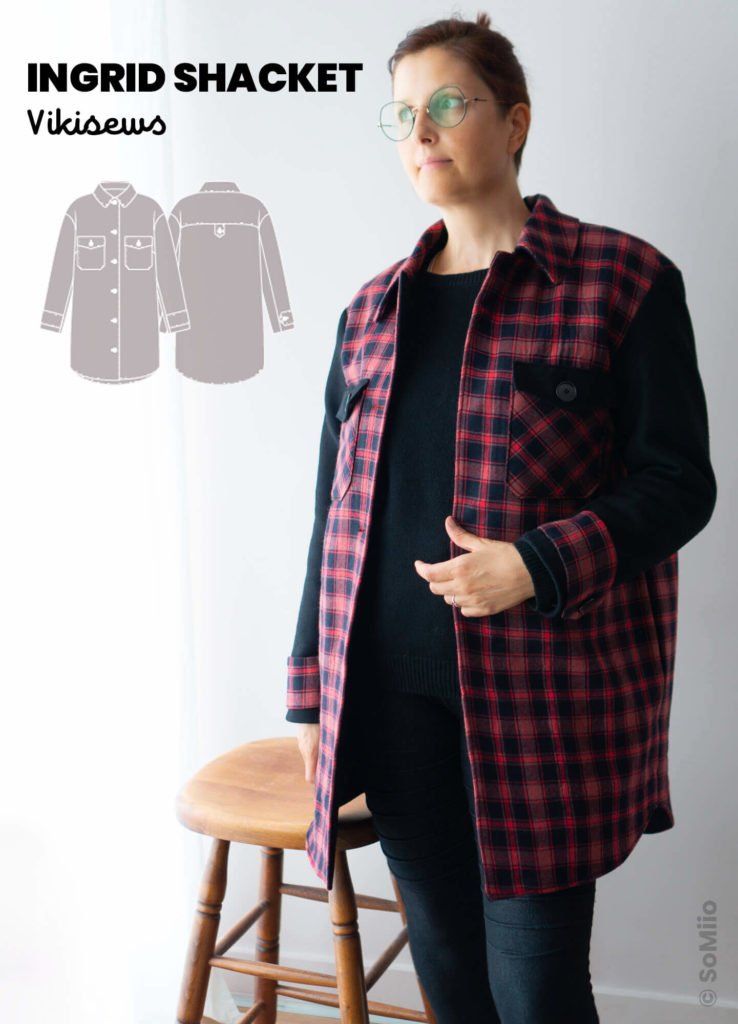
Hop, pim-pam-poum, une recherche sur internet plus loin et j’avais le patron. Le manteau, ou plutôt la shacket Ingrid (contraction de jacket & shirt, soit veste & chemise en VF) est un patron de Vikisews, marque russe de patrons.
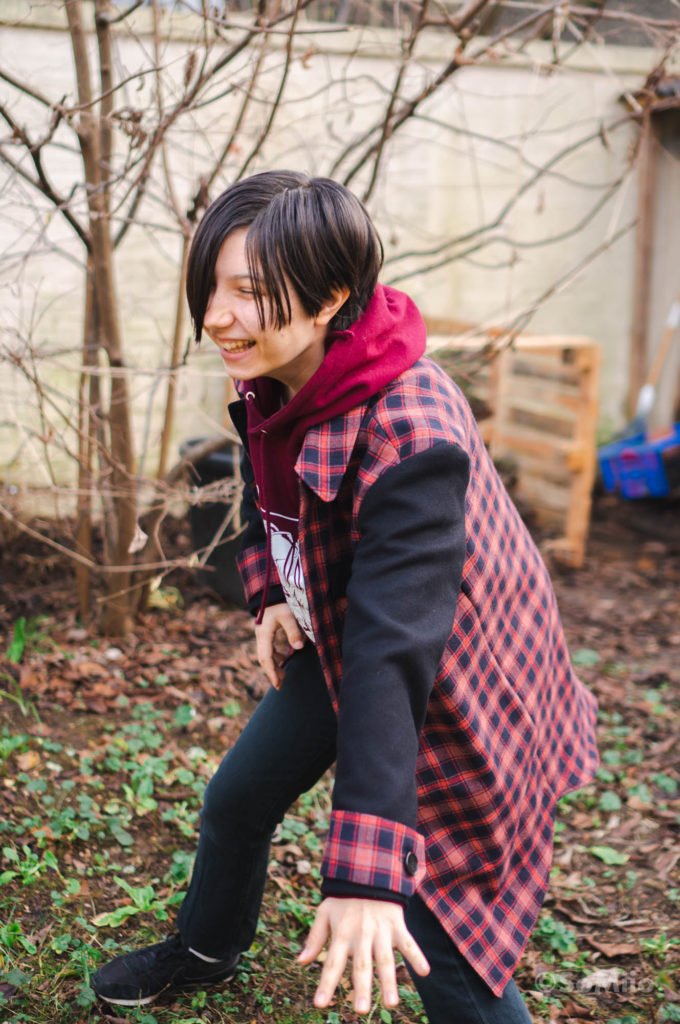
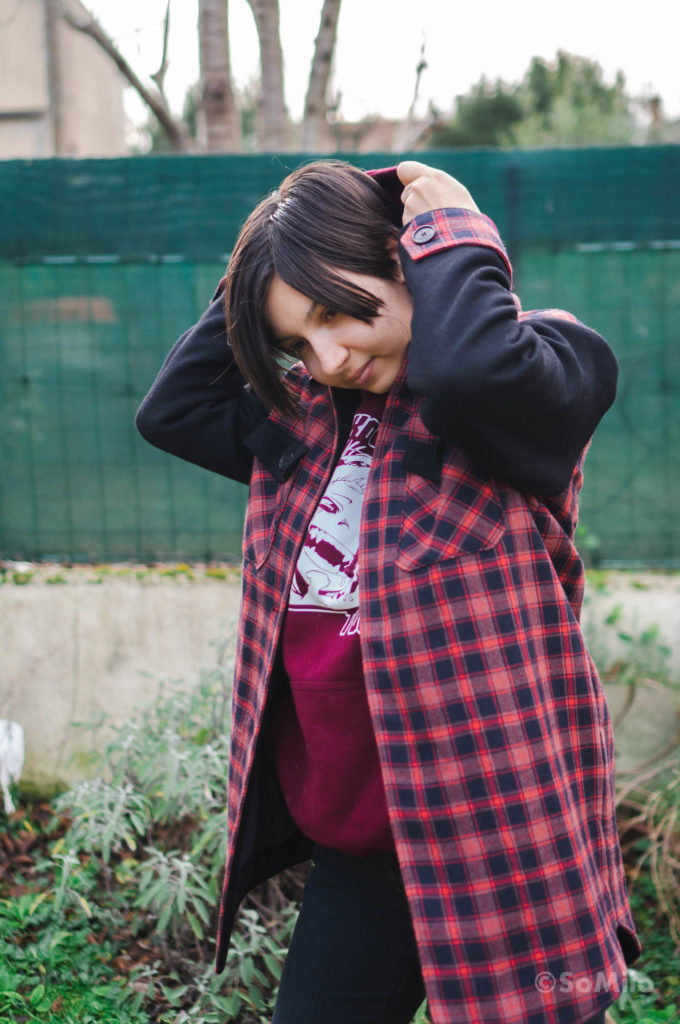
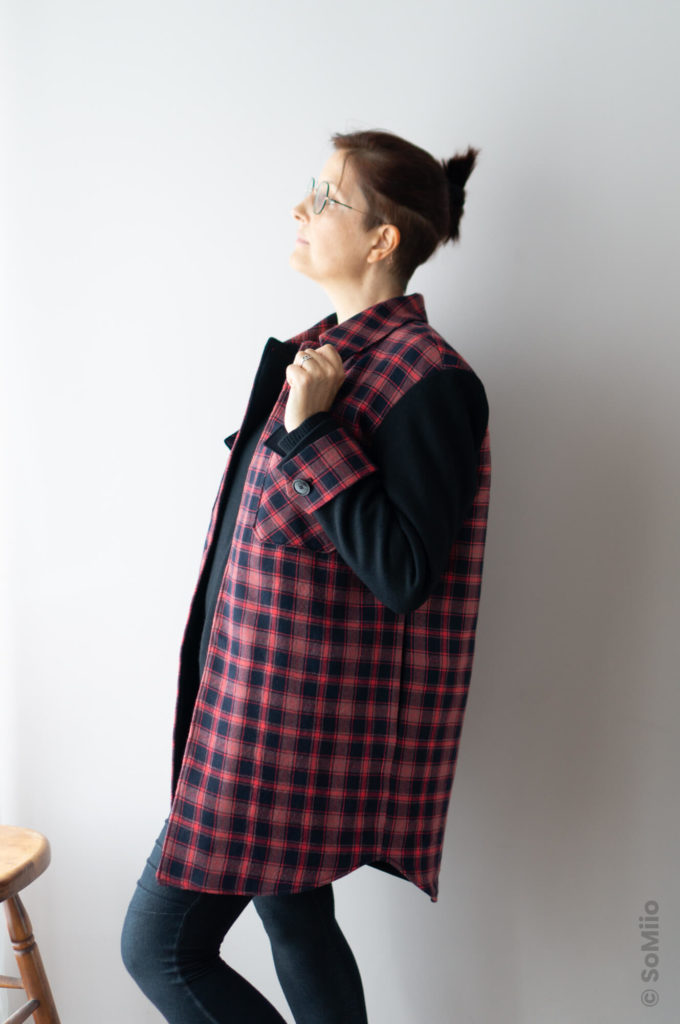
La shacket Ingrid est donc un manteau doublé qui a le style d’une surchemise à épaules tombantes.
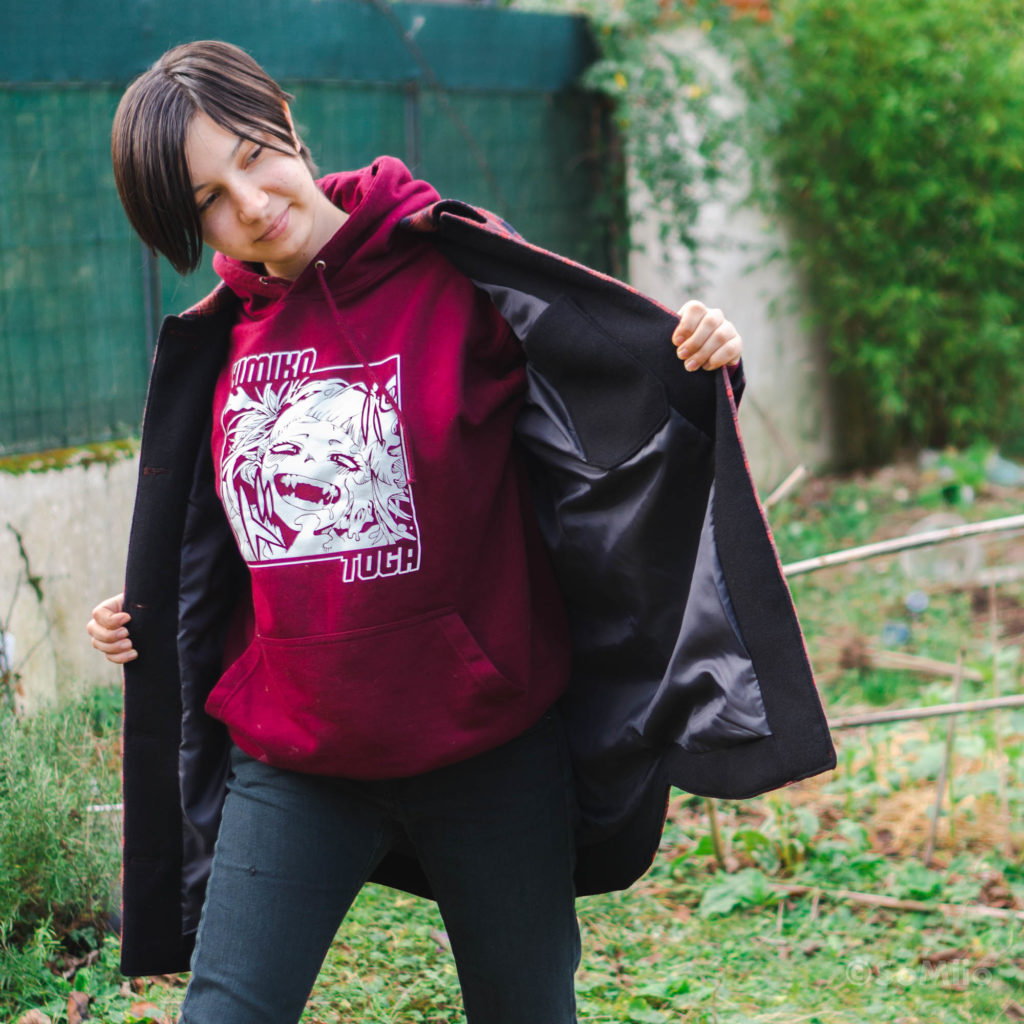
Si le manteau a le style d’une chemise, dans le patronage c’est un vrai manteau avec des pièces différentes pour le dessus et dessous de col, des parementures d’ourlet et de patte de boutonnage et même pour la doublure des poches plaquées.
Vikisews a commencé à traduire ses patrons en anglais, et par la même occasion s’est aligné sur les prix européens.
Radine un jour, radine toujours, j’ai acheté la version russe, pensant pouvoir traduire les explications.
Mais les patrons pdf de Vikisews russes sont protégés contre le copier-coller pour la traduction.
Oh, on peut copier, mais quand on colle, on n’a plus du russe mais des caractères spéciaux chelous. Ce n’est donc plus une langue traductible mais du charabia. Bien ouéj.
Ah ! Feinte mais contrefeinte de ma part : j’ai transformé les pages (des points qui me questionnaient le plus) en images et utilisé un traducteur qui prend des images en entrée. Na.
En vrai, ça prend du temps et ça n’est pas très pratique mais ça dépanne.
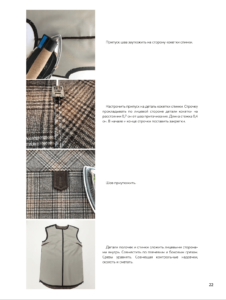 Heureusement, les explications sont illustrées de photos très pros et améliorées en faisant figurer quelques lignes pour montrer les coutures.
De ce que j’ai pu en voir, ces explications sont vraiment très complètes, avec notamment un livret complet à part, et générique, sur les ajustements de patrons qui peuvent être nécessaires.
On y trouve aussi les indications d’où entoiler et stabiliser les coutures : emmanchures, encolure, col, épaules, coutures côté, têtes de manche, etc. Un peu partout quoi !
Et il y a même des instructions sur quoi, quand et comment repasser.
La couture de la shacket Ingrid
Là, où il a encore fallut feinter, ce fût pour le tissu. Parce que ma nièce a une passion particulière (et j’espère pas trop passagère) pour les carreaux rouges & noirs.
Après avoir épluché un nombre relativement considérable de sites de boutiques de tissus, la meilleure correspondance était cette flanelle de laine chez Tissus de Rêve.
Alors bon, je me doutais que la flanelle c’était pas gagné.
Cependant, je voulais absolument du 60 à 100% de laine pour un tissu qui ne bouloche pas au bout de 2 heures. Et parce qu’il faut qu’elle qu’elle ait chaud ma loupiote. Et puis c’était sa préférée.
Au final, non seulement la flanelle était définitivement trop fine mais en plus il n’y en avait plus qu’un mètre. Angoisse.
J’ai complété avec 1,20 m de drap de laine sergé noir et j’ai croisé fort les doigts des mains et des pieds.
D’ailleurs, j’ai cousu la shacket Ingrid en taille 38 et en stature 162-168 (car la gamine est la plus grande la famille !) mais j’ai retiré -6 cm en hauteur pour que ça passe dans mon coupon.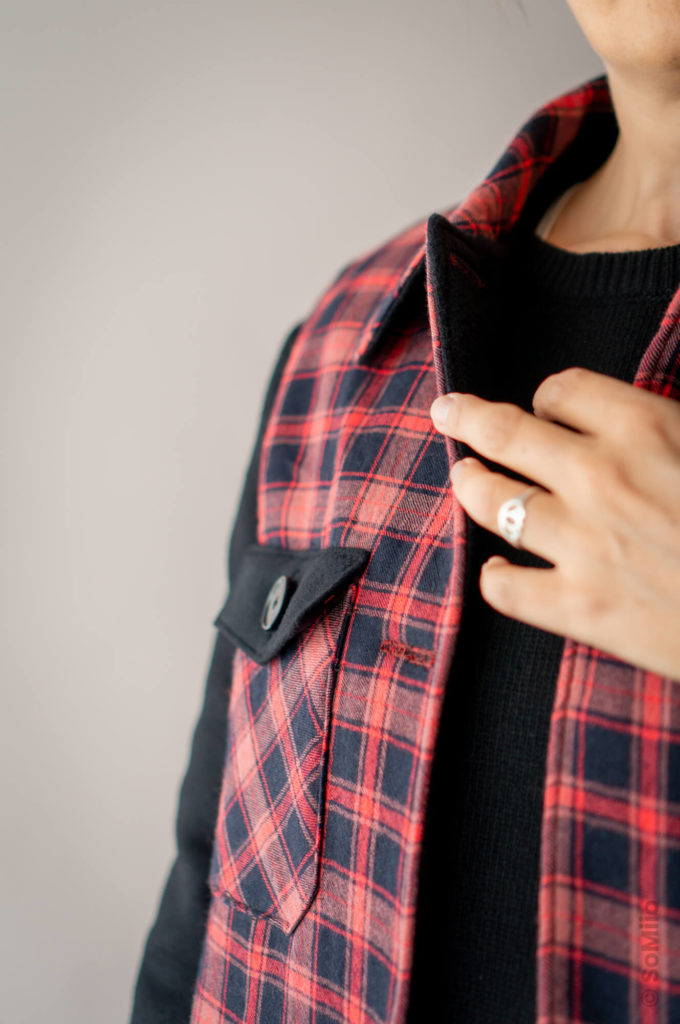
L’idée était de thermocoller et tripler la flanelle pour le buste et de faire les manches & autres parementures dans le très beau drap de laine noir.
Et devinez quoi ? Ça a marché.
Alors certes, il ne reste plus grand chose de la flanelle mais c’est passé.
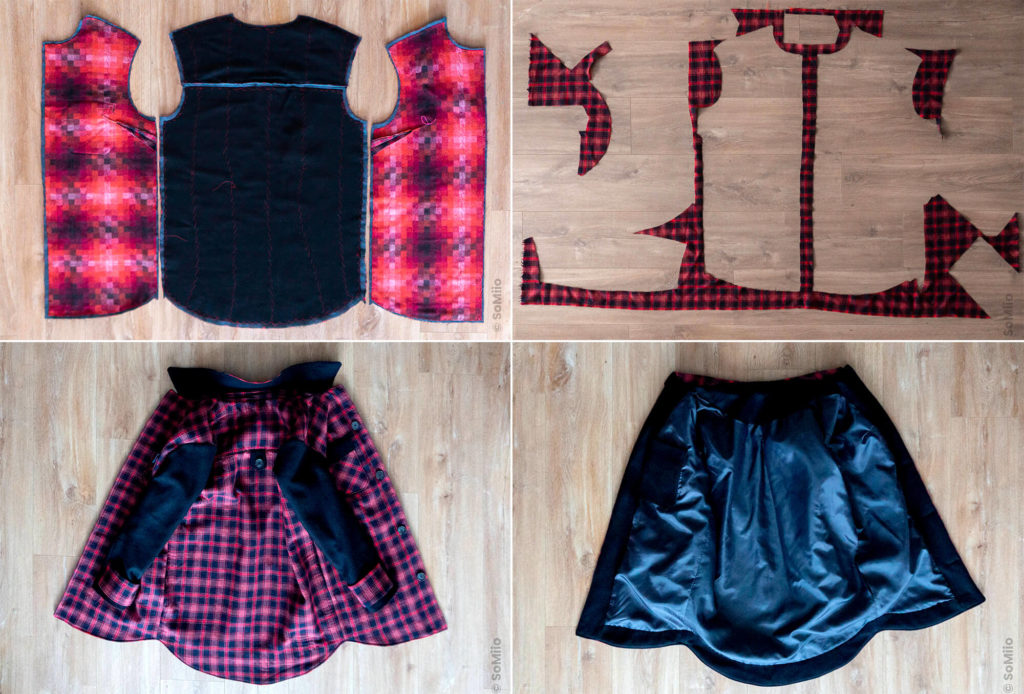
Cependant, comme la flanelle se déformait pas mal, j’ai coupé les pièces devant et dos dans le thermocollant que j’ai soigneusement épinglé pour la « redresser ». J’ai plus ou moins réussi puisque sur un côté mes raccords sont OK, et de l’autre non.
Comment pourquoi ? → Mystère.
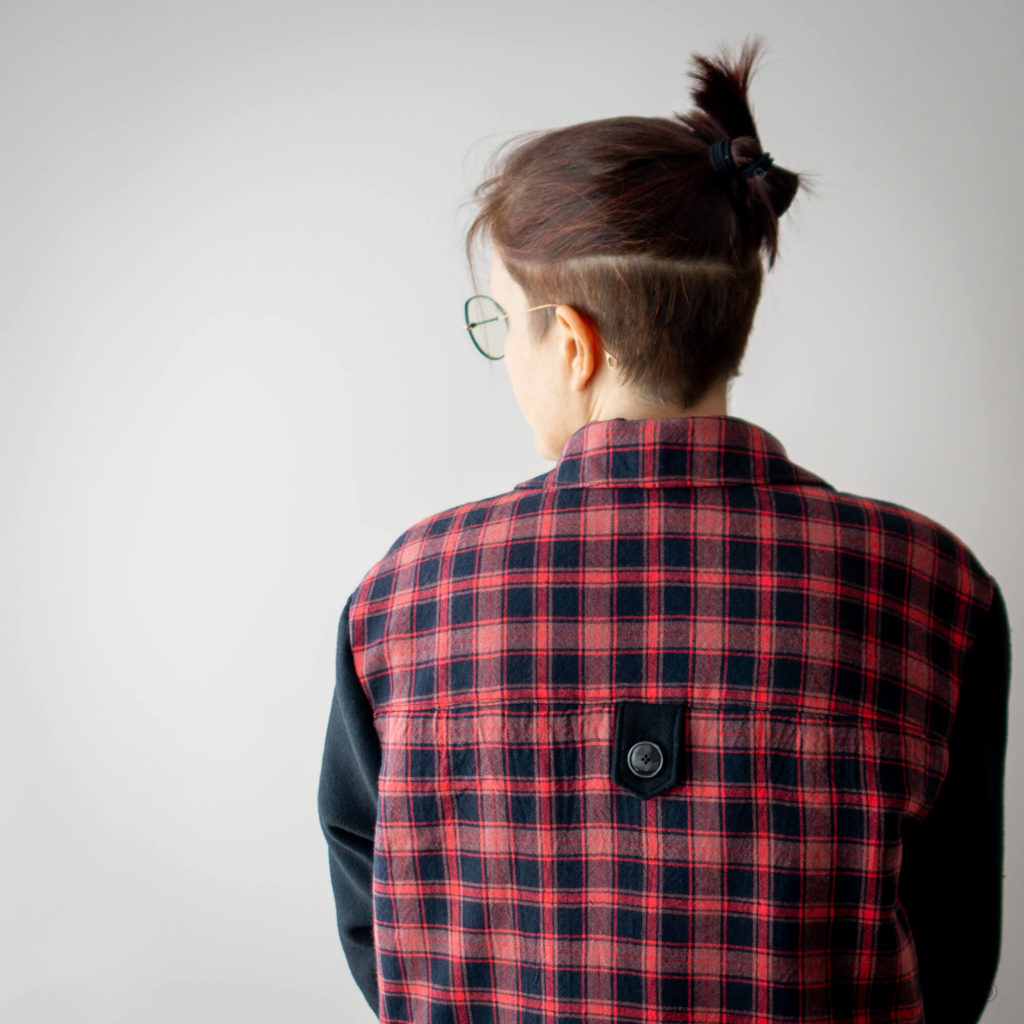
Mais le dos & le col, les plus visibles, sont matchy-matchy.
Ensuite, il faut aussi thermocoller tout le reste, toutes les autres pièces.
C’est un peu long.
OK, donc avec le thermocollant laineux, on a une première couche.
Et j’en ai ajouté une seconde – ou plutôt une triplure ça s’appelle – avec des chutes de velours de laine et de drap de laine.
Au début, j’ai tenté d’assembler avec un thermocollant double face tissé trouvé chez Fil 2000. Échec total. Puis j’ai essayé avec du ruban à ourlet. Re-échec.
Finalement, j’ai assemblé à grands points de chevron, comme de l’entoilage tailleur. Mais en plus compliqué à réaliser de manière invisible car la flanelle est fine.
C’est aussi un peu long.
J’ai même rabattu les pinces ouvertes avec un point de chausson pour avoir un résultat bien net.
Parce qu’il arrive à un moment, pourquoi compter le temps.
Bon, sinon, ai-je modifié le patron ? Bien sûr !
Pour ajouter des poches ? Bingo !
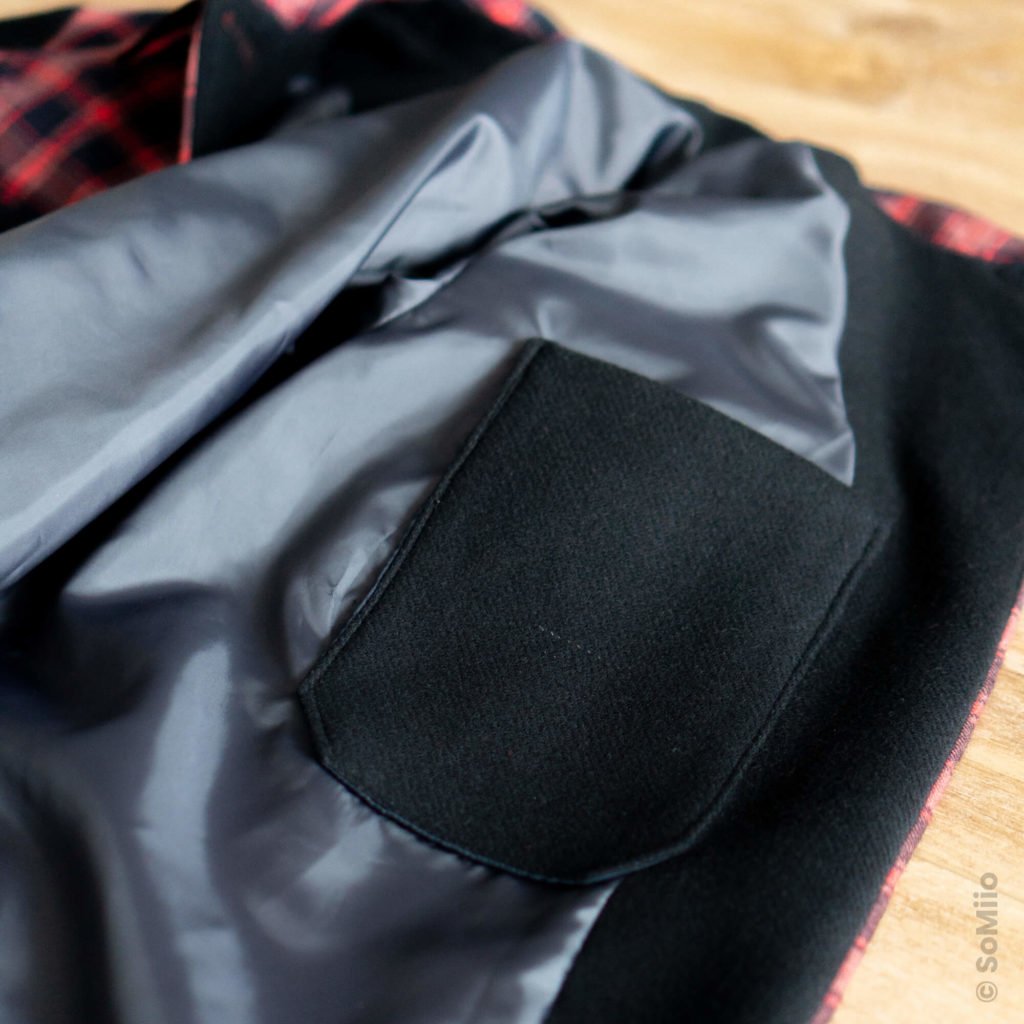
J’ai ajouté 2 poches dans les coutures côté et une poche intérieure spécialement taillée pour un téléphone.
Les poches côté sont finalement trop loin en arrière pour être vraiment confortables mais elles contiendront sans problème un mouchoir et une paire de gants.
Elles sont aussi réalisées dans les règles de l’art avec parementures de poches et tout.
Les poches plaquées ont été taillées dans le biais parce que je n’avais plus assez pour les raccords (et pour ne pas m’embêter non plus). Elles sont totalement fonctionnelles et doublées de manière très bien patroné.
Le patron inclut aussi de chouettes détails avec la petite patte dos et les pattes sur les manches.
Enfin, il reste encore la doublure à attacher, les parementures d’ourlet et de patte de boutonnage à glacer, les boutonnières à faire et les boutons à coudre.
Les boutonnières ne sont pas folichonnes mais ça passe pour l’œil non averti.
J’ai fini de coudre les boutons directement chez ma sœur, et j’ai même tapé dans son stock puisqu’il en fallait 10 quand j’en avais 5…
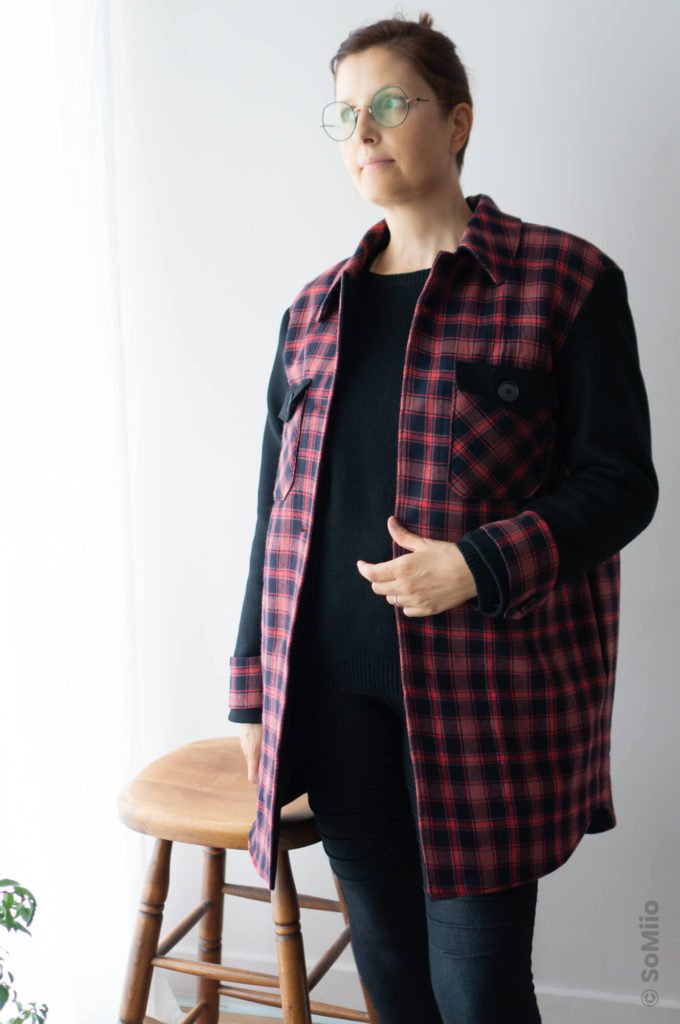
Et ma nièce a eu sa Shacket Ingrid 1 semaine APRÈS Noël, juste avant que le froid ne nous retombe dessus.
Conclusion
Au final, avoir une deadline (même ratée) m’a bien motivée pour finir ce projet défi le plus rapidement possible. Même si j’avoue que j’en avait un peu ras la casquette sur la fin. Comme le dernier mois d’une grossesse un peu : « Nan, mais c’est sympa mais vivement que ça se finisse« .
Mais je suis fière de moi et de la shacket.
Et sa destinataire le kiffe, détail qui a son importance aussi 😉
Je suis très favorablement impressionnée par la qualité du patron de Vikisews : patronage & explications nous emmènent vraiment sur le chemin d’une réalisation de haut niveau.
J’avais hésité un moment avec la surchemise Rya de Fibremood et je ne regrette pas mon choix. Le patron de Fibremood n’est pas doublé et je suis bien sûre que le patron n’est pas aussi poussé dans son patronage et les explications de finitions au poil.
Oualah, oualah ! Au programme de la semaine prochaine : on continue sur les cadeaux de Noël.
Enregistrer sur Pinterest
{:}{:gb}
The Ingrid shacket is a Christmas project, arrived totally out of order in Santa’s workshop todo-list.
Having learned that my niece was freezing when going to school, in need of a coat, and knowing what she was longing for since I follow her on Instagram, I took the plunge… and warned her that I would probably not be in time for Christmas.
All that was left was to find the pattern and especially the fabric for this non-little person (she’s outgrowing me!) who has very specific tastes.
| ITEM | SHOP | PRICE | QUANTITY |
| Shacket Ingrid PDF pattern (in russian) | Vikisews | 1 | 3,42 € |
| Black wool twill coating | Tissus de Rêve | 1,2 m | 14,90 € |
| Wool flannel with red & black checks | Tissus de Rêve | 1 m | 9,90 € |
| Black wool (remnant) | Tissus de Rêve | 1 m | 0 € |
| Wool check (V9288 cape remnant) | Tissus.net | 1 m | 0 € |
| Polyester lining | ? | 2 m | 8 € |
| Black pearly buttons | La Réserve des Arts | 5 | 1 € |
| Black buttons | My sister stash | 5 | 0 € |
| Thick fusible interfacing | Fil 2000 | 2 m | 6 € |
| Thread | Stock | 0 | 0 € |
| Total | 37,22 € |
The Ingrid shacket pattern

Hop, pim-pam-poum, a search on the internet later and I had the pattern. The coat, or rather the Ingrid shacket (jacket+ shirt) is a pattern from Vikisews, a Russian pattern brand.
The Ingrid shacket is a fully lined coat with the style of an overshirt with dropped shoulders.
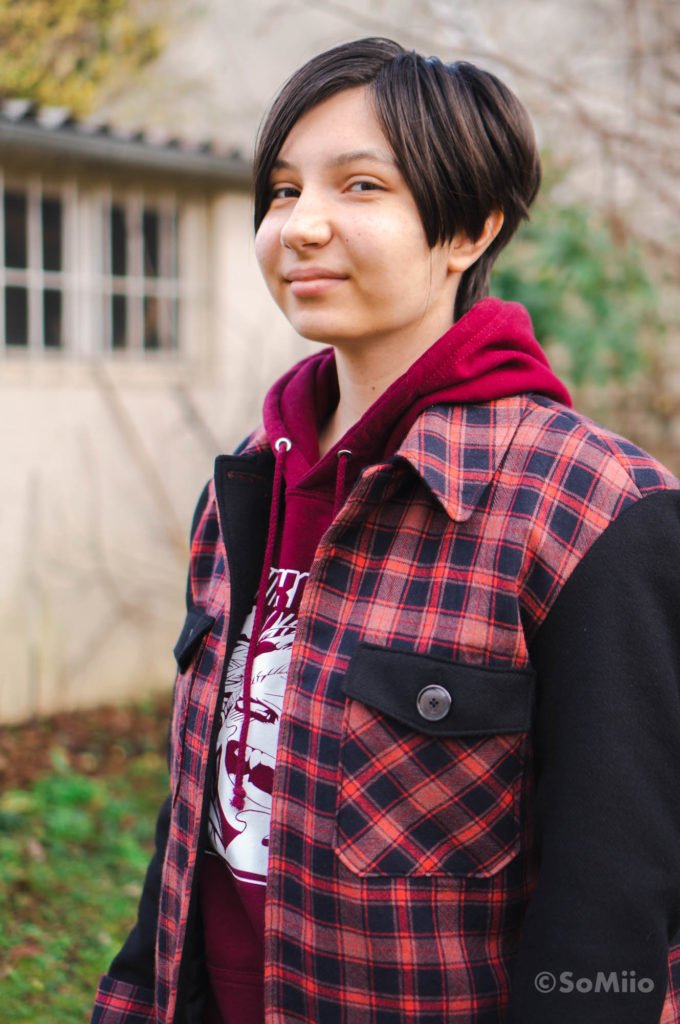
If the coat has the style of a shirt, in the pattern it is a real coat pattern with different pieces for the top and bottom of the collar, hem and placket facings and even for the lining of the patch pockets.
Vikisews started to translate its patterns into English, and at the same time aligned itself with the European prices.
Once a cheapskate, always a cheapskate, I bought the Russian version, thinking I could translate the explanations.
But the Russian Vikisews PDF patterns are copy and paste protected for translation.
Oh, you can copy, but when you paste, you don’t have Russian anymore, but weird special characters. So it’s no longer a translatable language but gibberish. Nice.
Ah, feint but counterfeit on my part: I turned the pages (of the points that questioned me the most) into images and used a translator that takes images as input. Na.
In reality, it takes time and it’s not very practical but it helps.
Fortunately, the explanations are illustrated with very professional photos and enhanced by including a few lines to show the seams.
From what I could see, these explanations are really complete, with a comprehensive and generic booklet on pattern adjustments that may be necessary.
There are also indications of where to insert and stabilize the seams: armholes, neckline, collar, shoulders, side seams, sleeve heads, etc. Just about everywhere!
And there are even instructions on what, when and how to iron.
Sewing of the Ingrid shacket
Where I had to cheat again, it was for the fabric. Because my niece has a particular (and I hope not too fleeting) passion for red & black checks.
After scouring a relatively large number of fabric store websites, the best match was this wool flannel at Tissus de Rêve.
So I knew that flannel was not the best choice.
However, I absolutely wanted 60 to 100% wool content so the fabric wouldn’t go pilling after 2 hours. And also because I wanted her to be warm. And it was her favorite.
In the end, not only the flannel was definitely too thin but there was only one meter of it left. Anguish.
I completed with 1,20 m of black wool twill and I crossed my fingers hard on my hands and feet.

The idea was to use fusible interfacing AND interlining on the flannel for the bust and using the sleeves & other facings in the beautiful thick black wool.
And guess what? It worked.
So yes, there’s not much left of the flannel but it worked.
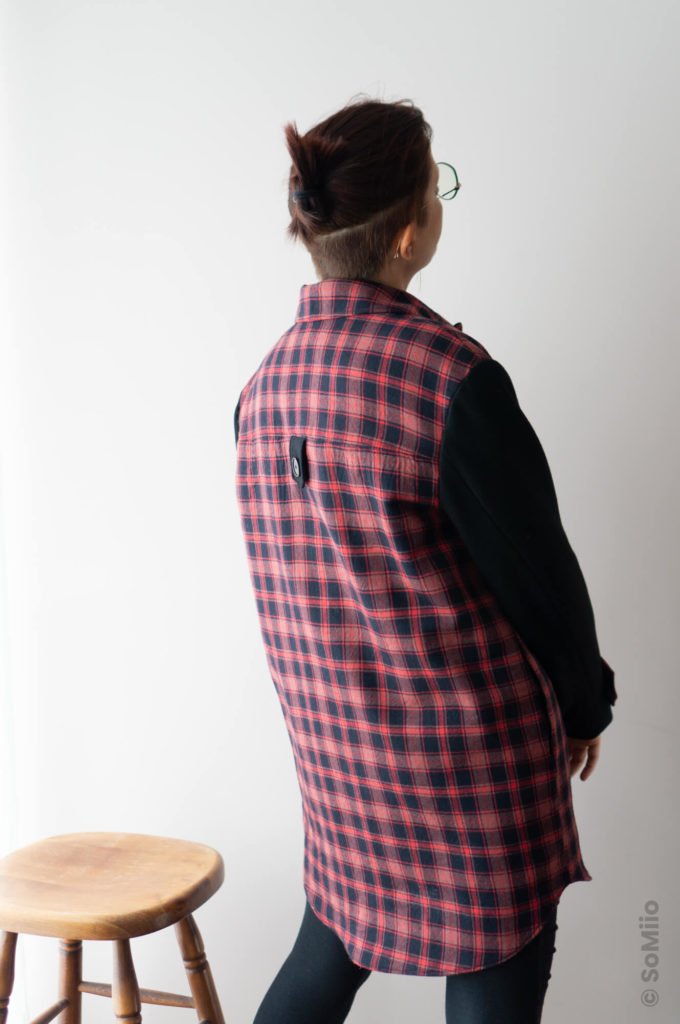
However, as the flannel was distorting quite a bit, I cut the front and back pieces in the fusible interfacing that I carefully pinned onto the flannel to « straighten » it. I was more or less successful since on one side my seams are OK, and on the other side they are not.
How come? → Mystery.
But the back & collar, the most visible, are matchy-matchy.
Then you have to fusible interface everything else too, all the other parts.
It’s a bit long.
OK, so with the woolly fusible interfacing, we have a first layer.
And I added a second layer – or rather an interlining, as it’s called – with leftover wool drape.
At first, I tried to assemble with a double-sided woven fusible interfacing found at Fil 2000. Total failure. Then I tried with hemming tape. Failure again.
Finally, I assembled with large herringbone stitches, like tailor interfacing. But more complicated to do invisibly because the flannel is thin.
It’s also a bit long.
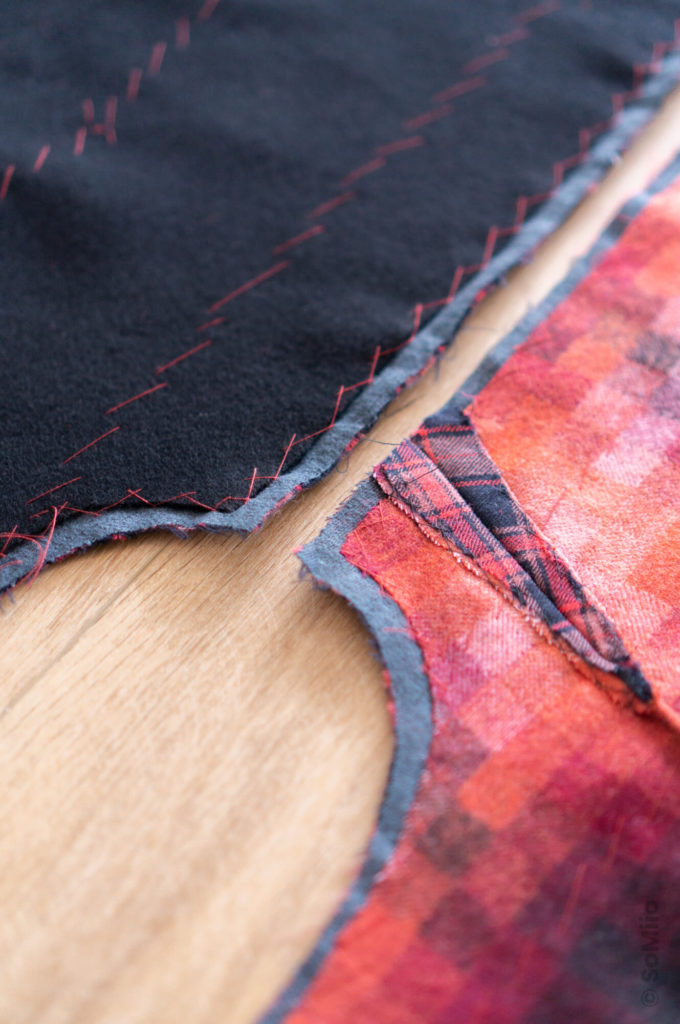
I even flattened over the open darts with a catchstitch to get a neat result on the outside.
Because there comes a time, why count the time.
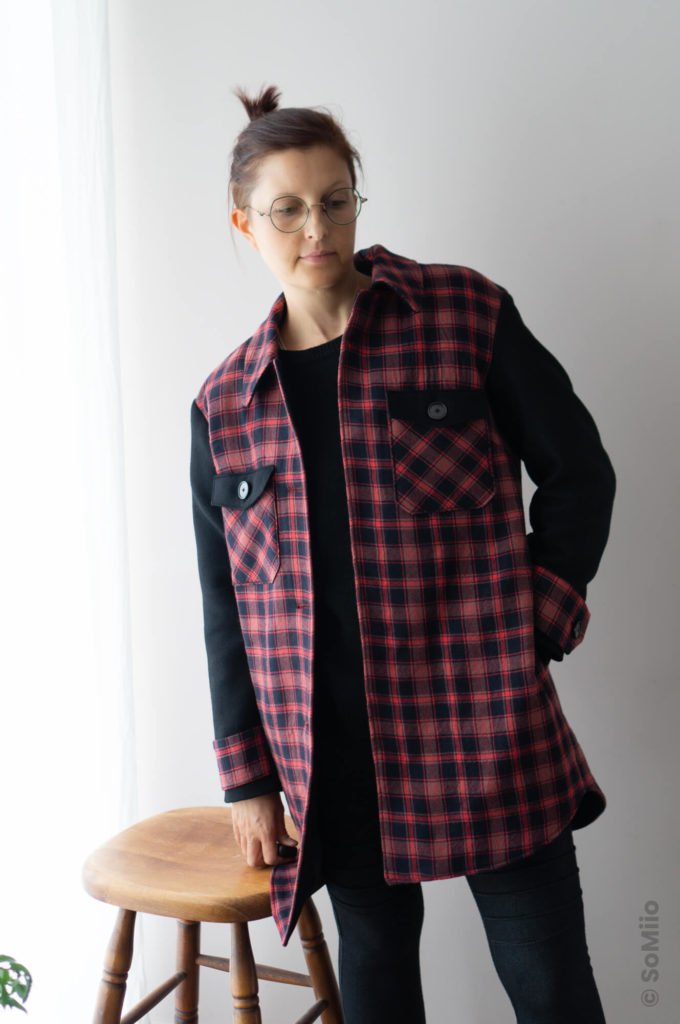
Now, did I change the pattern? Of course you did!
To add pockets? Bingo!
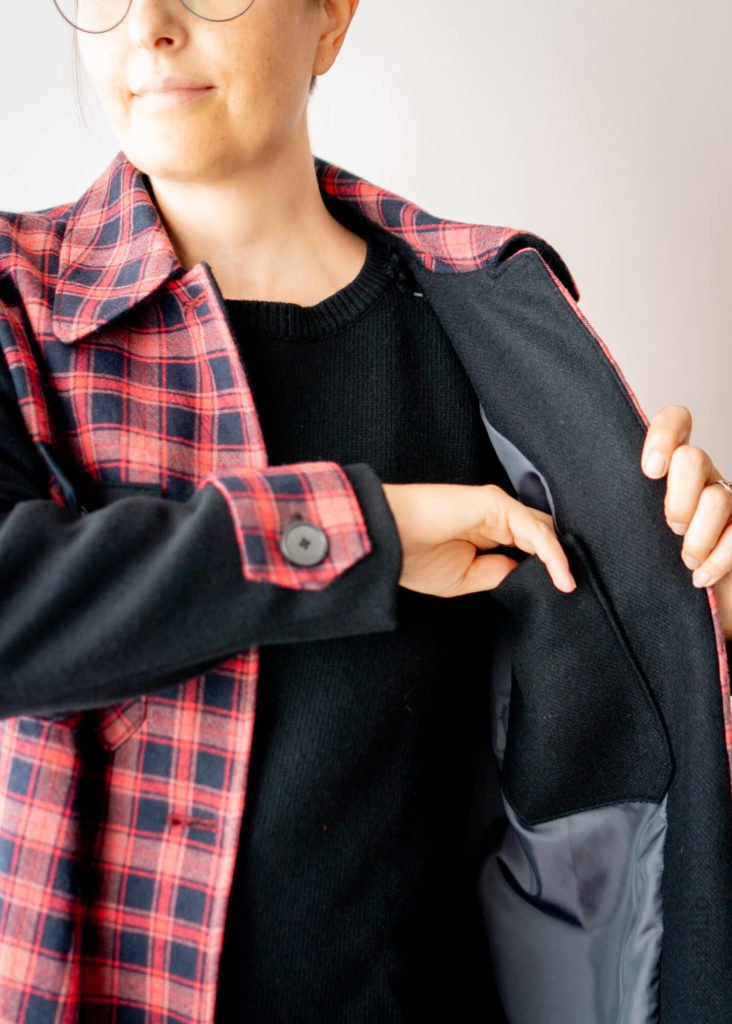
I added 2 pockets in the side seams and an inside pocket specially cut for a phone.
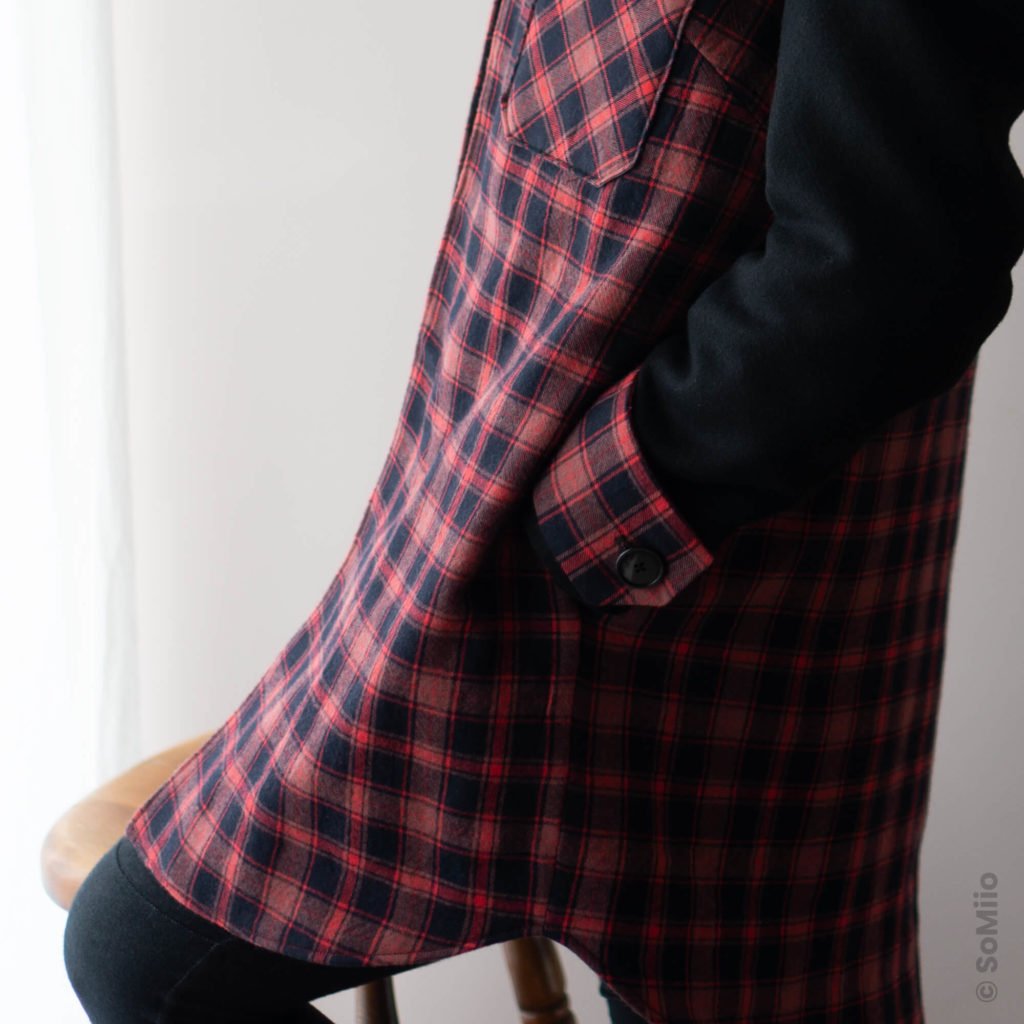
The side pockets are finally too far back to be really comfortable but they will hold a handkerchief and a pair of gloves without problem.
They are also made in the rules of art with pocket linings and all.
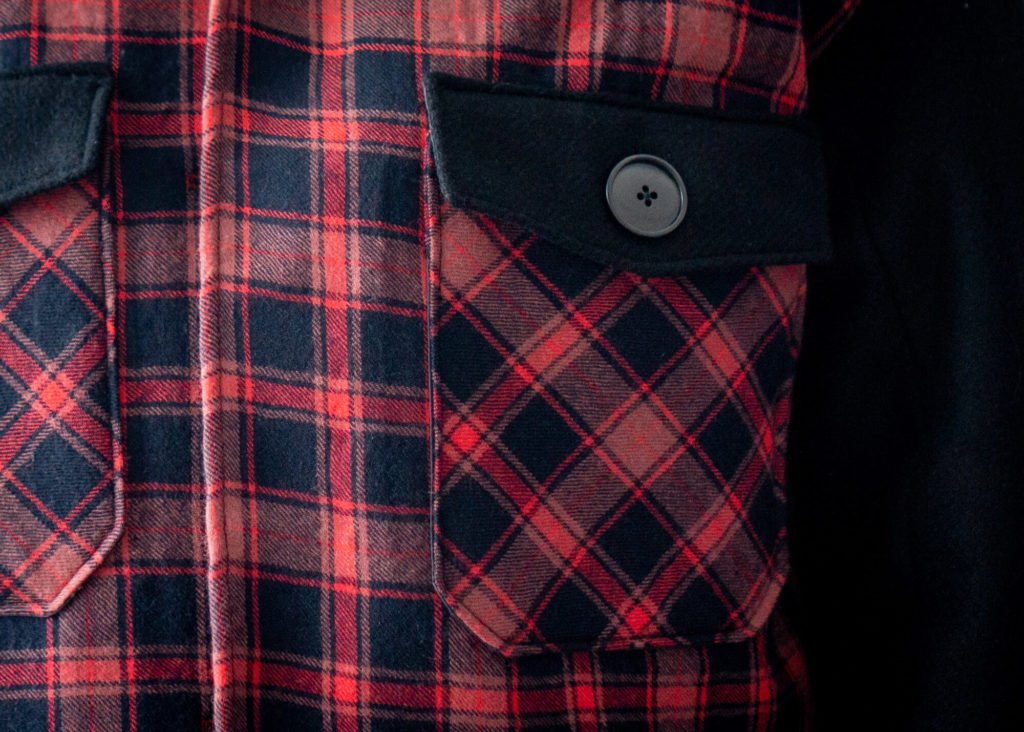
The patch pockets were cut on the bias because I didn’t have enough to match the pattern (and not to bother either). They are totally functional and lined in a very well drafted pattern.
And also, why put patch pocket if it’s to hide them in the pattern?
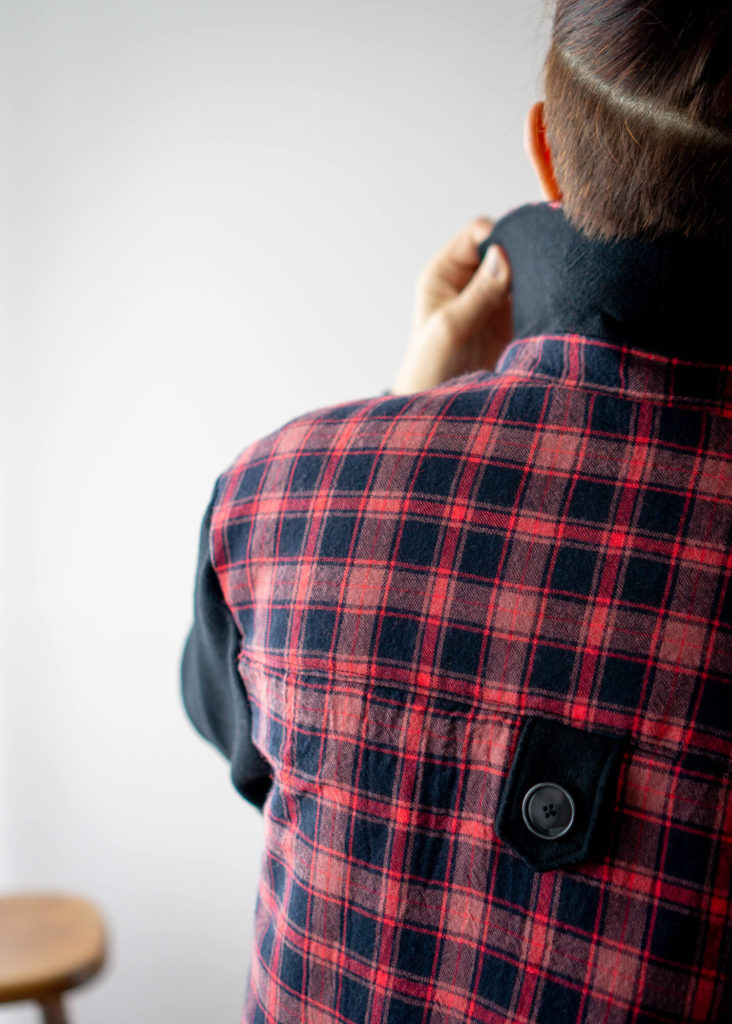
The pattern also includes some nice details with the little back tab and the tabs on the sleeves.
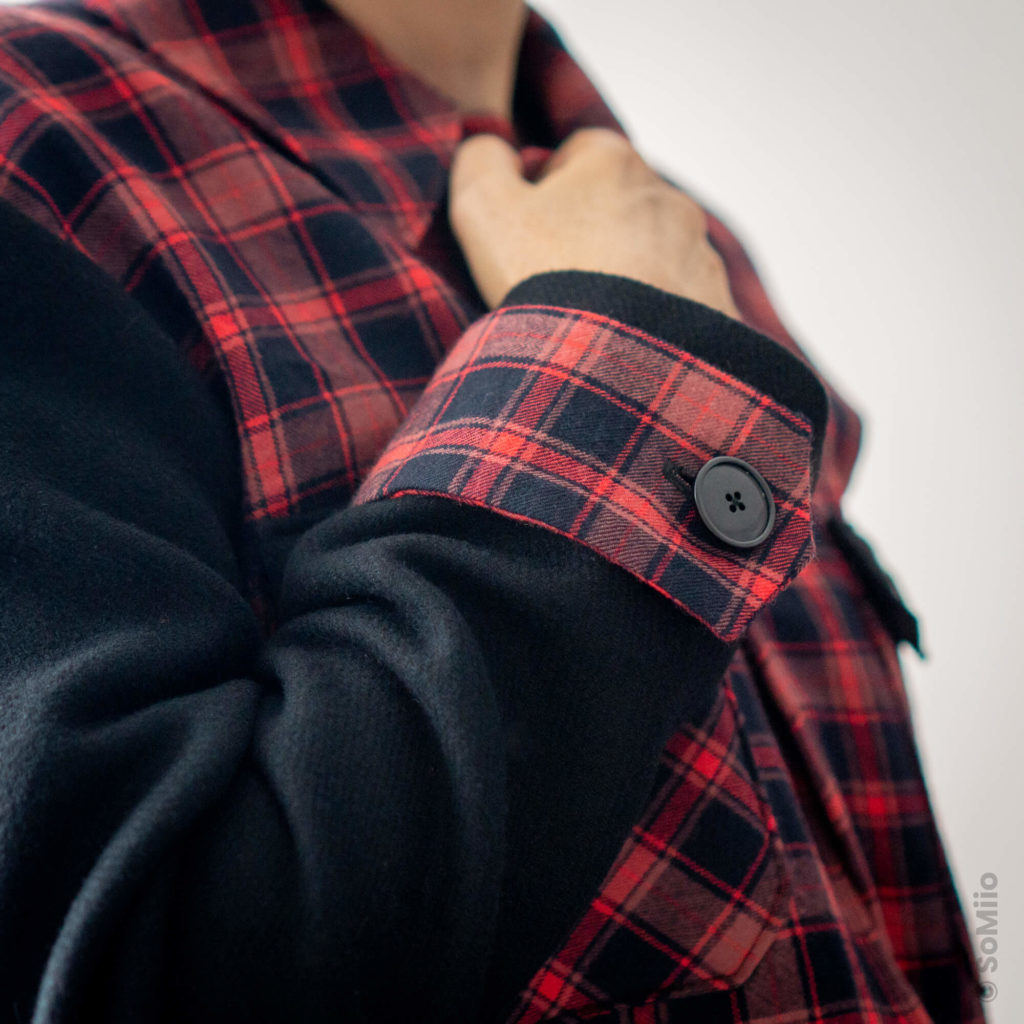
Finally, there is still the lining to attach, the hem and placket facings to catchstitch, the buttonholes to make and the buttons to sew.
The buttonholes aren’t that great, but they’re okay for the untrained eye.
I finished sewing the buttons directly at my sister’s house, and I even dipped into her stock since I needed 10 when I had 5…
And my niece got her Ingrid Shacket 1 week AFTER Christmas, just before the cold weather hit us.
Conclusion
In the end, having a deadline (even a missed one) motivated me to finish this challenge project as soon as possible. Even if I admit that I was a bit fed up at the end. Like the last month of a pregnancy: « Nah, it’s nice but I can’t wait for it to be over« .
But I’m proud of myself and the shacket.
And the recipient loves it, which is an important detail too 😉
I am very favorably impressed by the quality of Vikisews’ pattern: drafting & explanations really take us on the path to a high level of realization.
I had hesitated for a while with the Rya overshirt from Fibremood and I don’t regret my choice. The Fibremood pattern is not lined and I’m sure the pattern is not as thorough in its drafting and finishing explanations.
So there you go! Next week’s program: we continue on the Christmas gifts.
Save on Pinterest
{:}




20 commentaires
Bonjour,
D’abord merci pour vos articles toujours détaillés et drôles ! Ensuite, félicitations pour cette réalisation. C’est un travail très soigné qui a été fait, le résultat est superbe. Il y a une belle qualité de finitions , de raccords, de mix de tissus, c’est chouette! Enfin, je pense que votre nièce doit vraiment être heureuse et fière d’avoir une tante pareille, douée et branchée!
Merci Cyrielle ! Je suis contente si j’ai pu vous amuser un peu 🙂 Je ne sais pas pour vous mais j’ai tendance à être encore plus exigeante sur les cadeaux que sur les projets pour moi !
Je confirme que la destinataire ne quitte plus sa shacket, qui lui tient bien chaud, et qu’elle en a reçu des compliments.
Bravo et merci !
Oh cool si elle a reçu des compliments ! Avec les températures de ces derniers jours, je me félicite de m’être dépêchée.
Quelle magnifique réalisation ! La demoiselle peut être fière que tu aies fait tout ce travail pour elle. Elle a un manteau unique que ses copines vont lui envier
Apparemment, elle en a reçu des compliments !
Un boulot de dingue mais un résultat à la hauteur des attentes!! J’adore ce manteau très original et le détail des manches!!! Bravo comme toujours pour cette superbe pièce qui en plus, cerise sur le gâteau, plait à la loupiote!! Je compatis aux différents aléas, je suis aussi en train de coudre un manteau et je m’y retrouve un peu, même si mon patron n’est pas en russe!!
Ah ah ! Oui mais en même temps, on est d’accord que je me suis auto-mise des bâtons dans les roues ! Je suis encore sur un manteau là… mais ce sont les explications qui sont un peu télégraphiques.
Travail magnifique et résultat magnifique ! Un boulot incroyable. Et les contraintes comme booster, ça marche : elle est plus belle avec ses manches noires qui mettent en relief les détails soignés. C’est bon à savoir que Wikisew explique bien, ils ont des modèles vraiment beaux et plus originaux que les créatrices françaises bien souvent trop plan-plan.
Oui, je suis d’accord. Au final, je pense que les manches noires viennent relever ce manteau qui aurait été moins sympa tout en carreaux rouges.
Bonne rigolade en lisant tes aventures sur cette réalisation. Très jolie veste
Parfois, je ne m’aide pas quand même XD
Que de travail, mais franchement c’est très très réussi et comme la destinataire est conquise youpi. Bravo
Merci Mayana ! Oui, le principal c’est l’objectif atteint 😉
https://www.onlinedoctranslator.com/fr/ je traduis tout avec il faut très souvent découper son PDF en plusieurs parties mais tu gardes 95 % de la mise en forme du documents burda russe quand c’était possible fonctionne très bien avec ^_^
j’adore ce manteau je suis fan des carreaux et le bi couleurs lui va a merveille ta nièce a bien de la chance
Cool ! Merci pour le lien. J’en aurai peut-être besoin pour un autre patron dans quelques temps 😉
Chapeau ! J’adore ce manteau chemise ! Quel boulot ! On voit bien que tu y as mis tout ton cœur et tu as même appris le russe par la même occasion. Tu n’as pas fini de nous étonner. Un grand bravo Solène.
J’y ai mis tout mon amour !
wahou !!! bravo, quel travail superbe. Je trouve que vous avez fait un modèle jeune, sympa et tout ça en quelques semaines. C’est fort !
Merci ! Heureusement que j’avais des vacances pour y passer mes journées quand même !