{:fr}
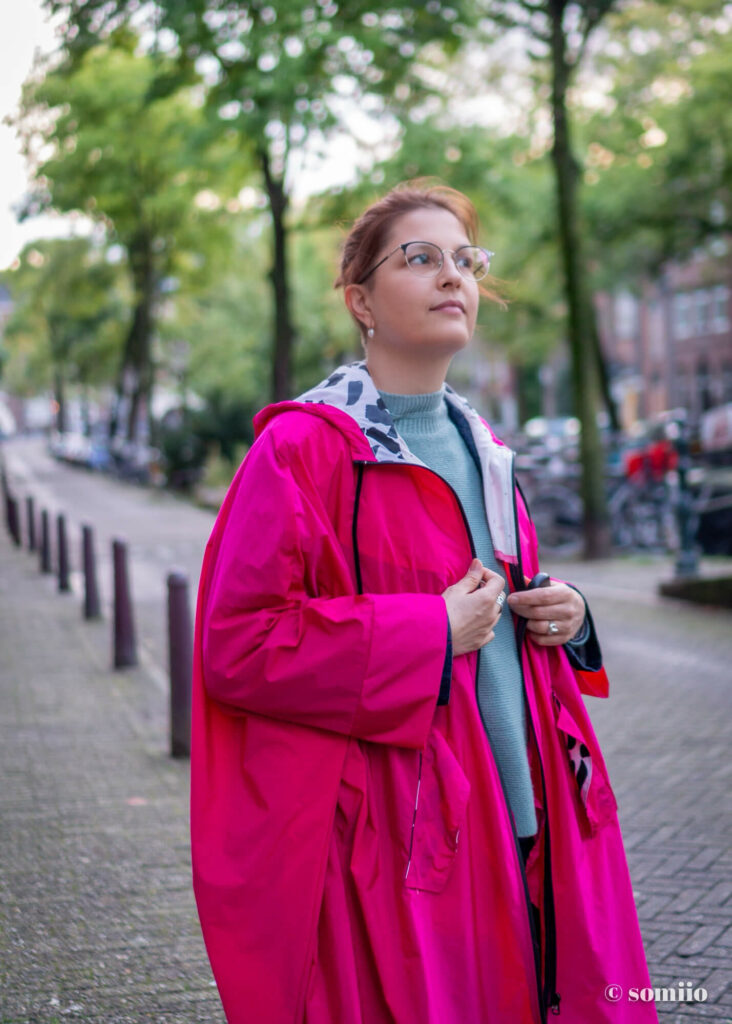
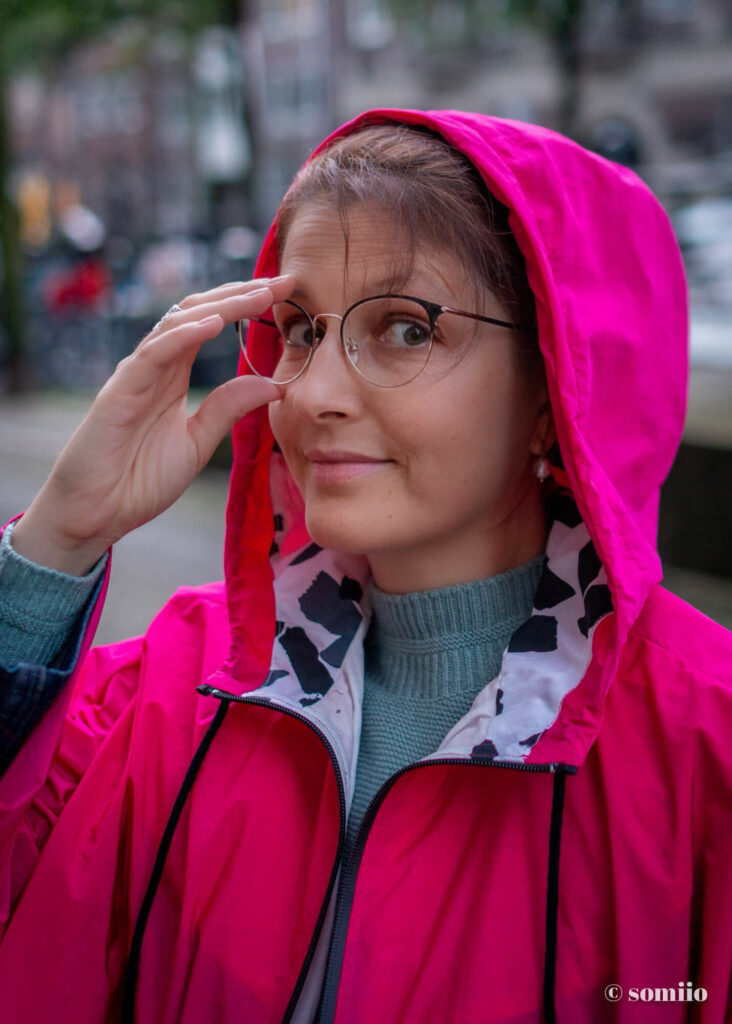
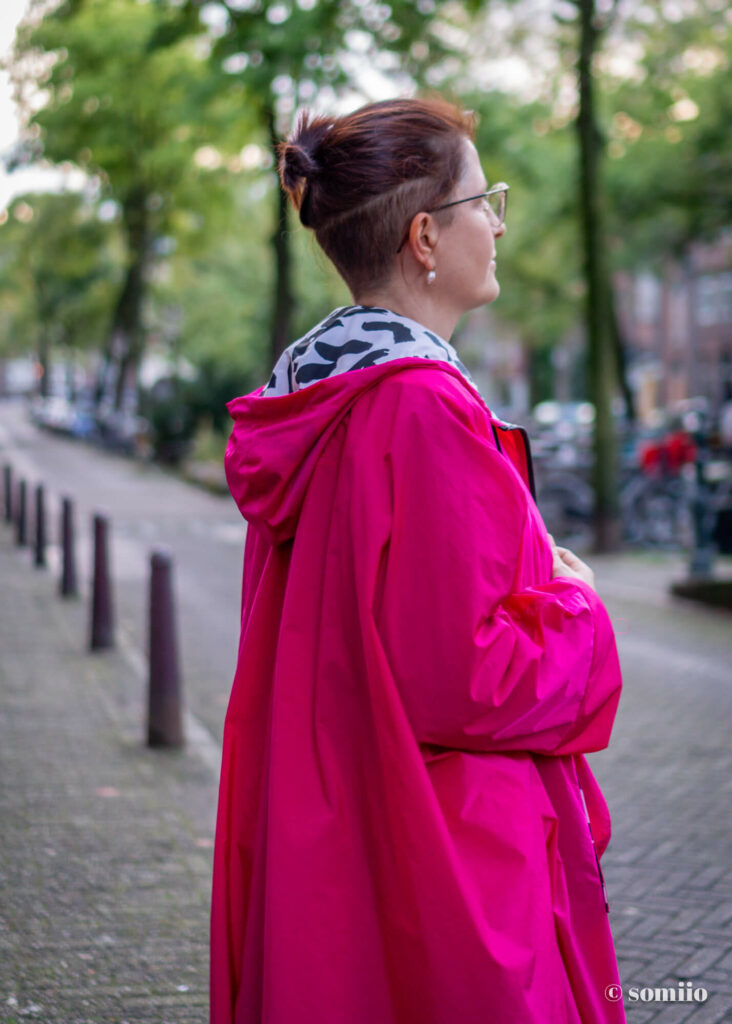
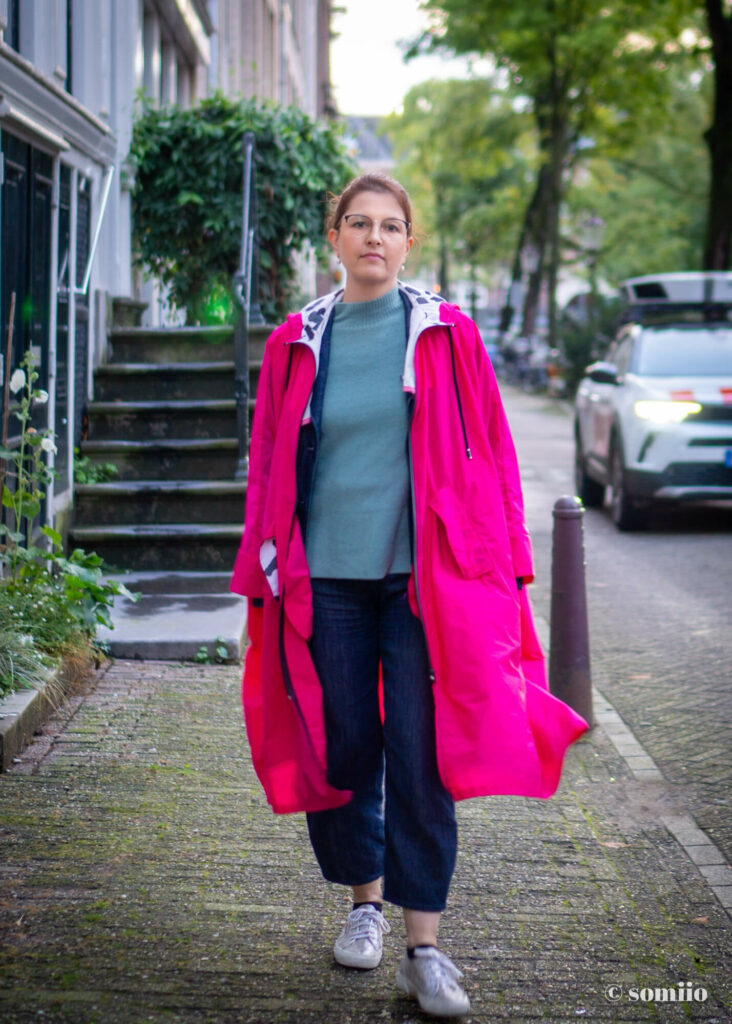
Je pourrais prétendre que cet imperméable 109 Burda 11/22 rose a été cousu pour Octobre Rose. Parce qu’il est vraiment très très rose quand même. Et vous n’y auriez vu que du feu. Ha ! Mais que voulez-vous, je suis trop honnête pour ça.
En réalité, j’ai imaginé cet imper au printemps dernier et je l’ai cousu pendant notre mois d’août pluvieux où je n’avais rien de léger mais imperméable à porter pour faire face aux averses. Bon, vu que je ne l’ai terminée qu’en septembre pour mes vacances, elle ne m’a pas vraiment aidée. C’est l’impulsion qui compte on va dire.
Une cousette d’été typique donc ! Je suis décidément parfaitement synchronisée avec les saisons. Vous en verrez d’ailleurs la confirmation dans les semaines qui viennent.
| ITEM | BOUTIQUE | QUANTITÉ | PRIX |
| Patron de l’imperméable Burda | Burda | 1 | 7,90 € |
| Taffetas imperméable fuchsia | Tissus du Renard | 3 m | 11,85 € |
| Popeline Katia (chutes) | Stock | 0,50 m | 0 € |
| Zip imperméable | ? | 0,90 m | ? |
| Œillets noirs (x 20) | Snaply | 2 | 2,49 € |
| Cordon à embouts | Snaply | 1 | 2,90 € |
| Fil (cadeau) | Elastic & Co | 1 | 0 € |
| Total | 25,14 € |
Le patron de l’imperméable 109 Burda 11/22
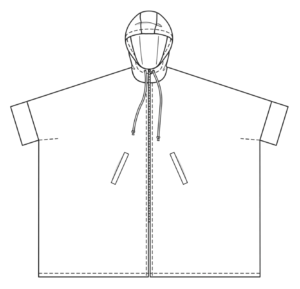
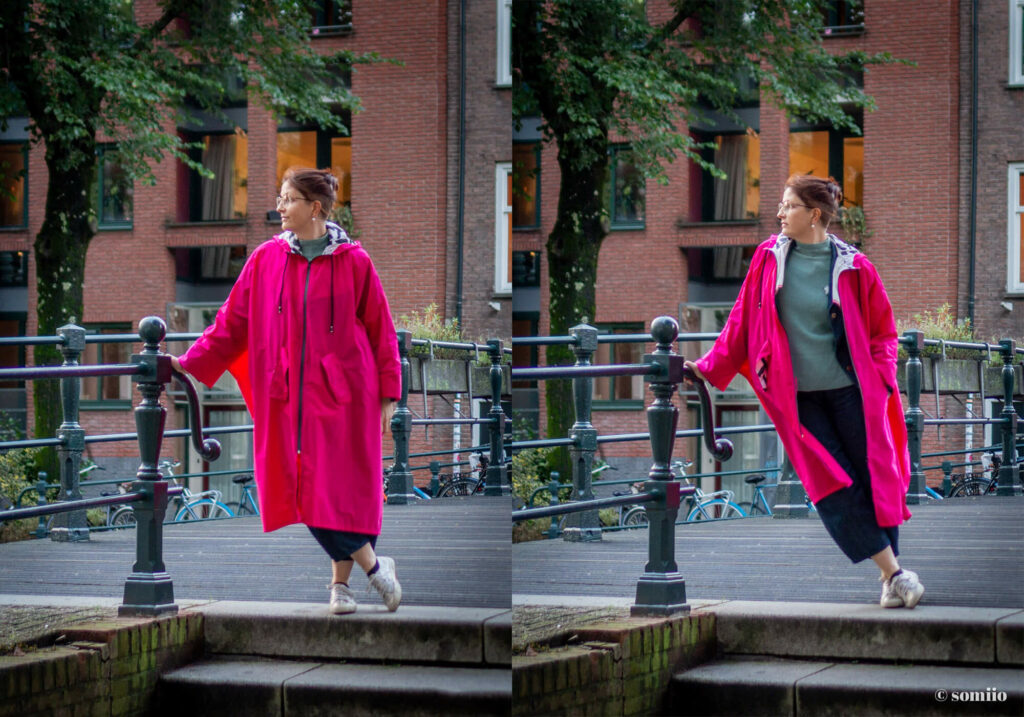
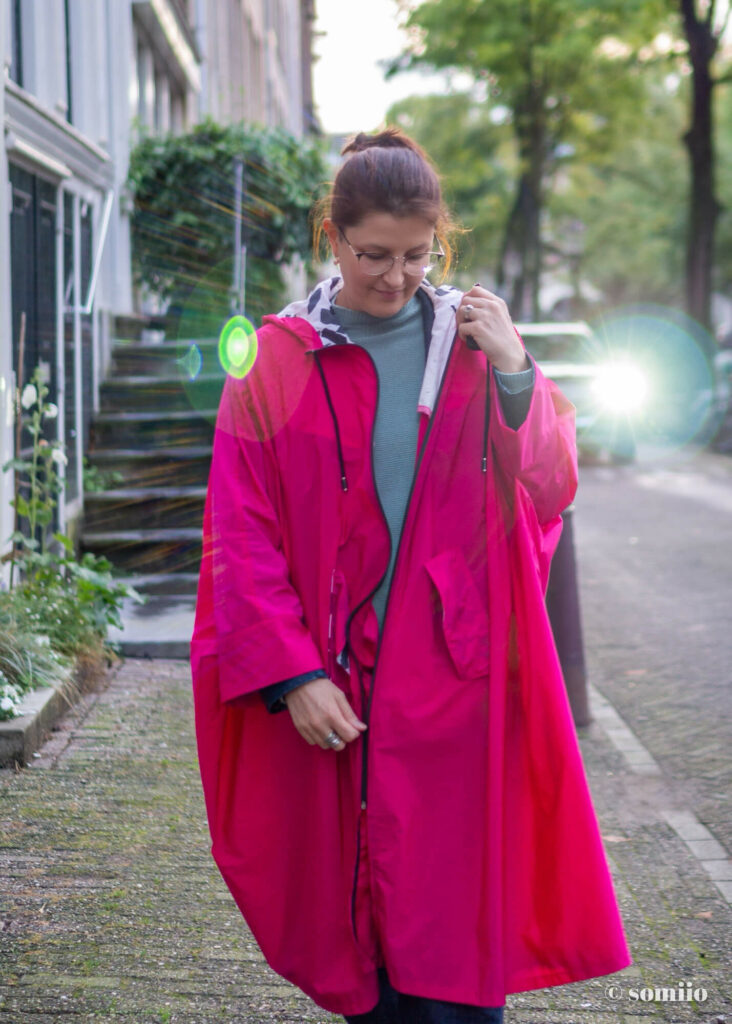
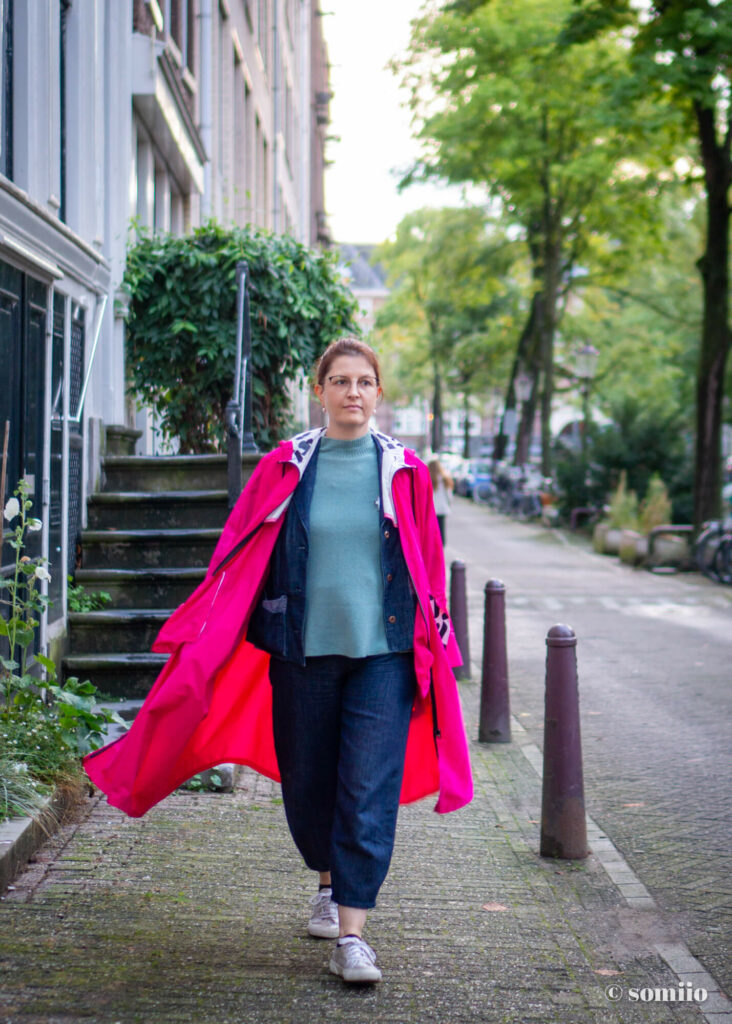
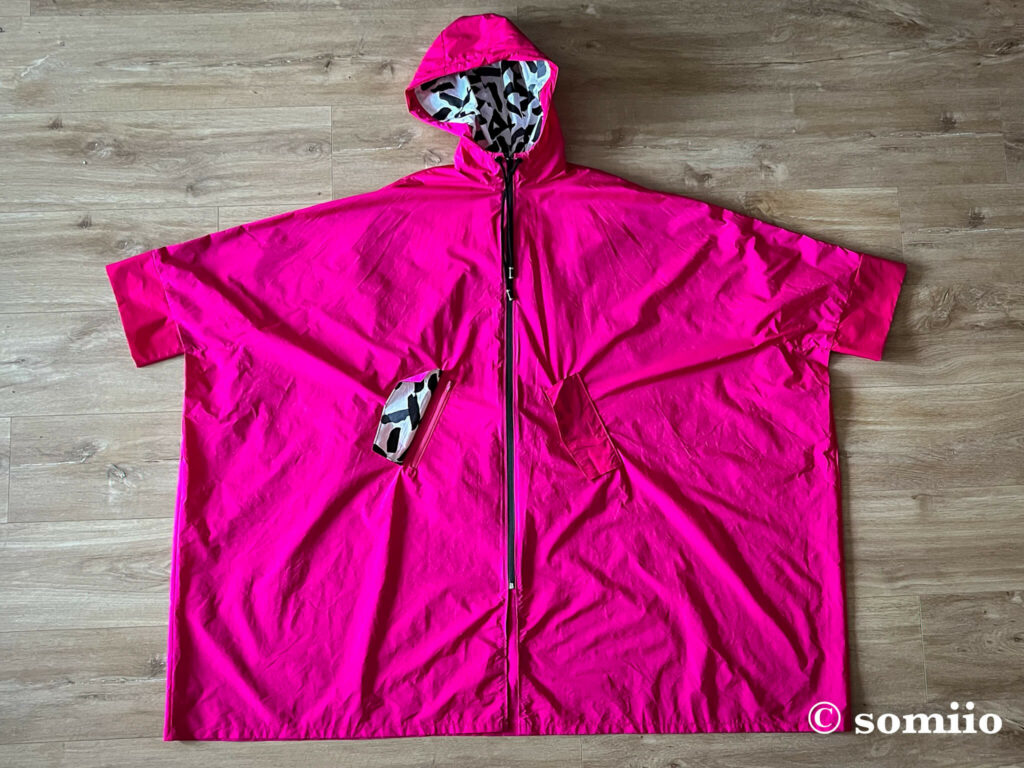
La « cape en polyester fonctionnel n°109 | Burda Style 11/22 », telle que l’appelle Burda, est un patron d’imperméable super ample, quasi rectangulaire avec une capuche en 3 parties et des poches passepoilées.
Commencé en août, je l’ai terminé un peu en catastrophe à la veille de mon départ à Amsterdam pour cause de réalisation reloue. Car qui part à Amsterdam sans imperméable ? (Pas moi.)
À part le patronage de base qui est intéressant, je n’ai pas grand chose de positif à dire sur ce patron d’imperméable 109 du Burda 11/22, ni de ses explications d’ailleurs.
M’enfin, ça, ça n’étonnera pas grand monde.
Quand on coud un imperméable, on coud avec du tissu imperméable (CQFD)… souvent du synthétique enduit qui se repasse mal, si tant est même qu’il puisse passer sous le fer à repasser tout court.
Et donc, quand je vois les poches passepoilées prévues au programme, je me demande sérieusement s’iels n’ont pas fumé la moquette chez Burda (ou autre chose pour rester dans le thème néerlandais).
Outre ces poches particulièrement complexes à réaliser dans ce genre d’étoffe, le patron et les explications ne prévoient absolument rien pour finir proprement les coutures ou le haut du zip.
Les explications sont même particulièrement nulles avec des propositions de rabattre le tissu sur le zip avec des points à la main.
Des points à la main sur du tissu imperméable et un zip enduit. Mais bien sûr Aenne*.
Bref, le patron est prévu comme si on comptait le coudre en gabardine de coton. Et non comme un vêtement de pluie.
Un vêtement technique avec ses techniques spécifiques, et la prise en compte des matériaux spécifiques.
Coudre l’imperméable 109 du Burda 11/22
Du coup, j’ai forcément fait quelques modifications dans la couture de mon imperméable 109 du Burda 11/22 pour le rendre 1. réalisable et 2. mieux fini.
Première petite modification : le dos coupé au pli plutôt que devoir faire une couture d’assemblage, des surpiqûres ET des finitions intérieures.
Pour les coutures d’épaule, je suis partie sur des coutures anglaises.
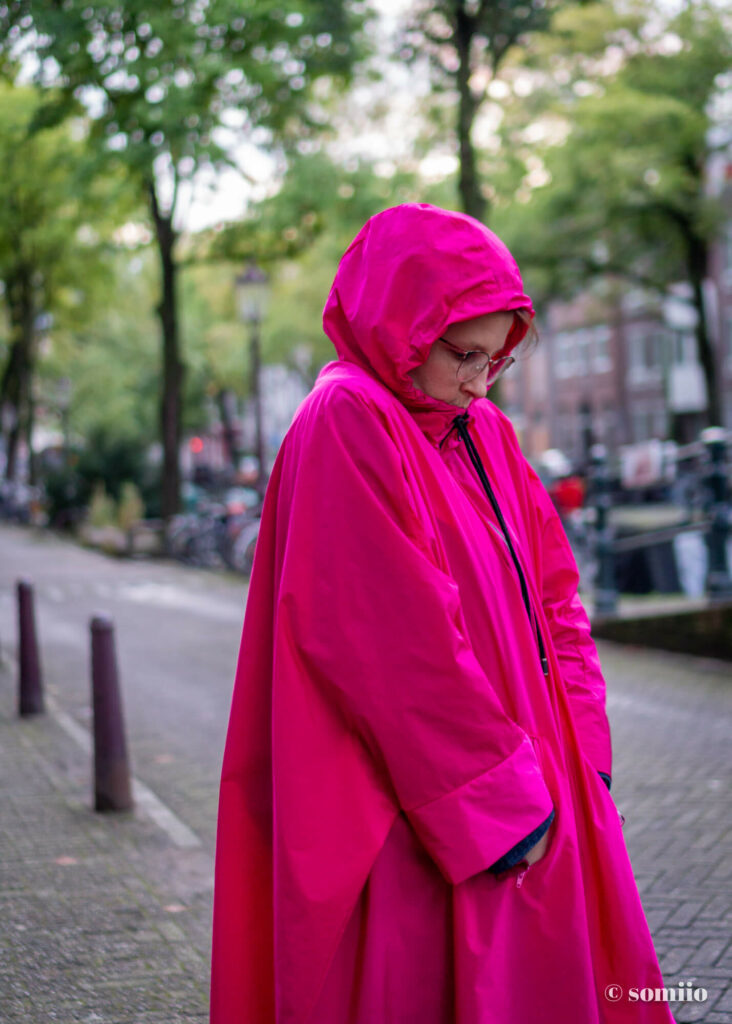
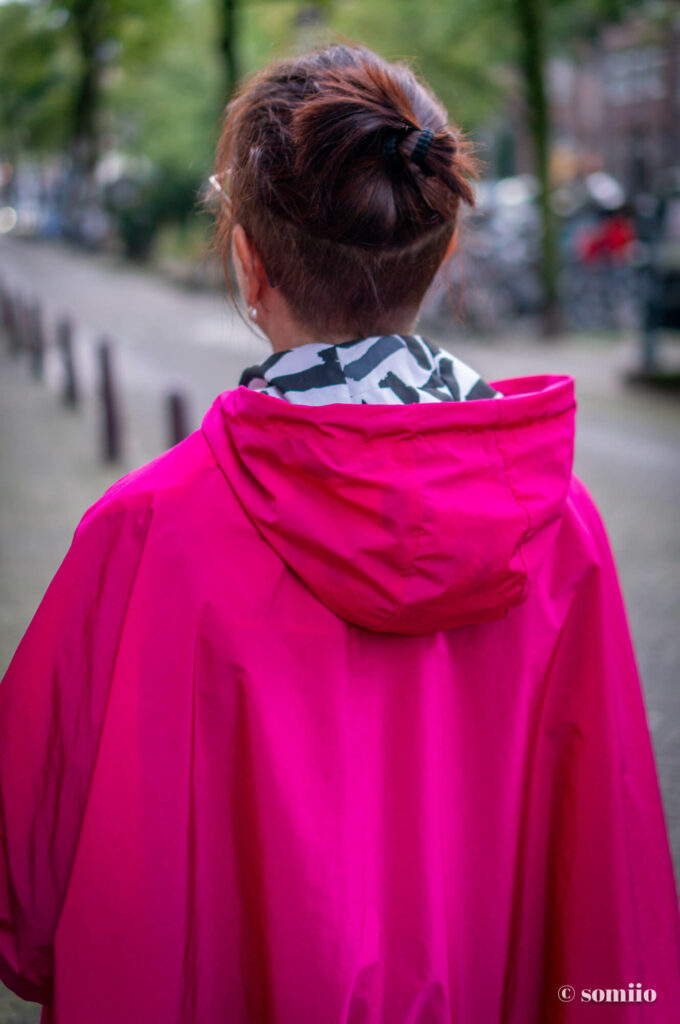
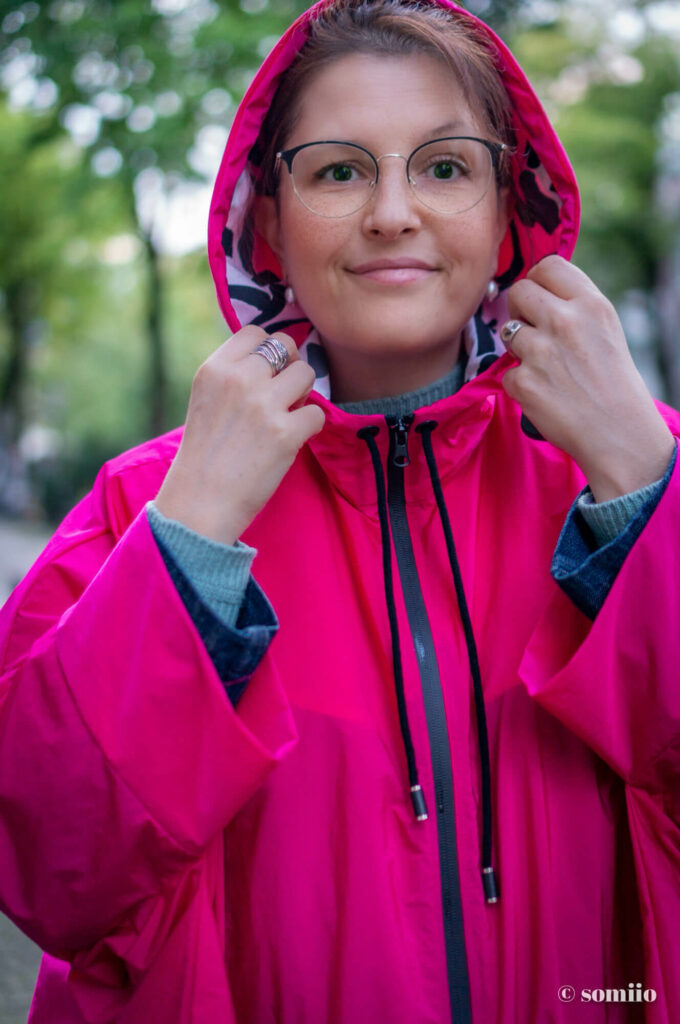
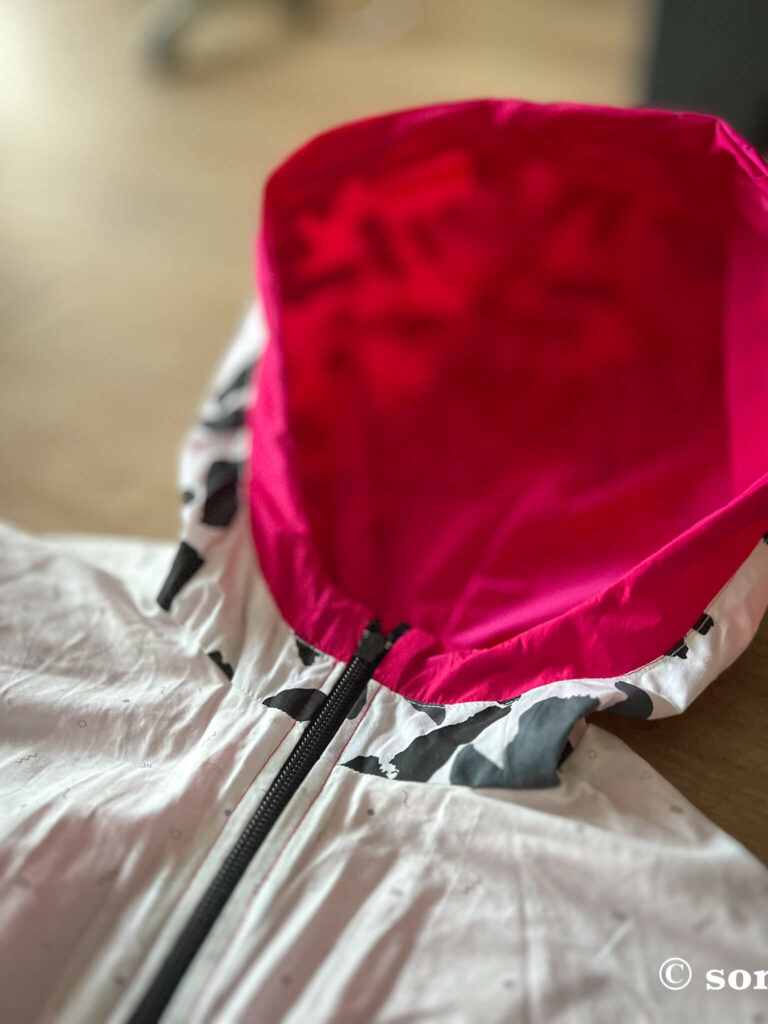
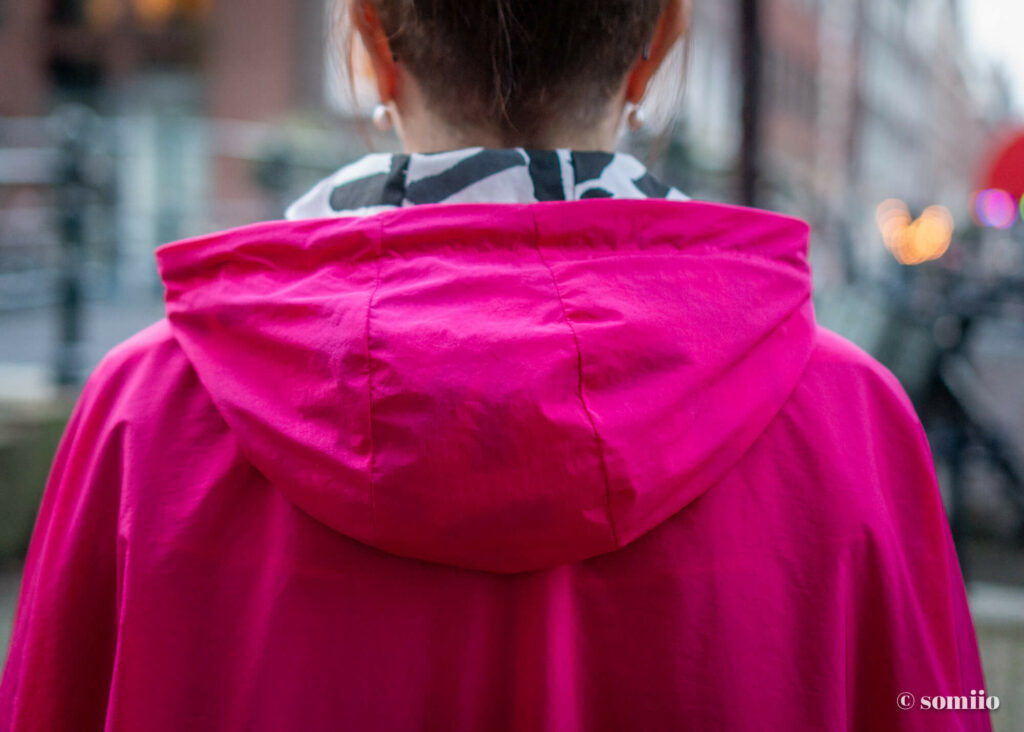
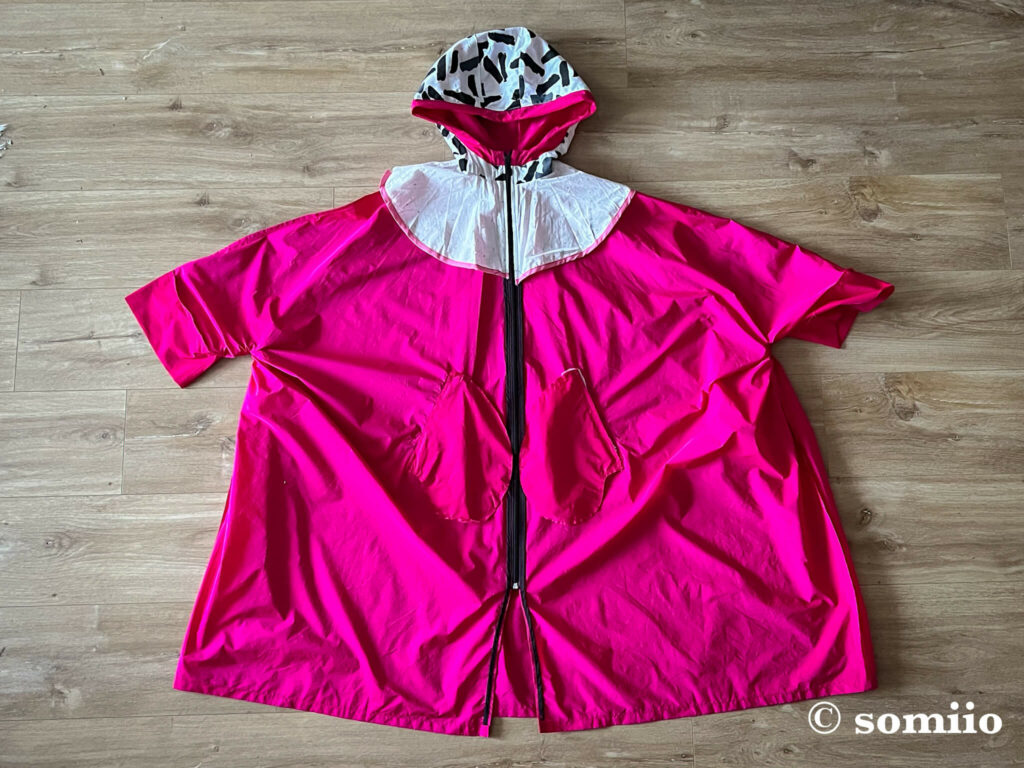
Ensuite, j’ai doublé la capuche, en créant les pièces de patron pour compléter la parementure prévue.
Et quand je vois à quel point l’intérieur de la capuche se voit, je suis bien contente de mon idée.
Bonus : c’est beaucoup confortable à porter en plus !
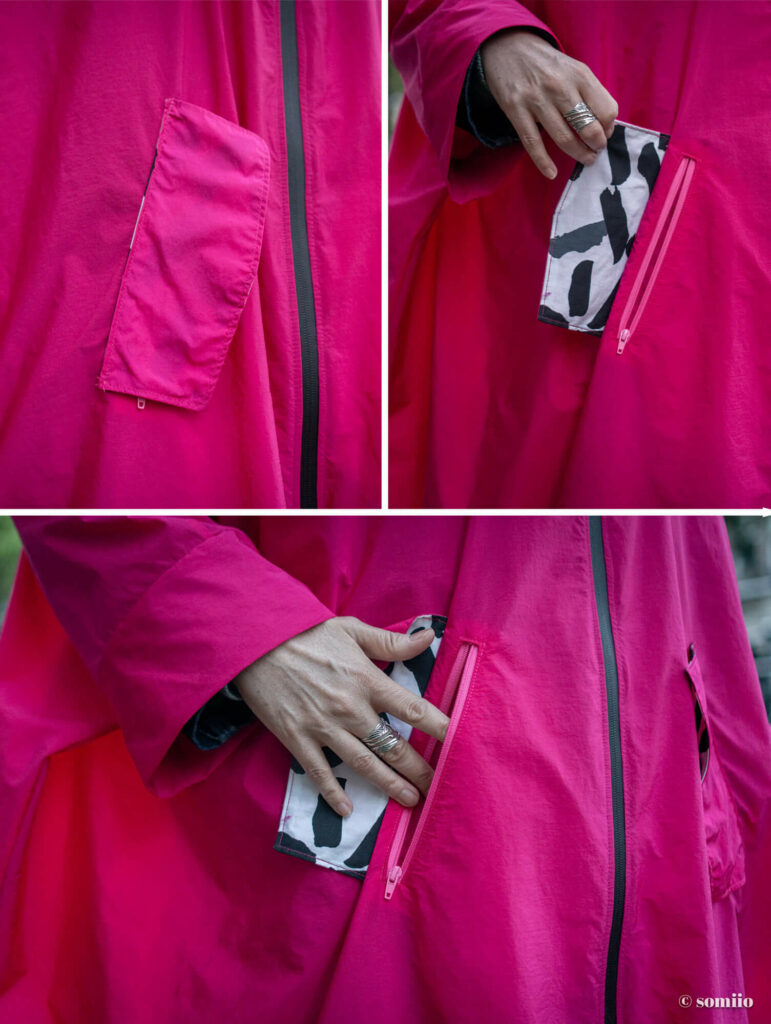
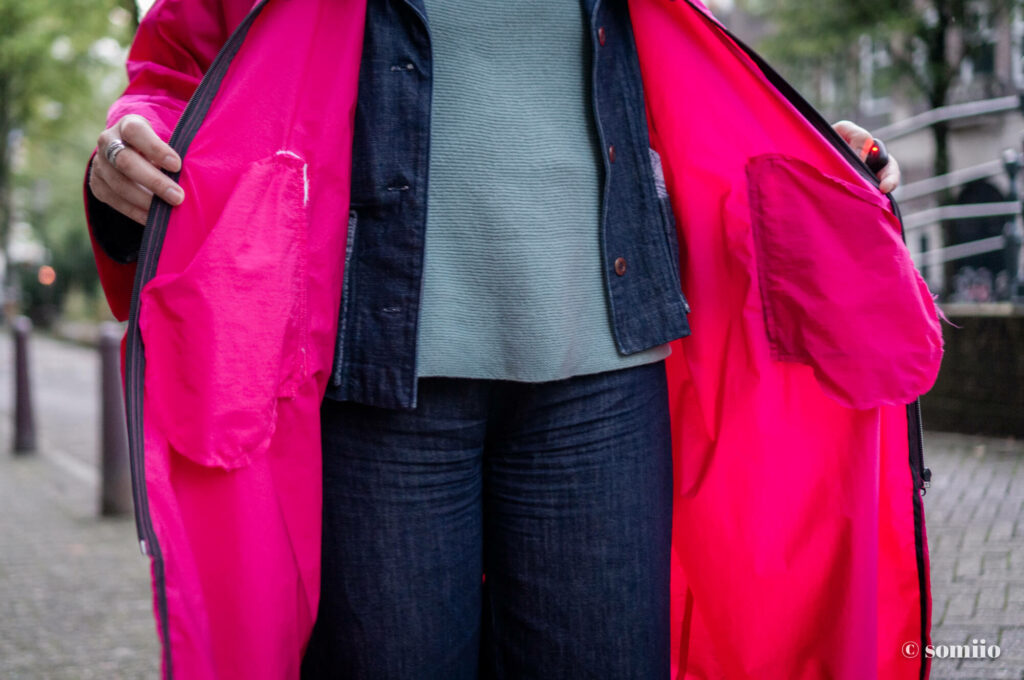
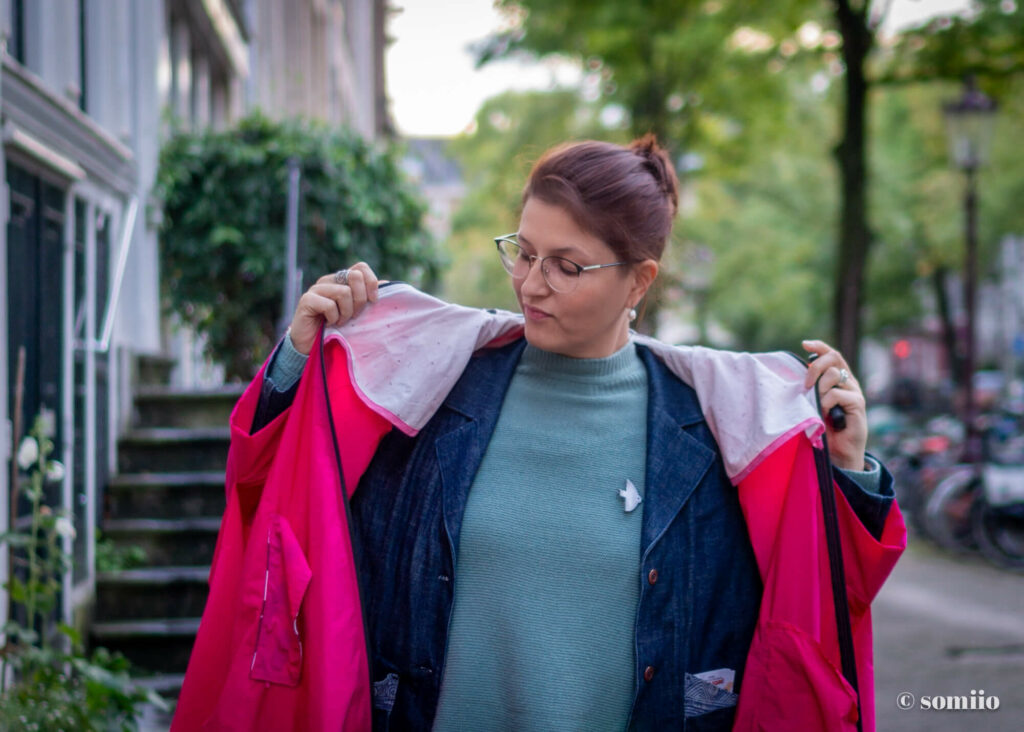
Troisième modification : les poches bien sûr. Je les ai remplacées par des poches zippées avec un rabat.
Le zip permet de sécuriser les trucs que je pourrais mettre dans ces poches. Les rabats, pour pas trop qu’on voit si je me foirais dans ma réalisation.
Au final, après avoir bien bien galéré sur les surpiqûres (non sérieusement, j’ai fini les points de début et fin à la main), j’ai réussi un truc pas trop moche vu de l’extérieur.
Mais je peux vous dire que j’ai testé un peu toutes les aiguilles possibles : universelles 70, universelles 80, microtex, spécial soie, etc. En fonction du nombre d’épaisseurs, les points se formaient ou pas. L’enfer.
Au porté, je trouve les poches sont trop près du centre à mon goût. Quand on met les mains dedans, elles sont posées sur le ventre façon kangourou… un peu chelou.
Elles sont même limite limite de dépasser.
Pour les maintenir, j’ai d’ailleurs fait un petit point en catastrophe.
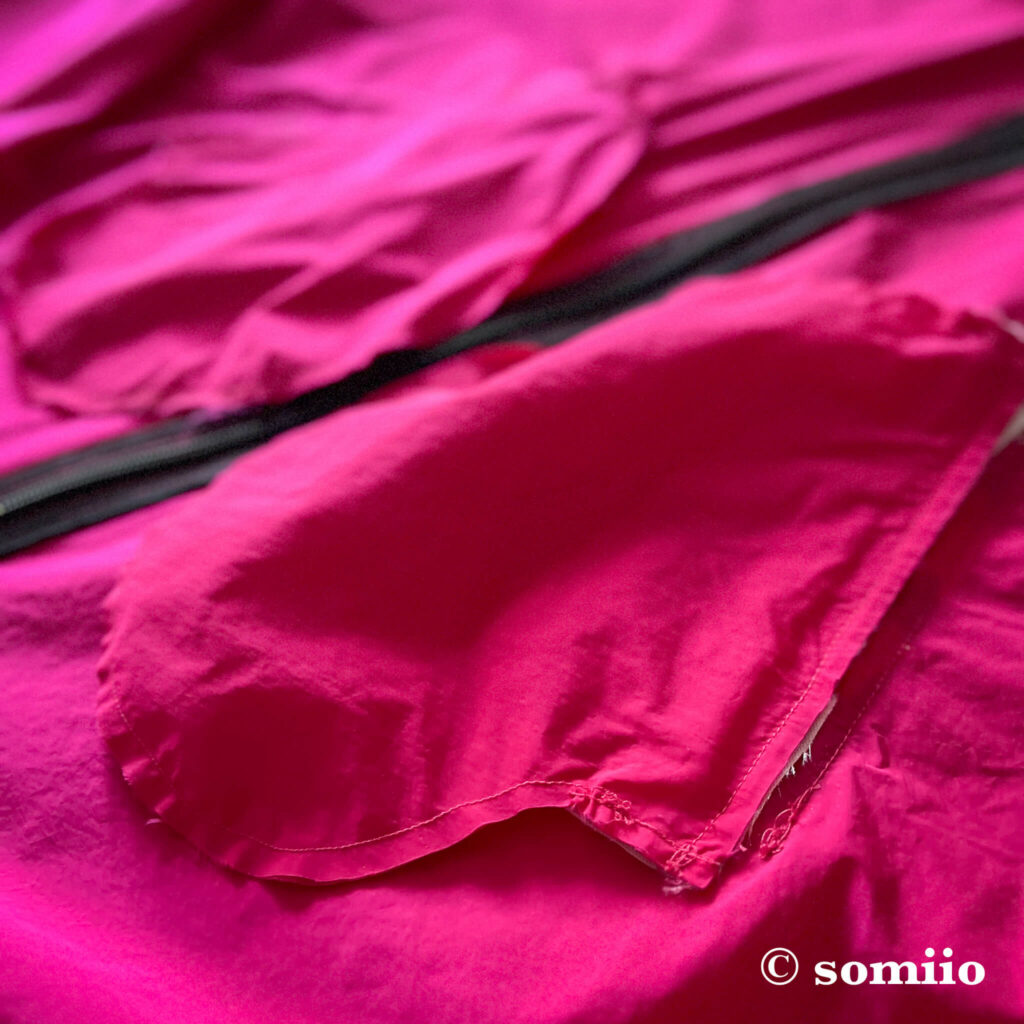
Par manque de temps, je n’ai pas fait de finitions sur les poches.
Je pense qu’il faut que je trouve le courage de les reprendre un peu :
- les raboter pour qu’elles dépassent moins,
- finir les bords bruts avec un biais
- et poser une pression sur les rabats pour les maintenir en place.
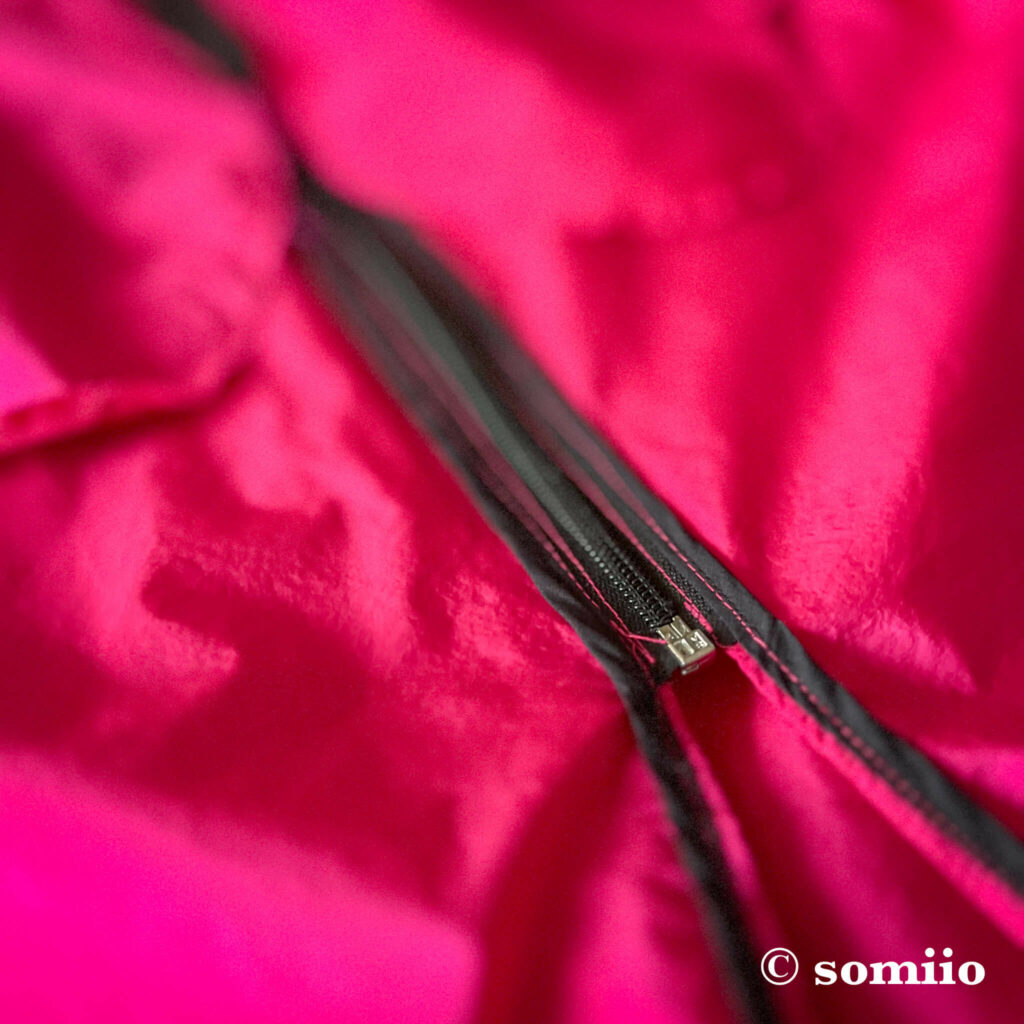
L’insertion du zip aussi m’a valu quelques sueurs froides. C’est d’ailleurs à cause de la première pose pourrie sous tous ses aspects que j’ai mis le projet de côté.
Quand je l’ai repris, j’ai tout décousu et recommencé à ma façon.
En haut, le zip a été pris en sandwich entre l’extérieur et la doublure de la capuche puis la parementure.
Ensuite, j’ai fini le bord du zip et le bas de la cape 109 du Burda 11/22 au biais avant de réaliser les surpiqûres de chaque côté.
Oui, encore des surpiqûres x_x… quoique avec le biais dessous, ça se passait légèrement mieux.
Et le biais m’a aussi permise de finir proprement et confortablement le haut du zip (que les instructions m’avaient conseillé de couper… instruction qui gagne le Prix de l’Instruction de Couture la Plus Débile de l’année 2023).
Sinon, j’étais assez inquiète de l’insertion des œillets dans ce tissu. Bien entendu, aucune suggestion de Burda à ce sujet.
J’ai testé du thermocollant mais il ne restait pas collé longtemps.
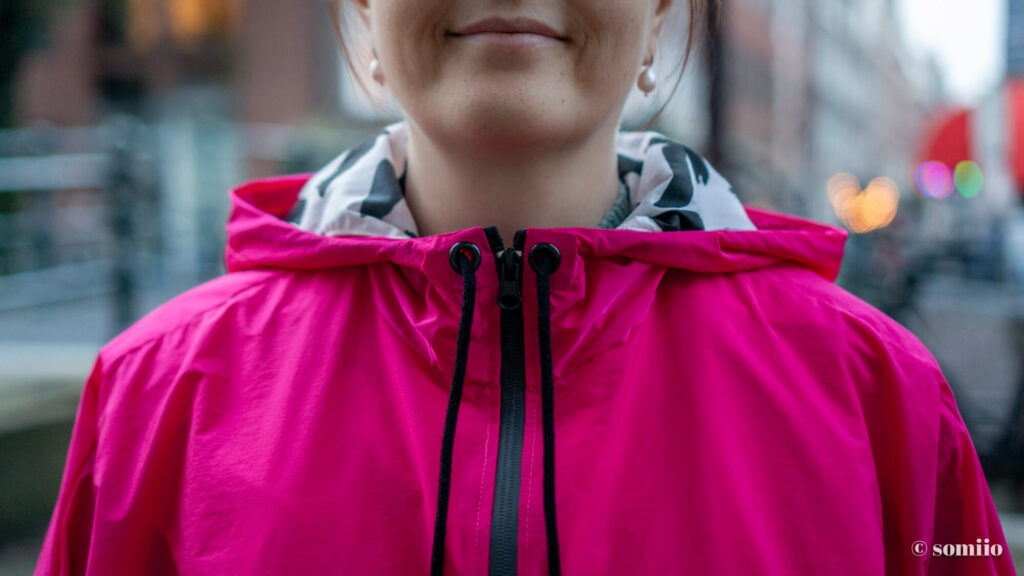
Heureusement, j’ai commandé le cordon à embout chez Snaply. Dans la commande ont été inclus ces renforts pour œillet Ironly qui, eux, tiennent vraiment bien du premier coup. Normalement, ils sont prévus pour être positionnés à l’extérieur mais ce n’était une option dans ce projet.
Les renforts sont donc placés à l’intérieur et font parfaitement le job ! Bravo Snaply (et merci ! Non, je ne suis pas rémunérée ni rien)
Après avoir consulté des photos de réalisation de cette cape 109 du Burda 11/22 sur le site russe de Burda, j’ai eu l’idée de cette large parementure pour enclore la couture de la capuche.
Elle a bien fonctionné pour enclore le zip et la couture. Cependant, au porté, elle tend à ressortir dans un petit bourrelet disgracieux qui m’agace passablement. Alors même que je l’ai fixé par un point aux épaules pour qu’elle ne bouge pas d’un fil. #fail
Il faudra que je trouve comment résoudre ce problème… avec des pinces pour réduire le volume en bas ?
Enfin, mon dernier agacement est venu de l’ourlet.
J’ai réussi un rempli… mais le deuxième n’a jamais voulu passer. Dès que je tentais de faire la transition entre le premier centimètre (où l’ourlet du milieu devant crée quelques épaisseurs) et le reste de l’ourlet, les points partaient en couille.
J’ai fini par lâcher l’affaire… j’avais d’autres projet couture à réaliser en urgence avant le départ.
Conclusion
PLUS JAMAIS JE NE COUDRAI D’ORGANZA SYNTHÉTIQUE IMPERMÉABLE ! Bordel.
Non, franchement, c’était pénible du début à la fin.
Sinon, ce type de cape est bien pratique. Ça se met au-dessus de n’importe quelle tenue. Ça prend peu de place. Ça met un sérieux défi à n’importe quel pickpocket (je porte mon sac dessous – #boncourage). Je pense qu’on doit aussi pouvoir l’utiliser pour faire du vélo.
Depuis mon retour en France, nous avons à nouveau une météo super chaude et étrange pour un mois d’octobre (au secours le réchauffement climatique !). Je ne l’ai donc pas reporté. D’autant que ses défauts me chiffonnent et m’empêchent de vraiment l’aimer sans retenue.
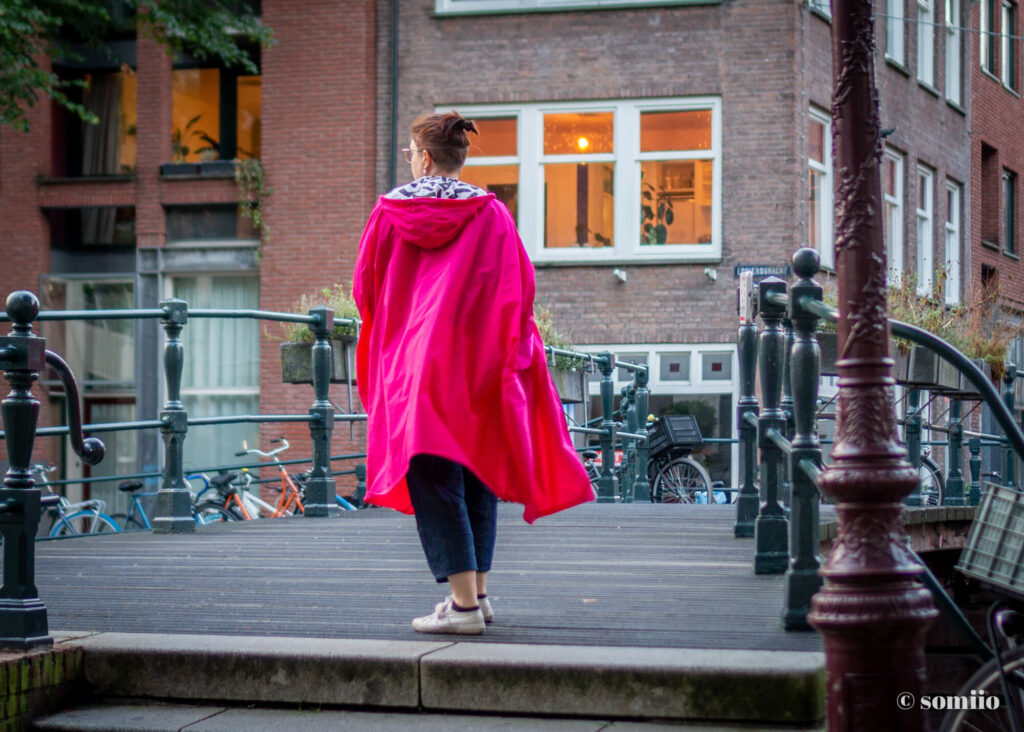
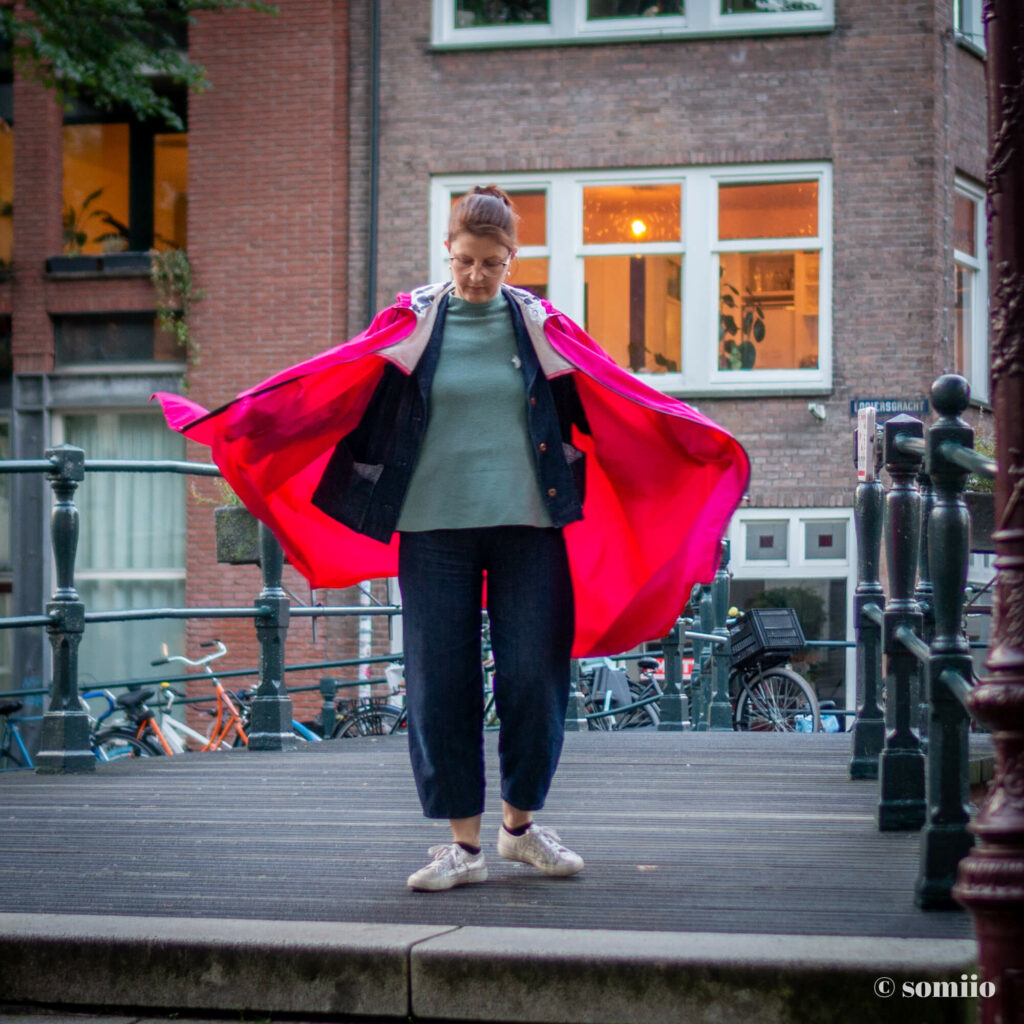
Et c’est dommage car je trouve son effet flottant et froufroutant très fun. Et rose ! Une touche de bonne humeur sous la pluie.
Parlant de rose, on se reparle deux secondes d’Octobre Rose : pensez à vous palper les seins, à les manipuler régulièrement. C’est pas comme si c’était franchement désagréable en plus 😉
Voilà pour ce retour au blog ! J’espère que vous ne m’en voudrez pas d’avoir râlé comme une voleuse tout du long. Normalement, ça ne sera pas le cas pour les prochains articles ;p
XOXO
{:}{:gb}
I could pretend that this 109 Burda 11/22 pink waterproof cape was sewn for Pink October (a French event against breast cancer). Because, well, it’s undeniably very, very pink. And you wouldn’t have known any different. Ha! But, you see, I’m too honest for that.
In fact, I thought up this mackintosh last spring and sewed it during our rainy August and sewed it during our rainy August when I had nothing lightweight yet waterproof to wear to face the showers. Well, since I only finished it in September for my vacation, it didn’t really help. It’s the thought that counts, I suppose.
So, a typical summer sewing project! I seem to be perfectly synchronized with the seasons. You’ll see more evidence of that in the coming weeks.
| ITEM | BOUTIQUE | QUANTITÉ | PRIX |
| Patron de l’imperméable Burda | Burda | 1 | 7,90 € |
| Fuchsia Waterproof Taffeta | Tissus du Renard | 3 m | 11,85 € |
| Katia Poplin (chutes) | Stock | 0,50 m | 0 € |
| Waterproof Zipper | ? | 0,90 m | ? |
| Black Eyelets (x 20) | Snaply | 2 | 2,49 € |
| Cord with End Caps Snaply | Snaply | 1 | 2,90 € |
| Thread (cadeau) | Elastic & Co | 1 | 0 € |
| Total | 25,14 € |
Burda 11/22 waterproof cape pattern 109
The « functional polyester cape No. 109 | Burda Style 11/22, » as Burda calls it, is an extra-roomy, almost rectangular waterproof cape pattern with a three-part hood and welt pockets.
I started it in August and finished it in a bit of a rush on the eve of my departure to Amsterdam due to a challenging project. After all, who goes to Amsterdam without a raincoat? (Not me.)
Apart from the interesting basic pattern, I don’t have much positive to say about this Burda 11/22 waterproof cape 109 pattern, nor its instructions, for that matter.
But, well, that shouldn’t surprise anyone.
When you sew a raincoat, you use waterproof fabric (QED)… often, it’s waterproof synthetic fabric that doesn’t press well, assuming it can even be ironed at all.
So when I see welt pockets in the instructions, I seriously wonder if they were smoking something at Burda (or something else to stay in the Dutch theme).
Besides being particularly challenging to make in this type of fabric, the pattern and instructions don’t provide anything to finish the seams or the top of the zipper properly.
The instructions are particularly lousy, suggesting folding the fabric over the zipper with hand stitches.
Hand stitches on waterproof fabric and a coated zipper. Of course, Aenne*.
Anyway, the pattern is designed as if you were going to sew it in cotton gabardine, not in waterproof synthetic fabric.
Rainwear is a technical garment with its specific techniques and the consideration of specific materials.
Sewing the waterproof cape 109 from Burda 11/22
So, I had to make some modifications to the sewing of my waterproof cape 109 from Burda 11/22 to make it 1. feasible and 2. better finished.
The first small modification: cutting the back on the fold rather than having to make a seam, topstitching, AND inner finishes.
For shoulder seams, I went with French seams.
Next, I lined the hood, creating pattern pieces to complete the intended facing.
And when I see how visible the inside of the hood is, I’m glad I did.
Bonus: it’s much more comfortable to wear too.
Third modification: the pockets, of course. I replaced them with zippered pockets with flaps.
The zipper secures the things I might put in these pockets. The flaps are there so that you don’t see if I mess up the sewing.
In the end, after struggling quite a bit with the topstitching (seriously, I hand-stitched the beginning and end stitches), I managed to make something not too ugly from the outside.
But I can tell you I tested all sorts of needles: universal 70, universal 80, microtex, silk special, etc. Depending on the number of layers, the stitches either formed or not. It was a nightmare.
On the wearing front, I find the pockets are too close to the center for my liking. When you put your hands in them, they sit on your belly like a kangaroo… a bit strange.
They are even close to sticking out.
To keep them in place, I did a little emergency stitching.
Due to a lack of time, I didn’t finish the pockets.
I think I need to find the courage to work on them a bit:
- Trim them so they protrude less.
- Finish the raw edges with bias tape.
- Attach a snap on the flaps to keep them in place.
Inserting the zipper also gave me some cold sweats. It was the disastrous first attempt, in particular, that made me put the project aside.
When I came back to it, I unpicked everything and started over my way.
At the top, the zipper was sandwiched between the outer fabric and the hood lining and the facing.
Then I finished the zipper edge and the bottom of waterproof cape 109 from Burda 11/22 with bias tape before making topstitching on each side.
Yes, more topstitching… although with bias tape underneath, it went slightly better.
And the bias tape also allowed me to finish the top of the zipper cleanly and comfortably (which the instructions suggested I should cut… instruction that wins the award for the Dumbest Sewing Instruction of 2023).
Otherwise, I was quite worried about inserting the eyelets into this fabric. Of course, there was no suggestion from Burda about this.
I tried some fusible interfacing, but it didn’t stay stuck for long.
Fortunately, I ordered cord with end caps from Snaply. The order included these Ironly eyelet reinforcements that hold really well on the first try. Normally, they are meant to be placed on the outside, but that wasn’t an option in this project.
So, the reinforcements are placed inside and do their job perfectly! Bravo Snaply (and thank you! No, I’m not getting paid or anything).
After consulting photos of the making of this Cape 109 from Burda 11/22 on Burda’s Russian website, I got the idea of this large facing to enclose the hood seam.
It worked well to enclose the zipper and seam. However, when worn, it tends to stick out in an annoying little bulge that annoys me greatly, even though I fixed it with a stitch on the shoulders to keep it from moving. #fail
I’ll have to figure out how to solve this problem… maybe with some darts to reduce the volume at the bottom?
Finally, my last annoyance came from the hem.
I succeeded in one… but the second one never wanted to go through. As soon as I tried to transition between the first centimeter (where the middle front hem created some thickness) and the rest of the hem, the stitches went haywire.
I eventually gave up… I had other sewing projects to do urgently before my departure.
Conclusion
NEVER AGAIN WILL I SEW WATERPROOF SYNTHETIC TAFFETA! Jeez.
Seriously, it was a pain from start to finish.
Otherwise, this type of cape is quite practical. It can be worn over any outfit. It takes up little space. It presents a serious challenge to any pickpocket (I wear my bag underneath – #goodluck). I think you can also use it for cycling.
Since my return to France, we’ve had unusually hot and strange weather for October (help, global warming!). So, I haven’t worn it. Especially because its flaws bother me and prevent me from really liking it without reservation.
And it’s a shame because I find its floating and frilly effect very fun. And pink! A touch of cheerfulness in the rain.
Speaking of pink, let’s talk about Pink October for a moment: remember to check your breasts, to handle them regularly. It’s not as if it’s really unpleasant .
So, that’s it for my return to the blog! I hope you won’t hold it against me for complaining like a thief throughout. Normally, that won’t be the case for the next articles; p.
XOXO
{:}




9 commentaires
Bravo pour ta ténacité ! Ça en valait le coup, assurément.
Bravo !
Bravo pour la persévérance, j’admire !!! J’adore cette réalisation et l’imper rose, ça claque ! A la vue des photos, tu m’as presque donner envie de m’en faire un et ensuite, j’ai lu la galère de la réalisation et ça m’est passé ;-D
Bravo au chaperon rose ! Une fois de plus tu nous étonnes avec une réalisation originale et parfaitement réussie.
Bravo ! & oui, on continue à se toucher 🙂 les seins.
Alors je dois dire que je suis restée perplexe devant le patron. Je l’avais repéré mais sans grande conviction.
Ta réalisation est très chouette, malgré les déboires de montage ,et la couleur magnifique. Mais comme tu le dis si bien les explications ce n’est pas le fort de Burda!! Cela me rappelle que j’ai acheté du softshell il y a des lustres pour une veste et j’imagine que la couture de ce type de tissu est tout aussi .. pénible.
Bravo en tout cas pour ta persévérance et le résultat obtenu!!
Bravo d’en être venue à bout de cette couture, j’aurais laisser tomber avec toutes ces mésaventures !
J’adore cet article d’une franchise implacable. Je trouve cette cape superbe. Vive le ROSE !
Je suis barbirative de l’obstination qu’il t’a fallu pour coudre cette beauté très très rose. Tu as certainement raison pour les pickpockets. Moins pour le vélo. Tu t’es bien sortie du match contre Burda, mais ça ne m’étonne guère. Juste bravo.
Si j’imagine carrément que la couture a dû être compliquée, je suis admirative de la façon avec laquelle tu as détourné ce modèle fastidieux à coudre en un vêtement plein de joli détails. J’aimerais participer à la course octobre rose de ma ville l’an prochain. Un joli imperméable rose pour aller avec le t-shirt, ce serait sympa… 😉 Ravie de retrouver tes lectures. Bon dimanche !