
Hyatt, Skipper’s Cap (Elsewhen Mllinery)
The Hyatt skipper’s cap is a cap design that I clearly prefer to the baseball cap. Is it my Breton-ness talking? A bit of French chauvinism? Or just snobbery… I’ll leave that to your discretion.
Anyway, this is not the first pattern of this type that I sew since I already tried with the sailor cap from the book Je Couds mes Chapeaux.
At that time, I wasn’t convinced by the pattern. So here is a new skipper’s hat pattern test (we’re going up in the hierarchy, have you noticed?) with the Hyatt pattern from Elsewhen Millinery. And we’re testing a new pattern brand, too, at the same time.
| ITEM | SHOP | QUANTITY | PRICE |
| Hyatt skipper’s cap | Elsewhen Millinery | 1 | 9,33 € |
| Grey ramie remnant (Top Rushcutter) | Stock | 30 cm | 0 € |
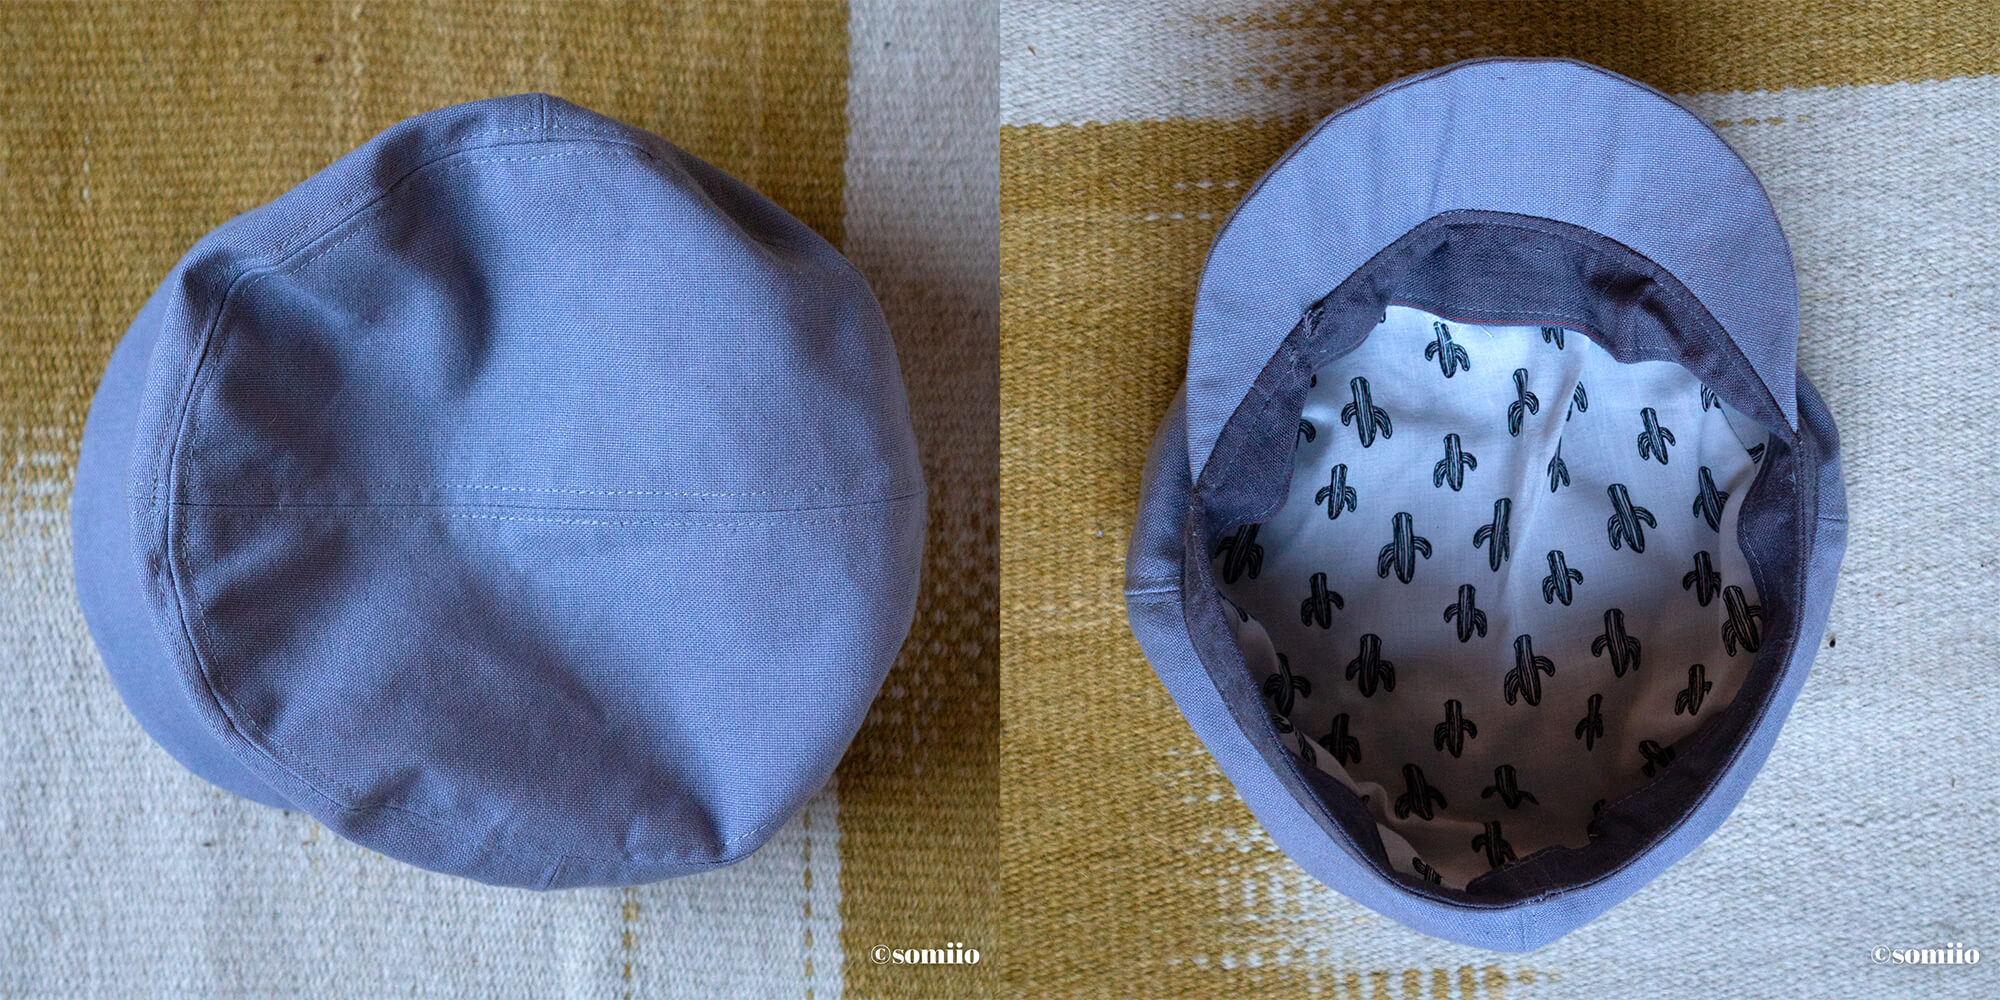
| Piece of cactus viscose fabric | Vide atelier | 30 cm | 2 € |
| Black linen canvas (Parasol short) | Mamzelle Fourmi | 50 cm | 0 € |
| Yellow printed fabric scrap | Récupération | 30 cm | 0 € |
| Fusible interfacing (small pieces & scraps) | Stock | 30 cm | 0,50 € |
| Ribbon | Søstrene Grenes | 20 cm | 0,10 € |
| Faux leather strap | Aliexpress | 1 | 3,52 € |
| Kam snap buttons | Aliexpress | 2 | 0,10 € |
| Thread | Stock | — | 0 € |
| Total | 15,55 € |
Captain Hyatt’s cap pattern
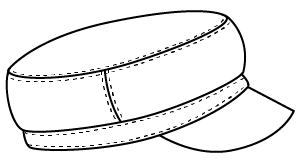
The Hyatt cap pattern offers two styles in 1: the captain’s cap and the skipper’s cap (also known as the sailor’s cap). Both are lined.

The captain’s cap has a high, stiff, structured cap. Think Red Army. The skipper’s cap has a rounder, softer style with no internal structure.
Overall, the 2 versions share the visor and cap top and differ on the headband and cap sides.

The pattern is available from 48 to 63 cm head size, from babies to adults, and can be sewn in a wide range of fabrics.
There will be something for the whole family, I tell you.

The explanations, in English and in inches only, offer text by the mile with a few illustrations sprinkled in between. So don’t count on a diagonal reading and a glance at the diagrams to get by.
No, no, no, we need to focus here.

As for the pattern sheet, it goes quickly to print and assemble with 5 small pages.
However, you have to draw the head entrance band (which is only a rectangle) and add the seam allowances on your own. Tsss.

Finally, when we talk about hats & caps, we also talk about specific material. Here, the skipper’s cap version essentially requires a plastic insert to stiffen the visor.
For the officer’s cap, it’s more complicated but I’ll tell you about it in due time.
On my side, I went to my local recycling center to find an old plastic document folder with loose elastics (they gave it to me for free by the way) and I cut the inserts in it.
Economical. Recycled. Totally my values XD
Sewing the Hyatt skipper’s hat
The grey cap was sewn in “wearable toile” mode first and the black version later.

On this 1st version, I used scraps of ramie used for my Rushcutter Top. To make the pieces fit in the scraps, I added some seams, like on the top of the cap cut in 2 pieces instead of one.
Both were sewn in size 21″ (53.35 cm for my 54-55cm head size).

Exclusive: behind the scenes of the preparations before the photos!
However, for the first one, the 1/2″ (1.2 cm) seam allowances were added to the fabric as recommended, which I still find quite rough. For the second one, I redraw the pieces with 1 cm seam allowances but sewed with 0.7 cm seam allowances.
As a result, the gray one is smaller than the black skipper’s cap.

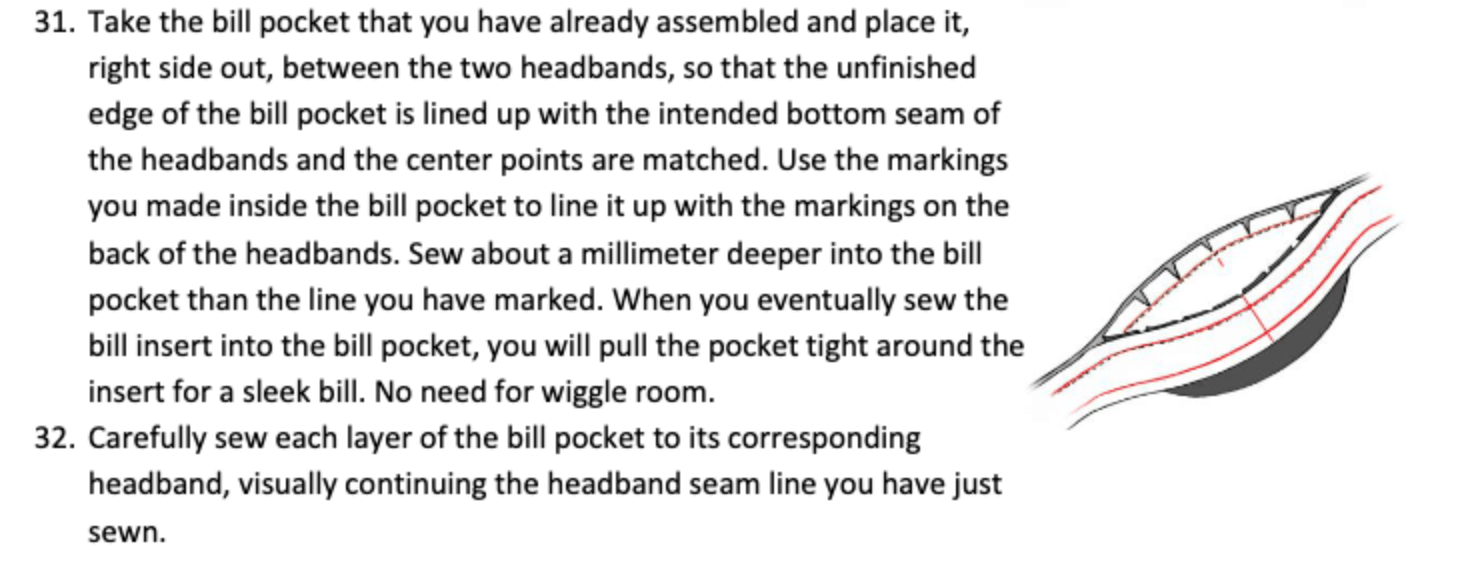
On the 1st grey version, I followed the construction instructions carefully. And in particular, step 31 which recommends to assemble each side of the visor pocket to one of the inner/outer sides of the headband.
A real pain in the ass to sew, which led to other alignment problems later on.

The purpose of this is to allow the plastic visor insert to be inserted only at the end to facilitate the final handling and sewing steps. Personally, I found it tedious and unnecessary.
By the way, for the grey one, I sewed, unstitched, restitched, restitched and ended up with a big hole and the head entrance band is not even.

No I wasn’t drunk when I sewed this headband.
That’s why I sewed the head entrance on the second version of the skipper’s cap instead.
On that one, I assembled the visor and inserted the insert. Then the visor was sewn sandwiched between the 2 pieces of the headpiece. Then I continued as explained.
Warning: if I were to make the captain’s cap version of the Hyatt cap pattern, I would think about it again because it is not the same cap or construction… Still to think about!

In the end, little millimeters here, little millimeters there, the black cap ended up being too big… while I just found the grey one a bit tight.
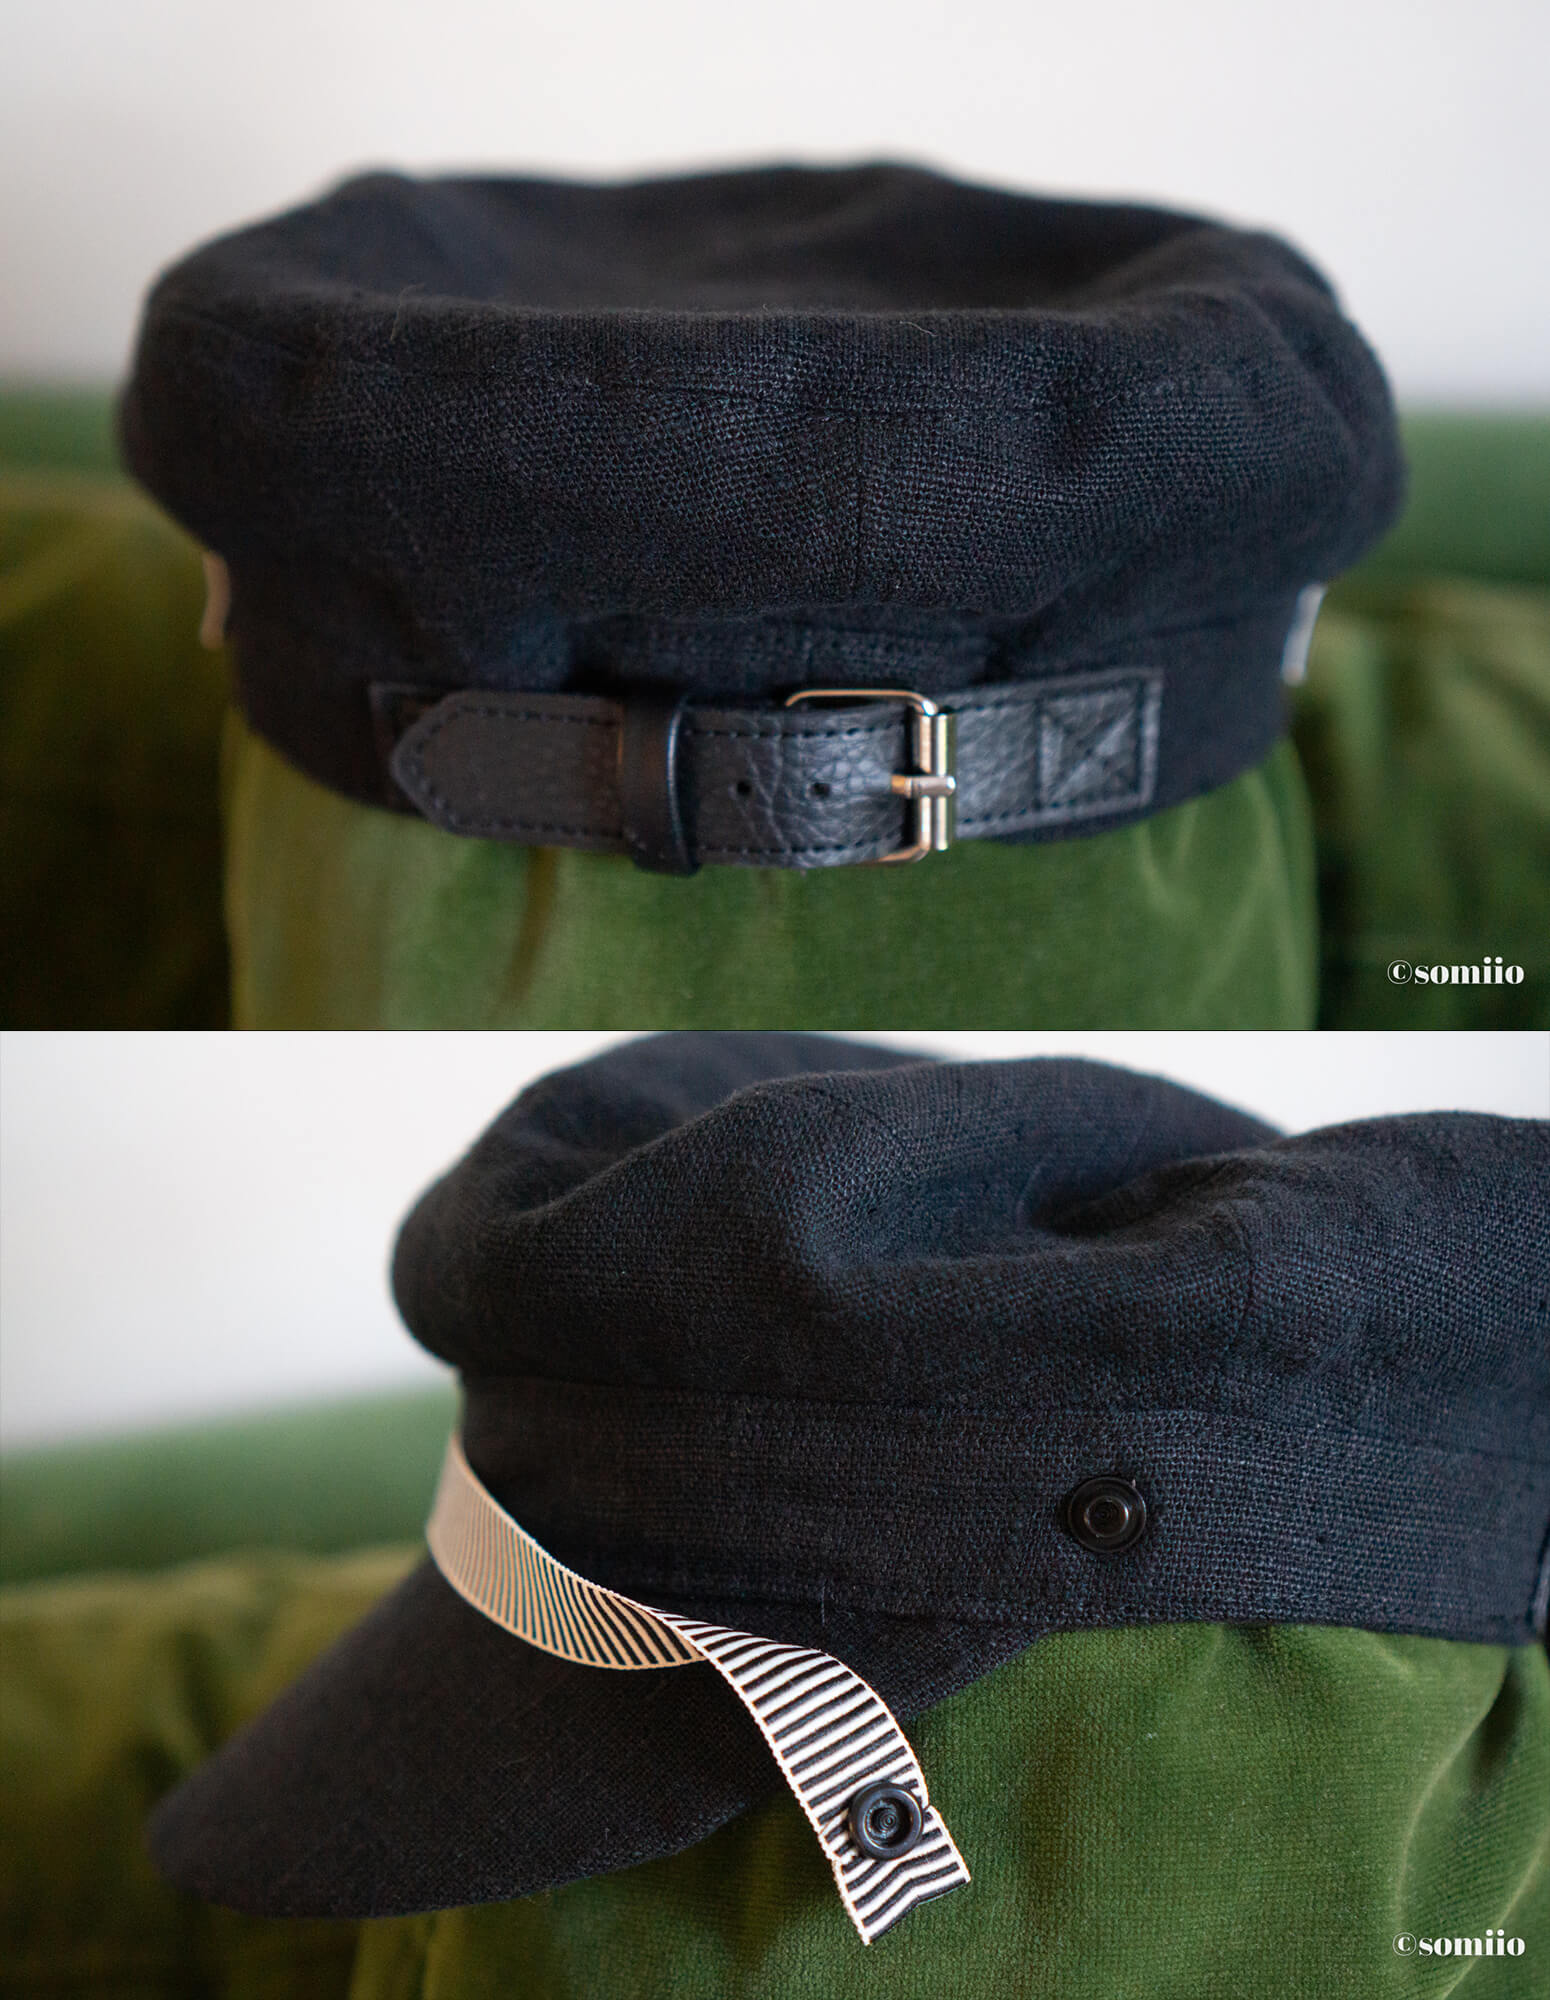
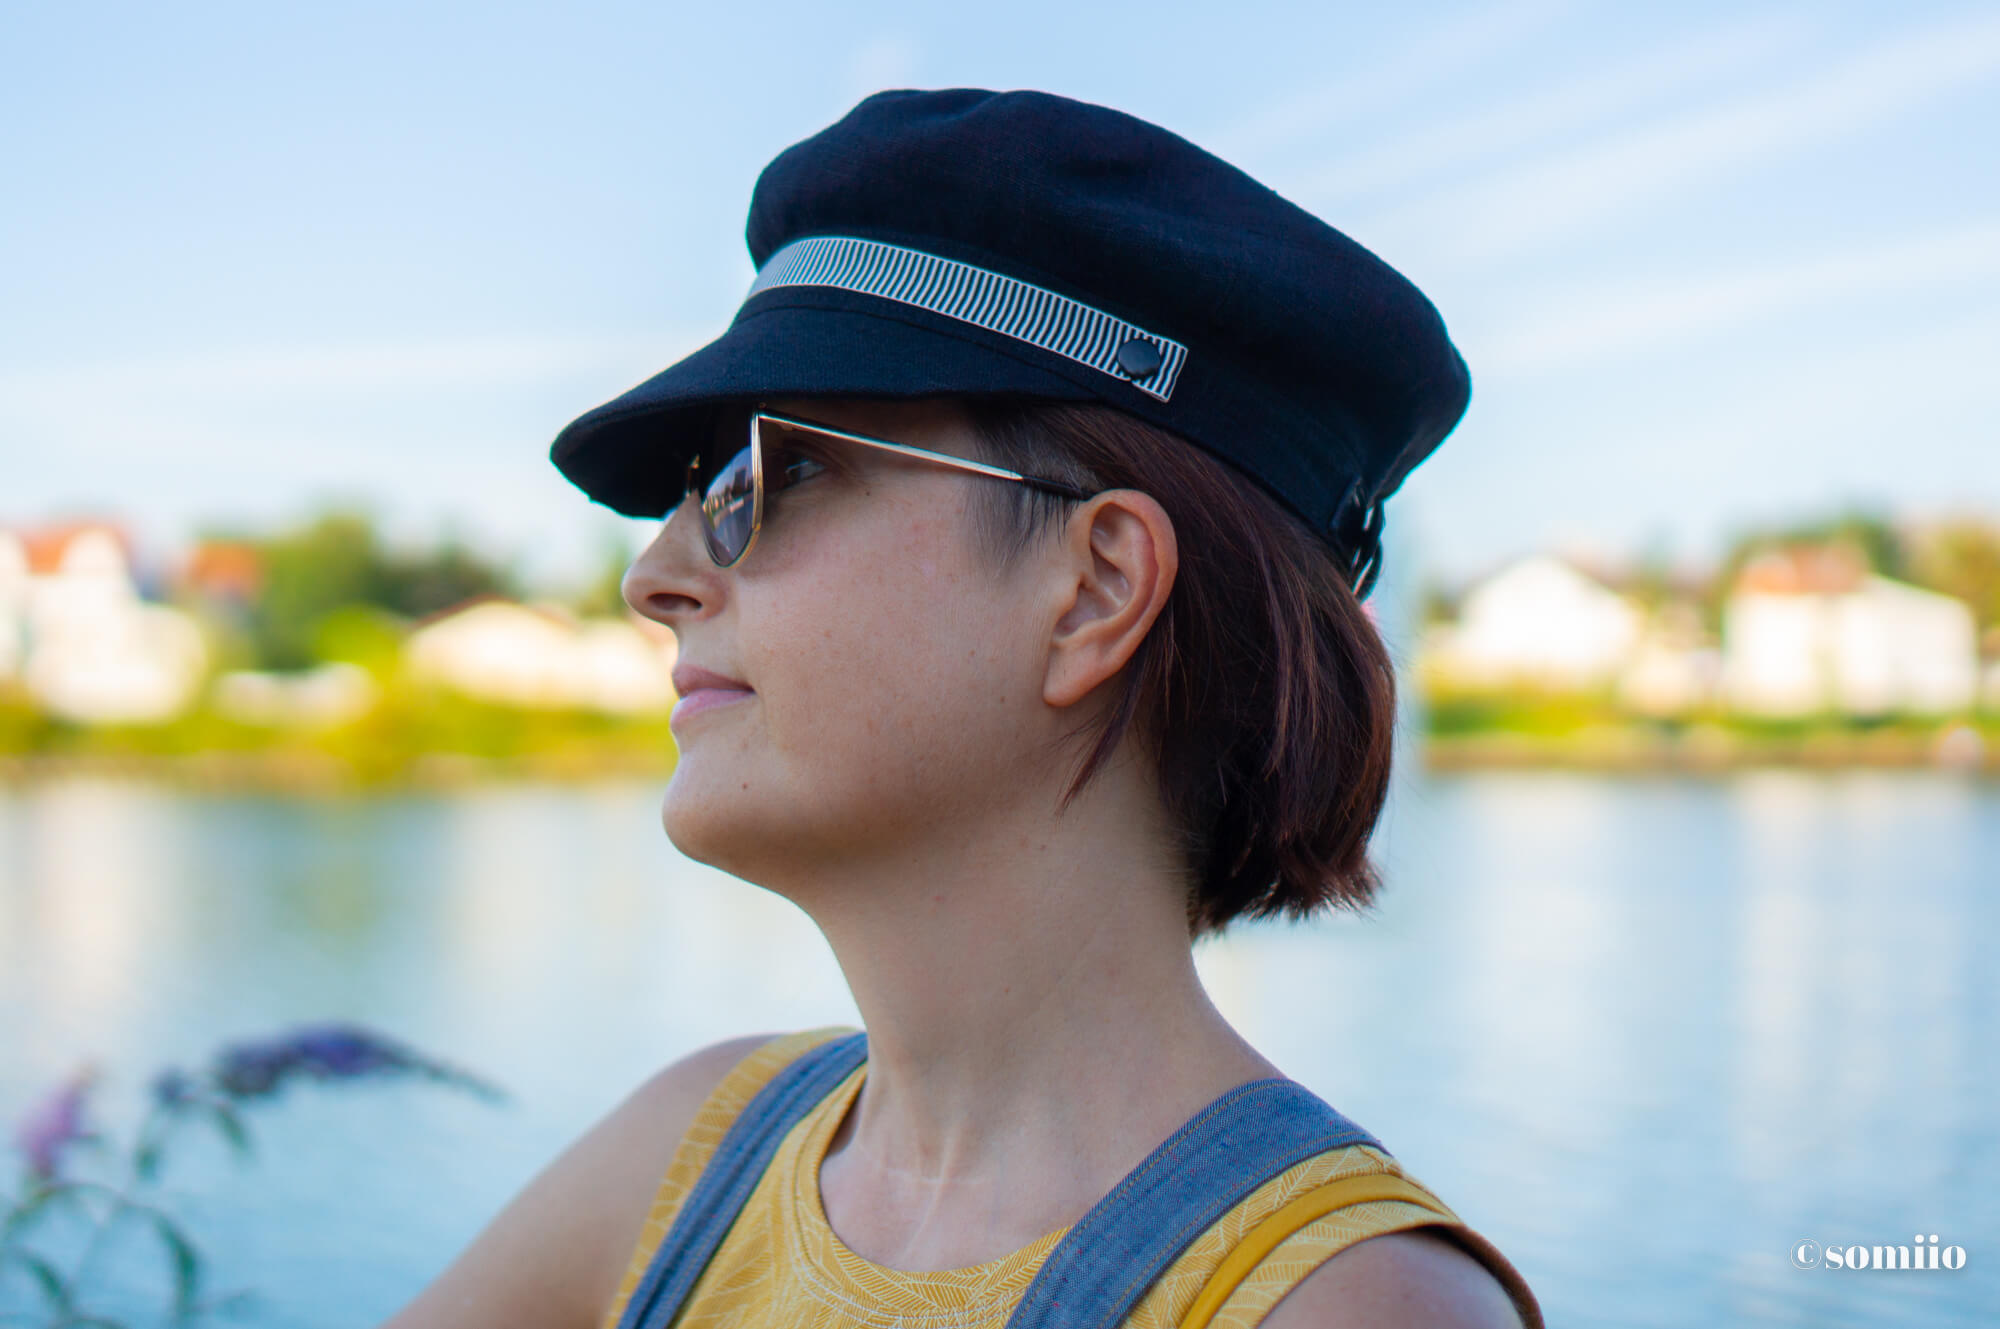
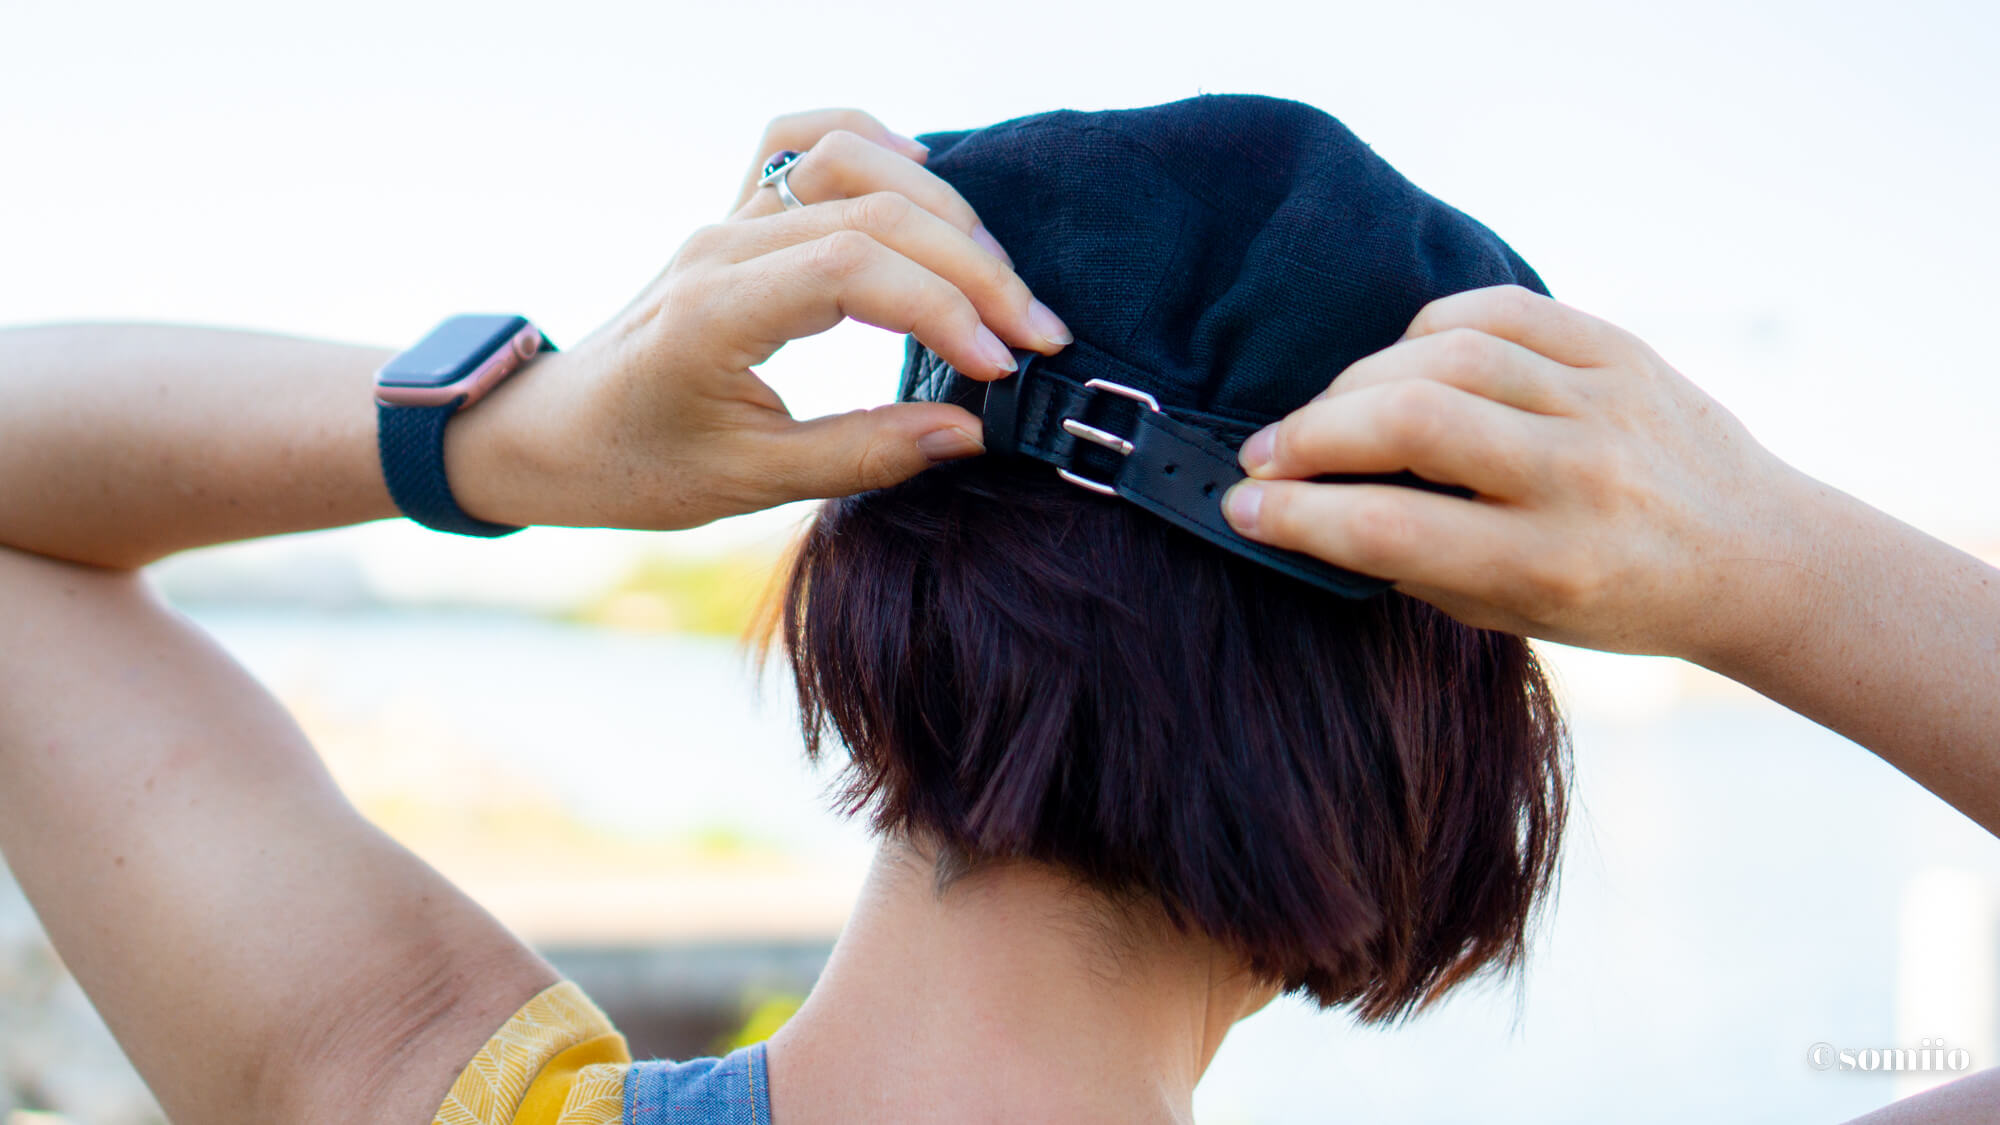
As a result, a leather tab from my stock makes it more adaptable and gives it a little extra style. In case I want to be able to change the tightness depending on the wind condition or my hairstyle.
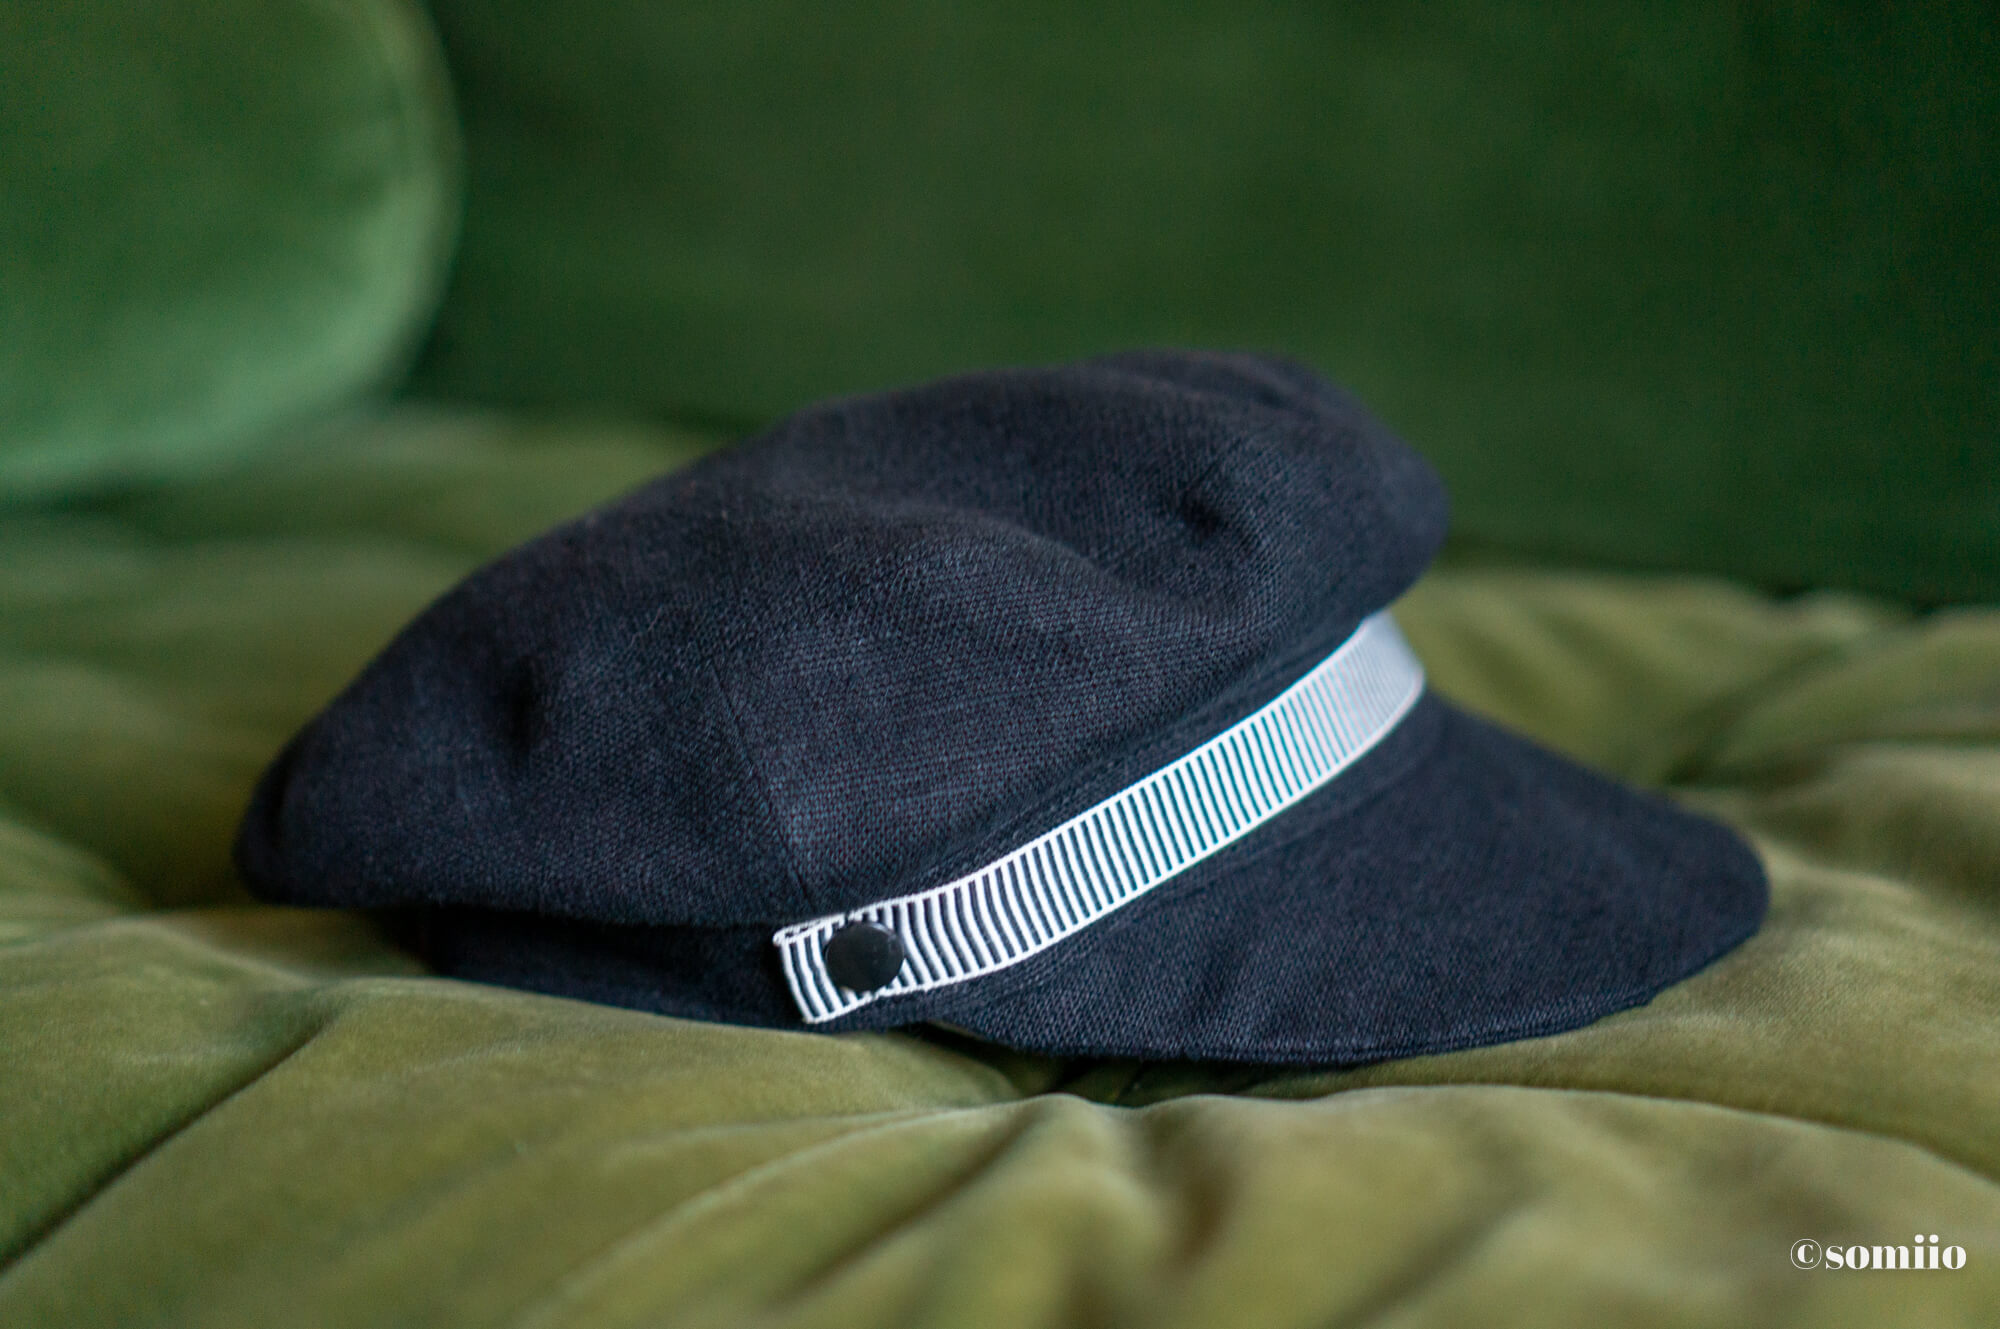
To finish it off, I added a decorative ribbon attached with Kam snaps.
Normally, it’s more like a braid of trimmings that you find here… but the Kam snaps will allow me to change this decoration very simply (one day)!
Conclusion
Clearly this Hyatt skipper’s cap pattern is much more convincing to me than the first sailor cap pattern I tested.
I like it even more because there is still the second version of the captain’s cap that I will probably test one day, but rather for winter. The 2 in 1 patterns, twice the fun.
On the other hand, in terms of quality of instructions and guidance, this pattern is not for beginners… and even in hat sewing I would say. That said, I will surely try other patterns from this designer Elsewhen who offers some that tempt me.
To be continued!
Phew, here is finally my weekly article finished. I had a hard time this week, due to fatigue, the Tour de France, the good weather and the call of the Sunday with my sister! No vacation for the brave!